
Halloween Glitter Ornaments Craft
DIY Halloween glitter ornaments are a fun activity to help dress up your house for Halloween. Last year we purchased a pre-lit black artificial tree online. You could also use some tree branches, spray paint them black, add them to a spooky cauldron or tall vase and hang your ornaments off of those. Check out a full tutorial on how we created the Halloween stick centerpiece here.
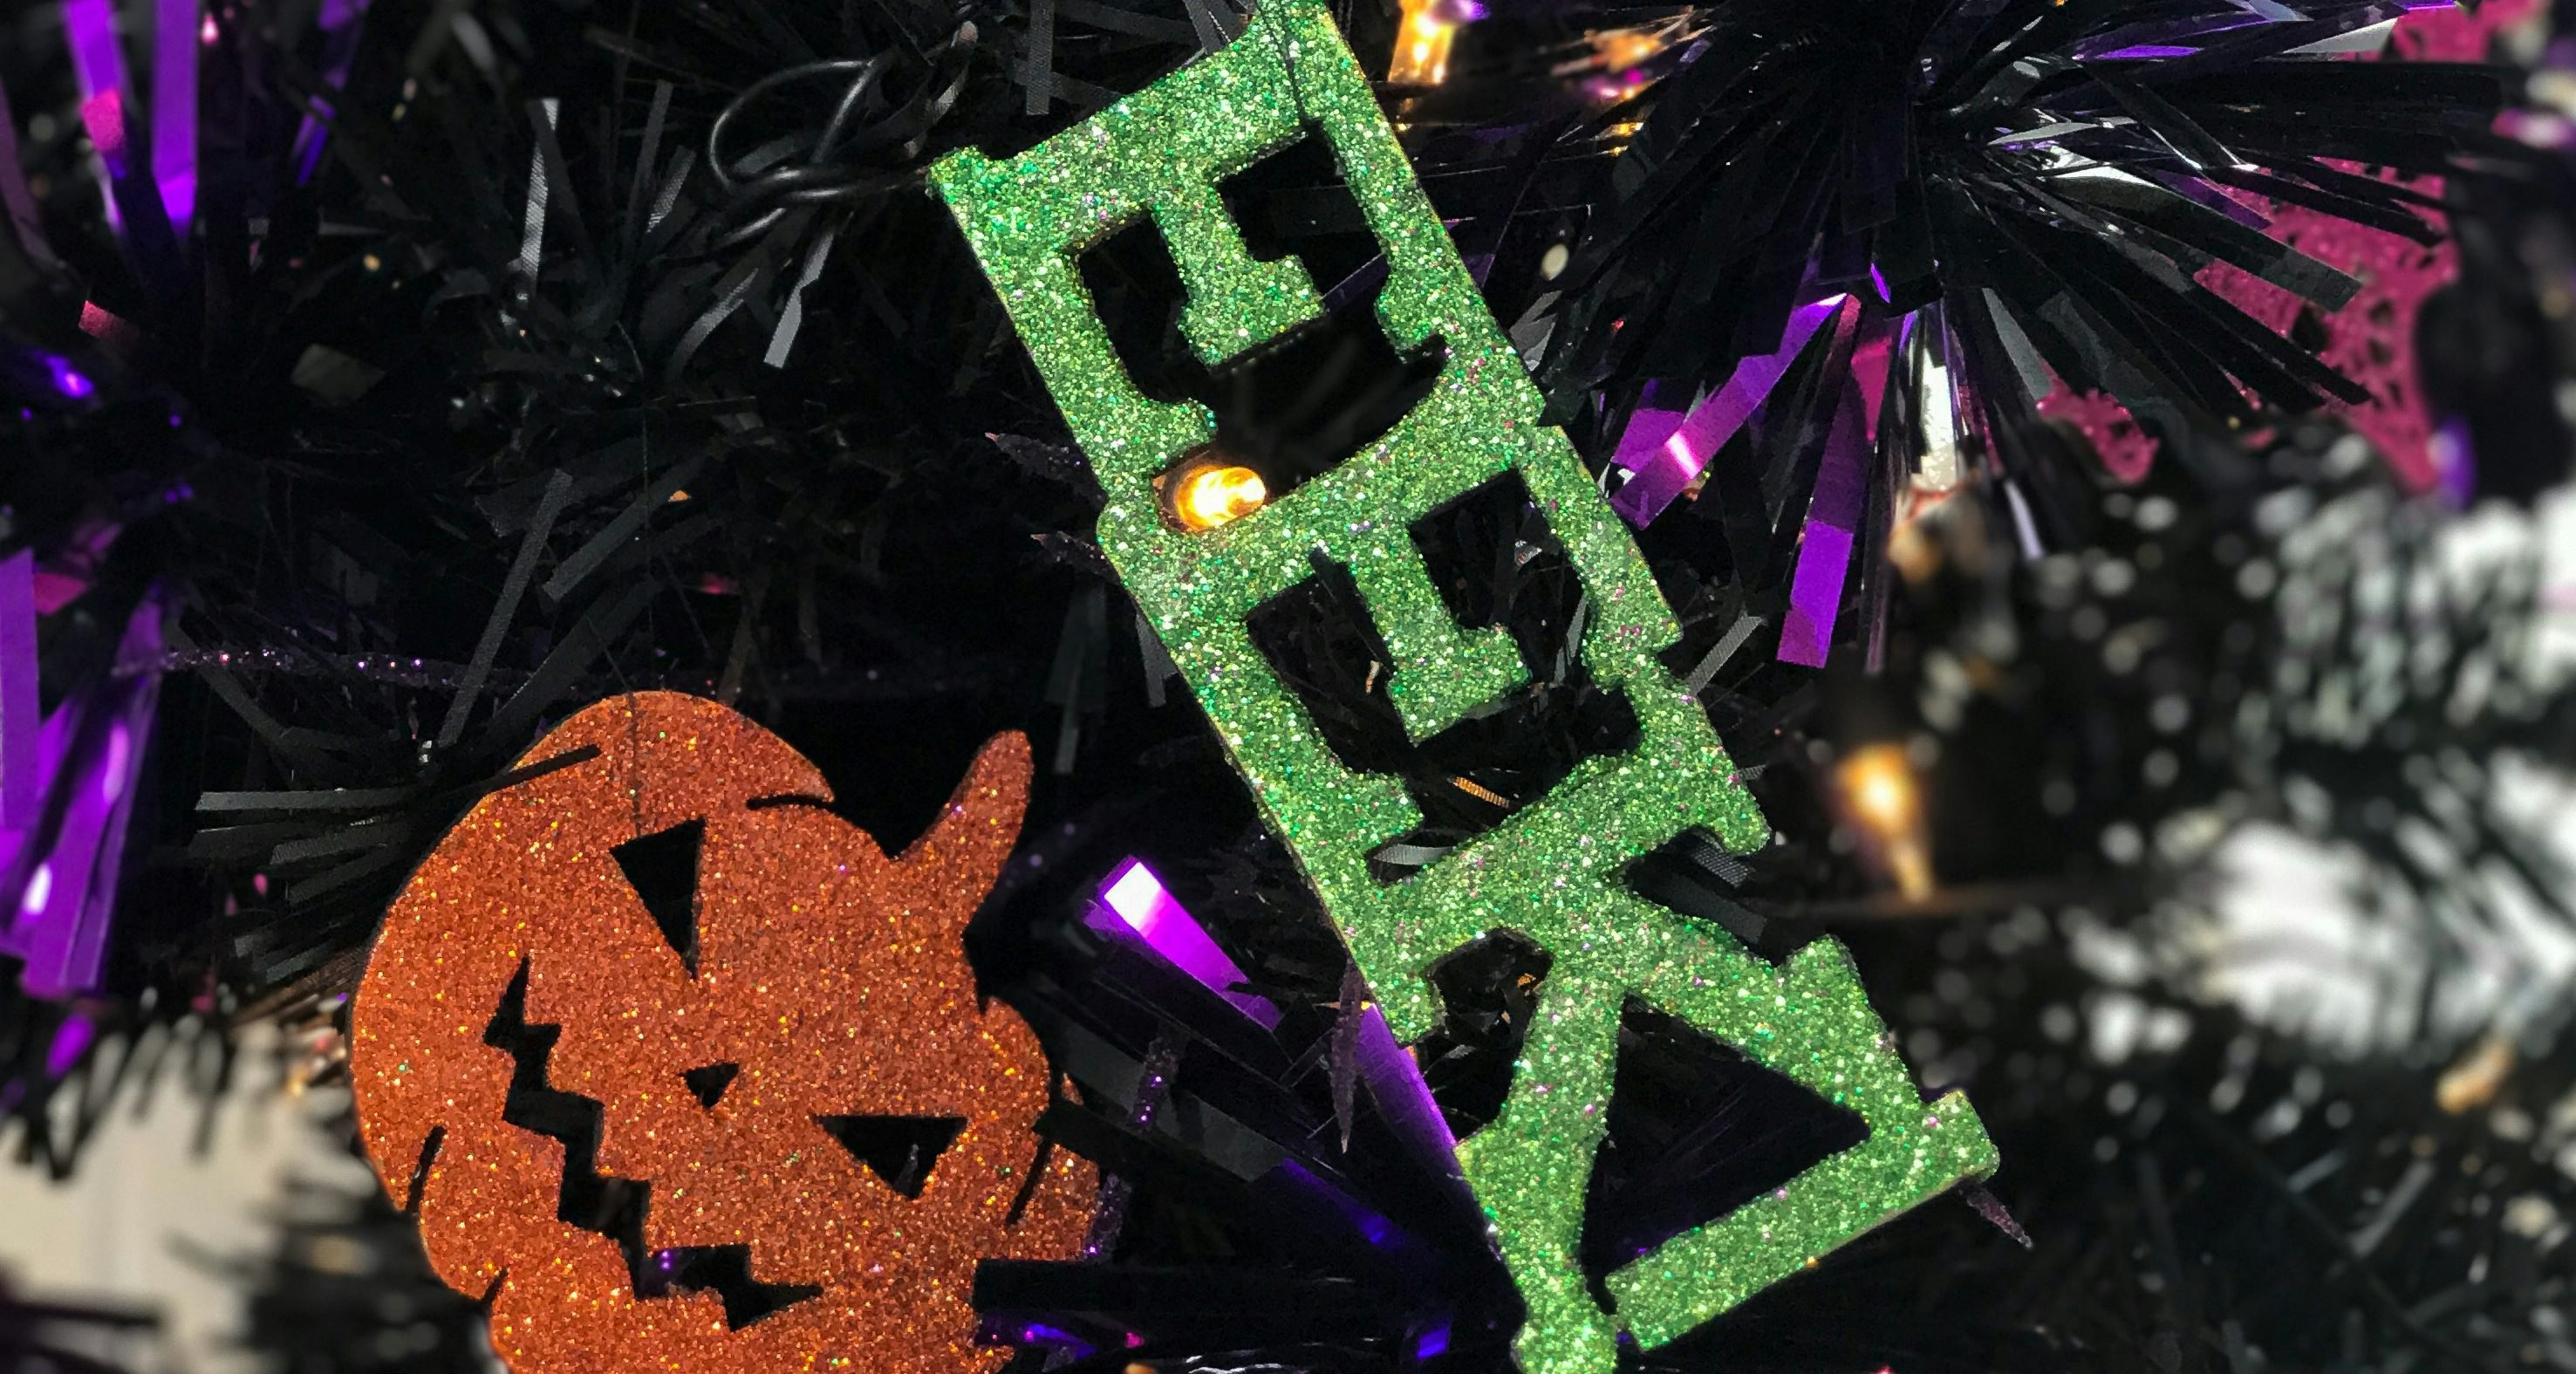
This year we made these cute ornaments to add some bright bling to the tree. I mean who doesn’t love tree bling? 😉
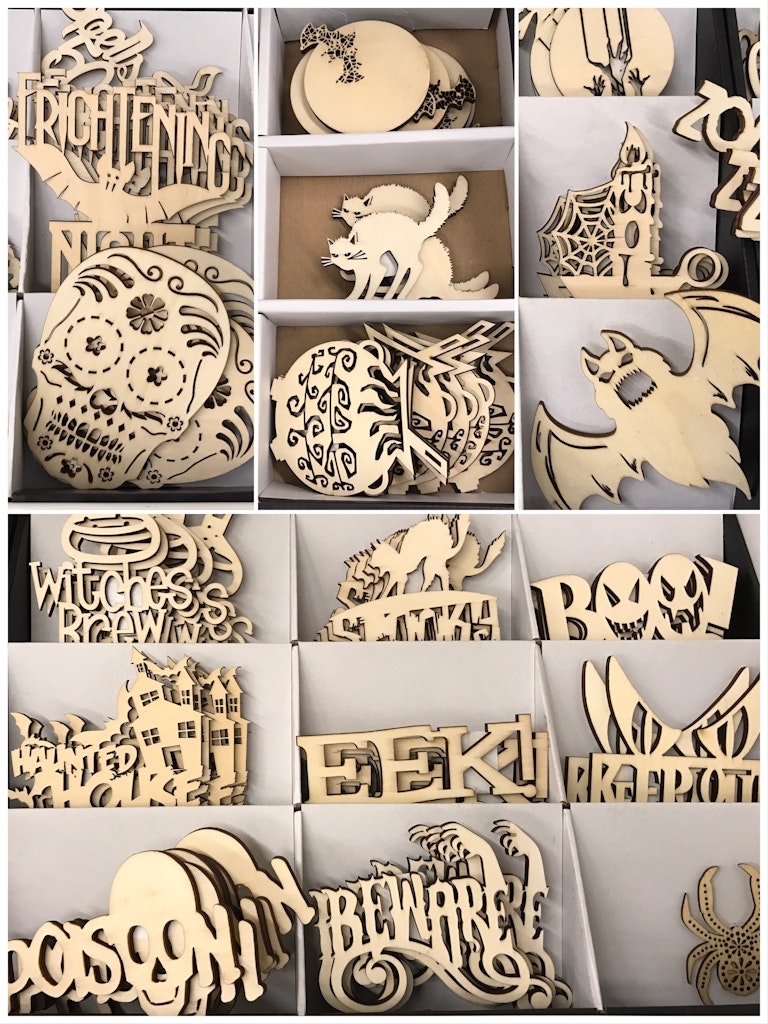
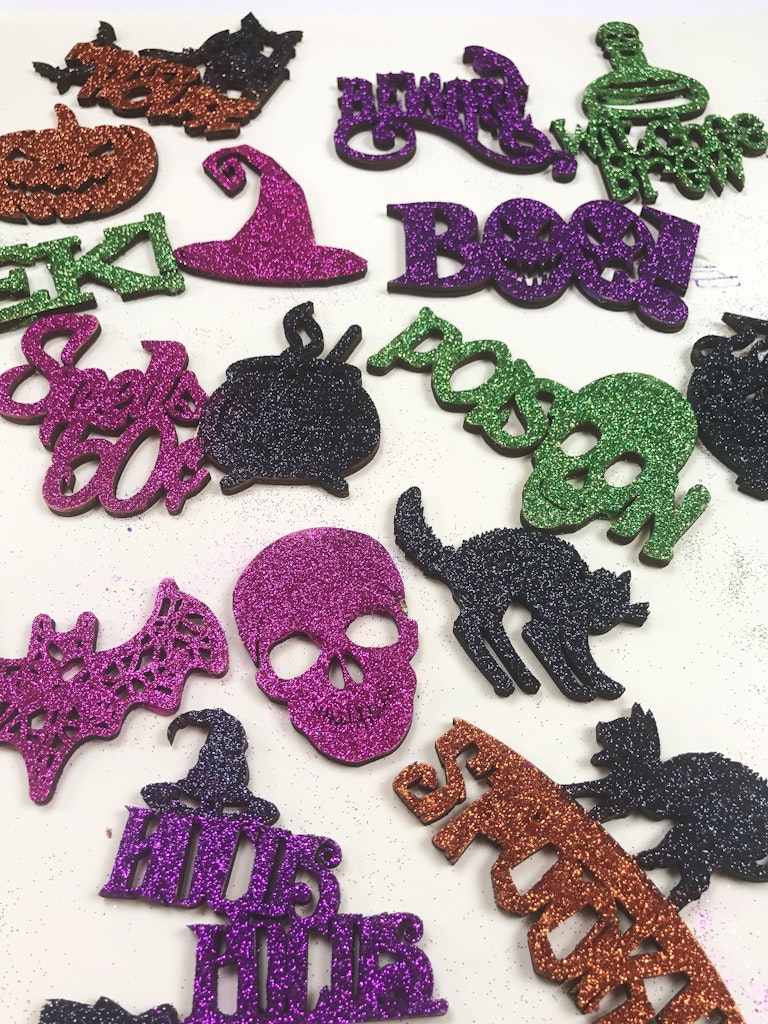
We found a large selection of these Halloween wood cutouts at Joann’s. But there are tons of options online too. So hard to choose!!
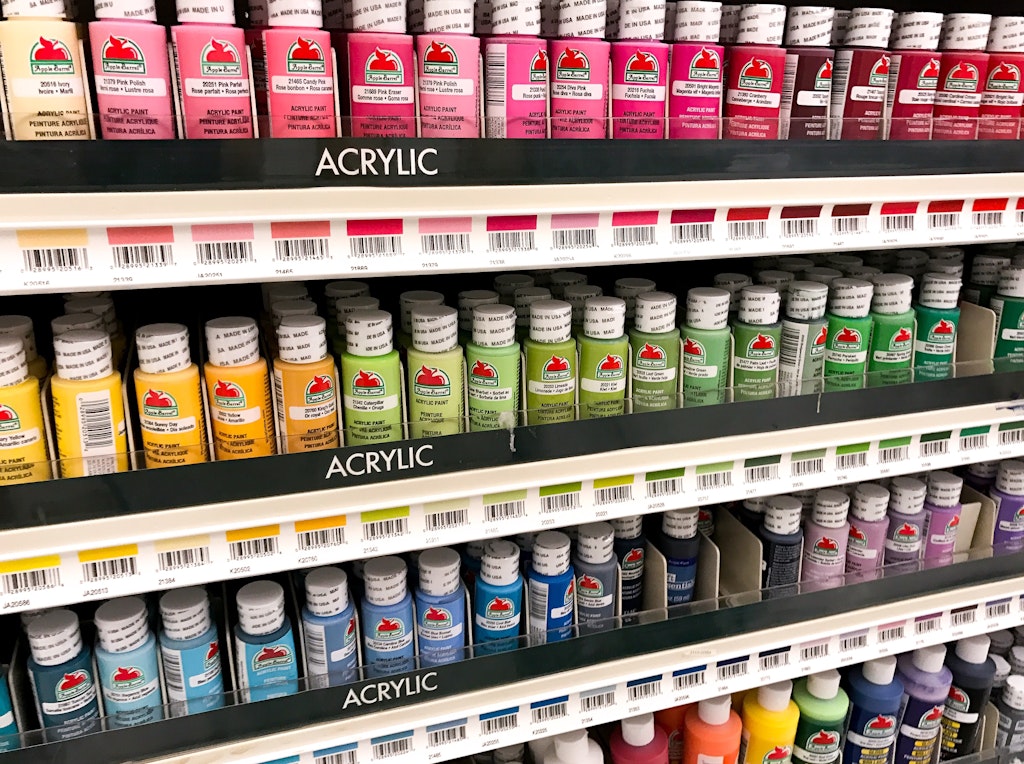
We made our way over to the acrylic paint aisle and picked out a few different colors. We chose colors that were pretty close to our glitter colors. This way if some of the glitter flakes off, you won’t see the bare wood underneath.
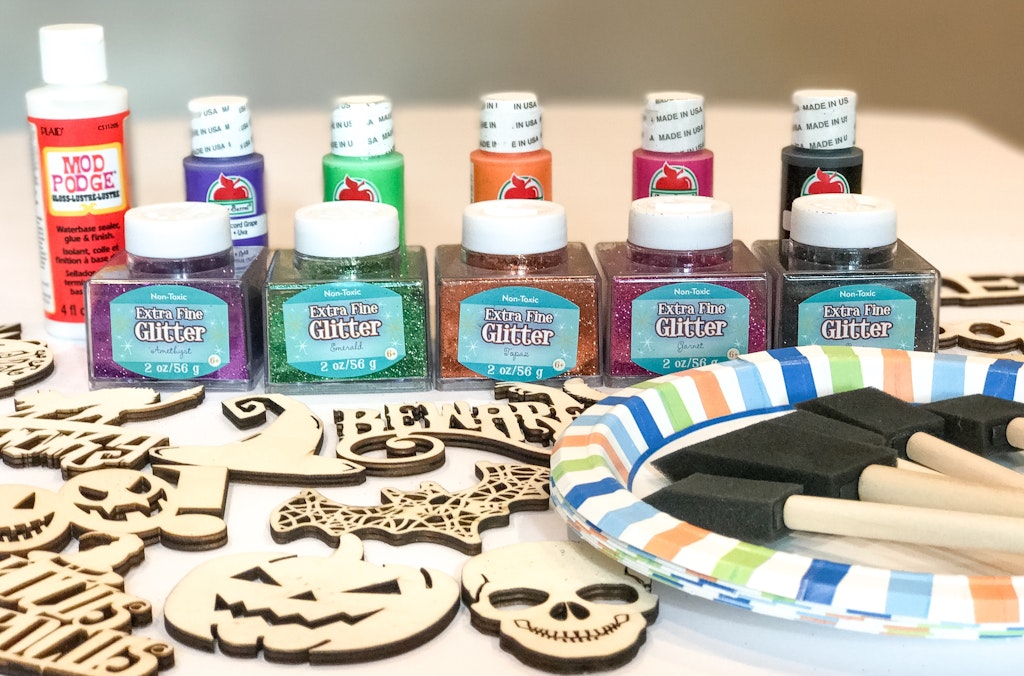
You’ll also need Modge Podge (we used the gloss finish), extra fine glitter, foam brushes or larger craft paint brushes and a bunch of paper plates to use as your workspace and glittering space. (Glittering is totally a verb ya’ll)
We only decked out one side of the ornaments since the other side would be hidden on our tree. If you’re using branches or something where the ornaments might spin around, you might want to consider doing both sides.
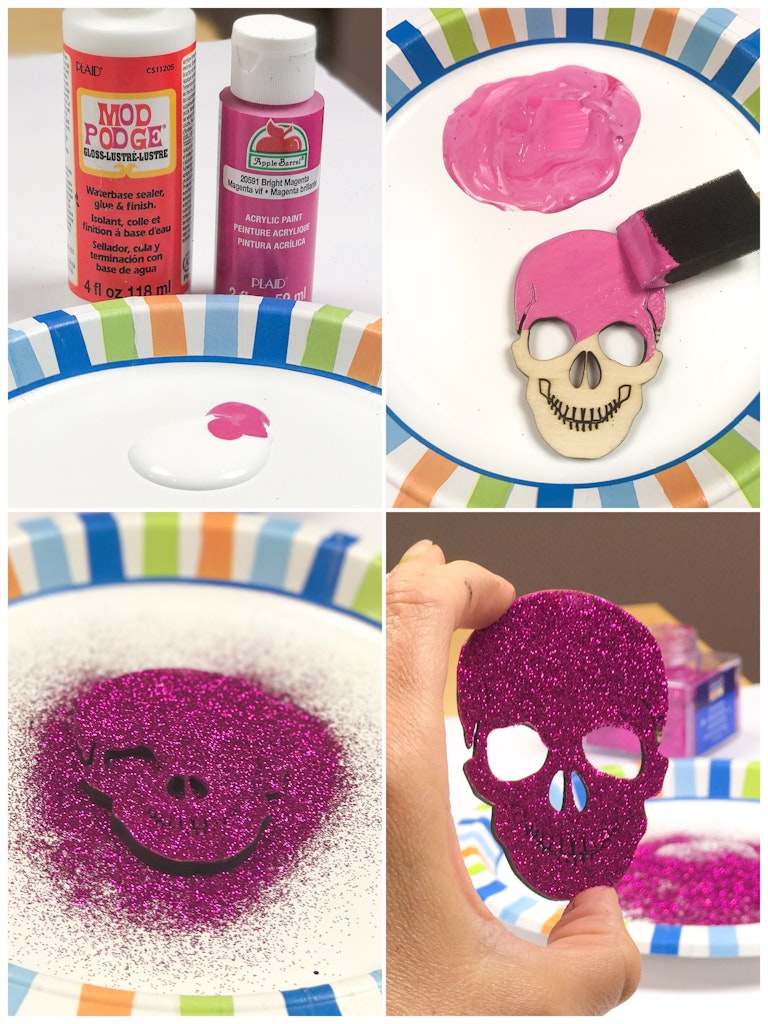
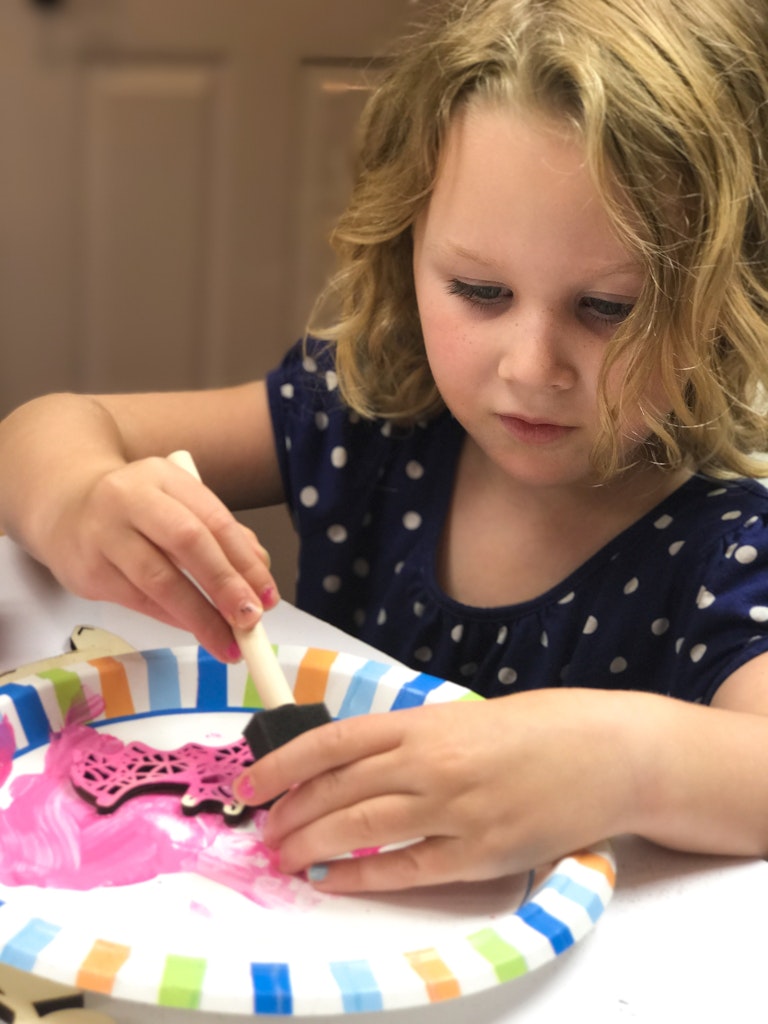
Take your Modge Podge and squirt some out onto your paper plate. Add a little paint to the Modge Podge and mix. A few drops go a long way. Brush your ornament with a thin layer of the Modge Podge/paint mixture. While the ornament is still wet, cover it completely with your glitter and tap off any extra.
You can use a different plate for glittering then you can easily pour the extra glitter into the container.
Let them dry completely.
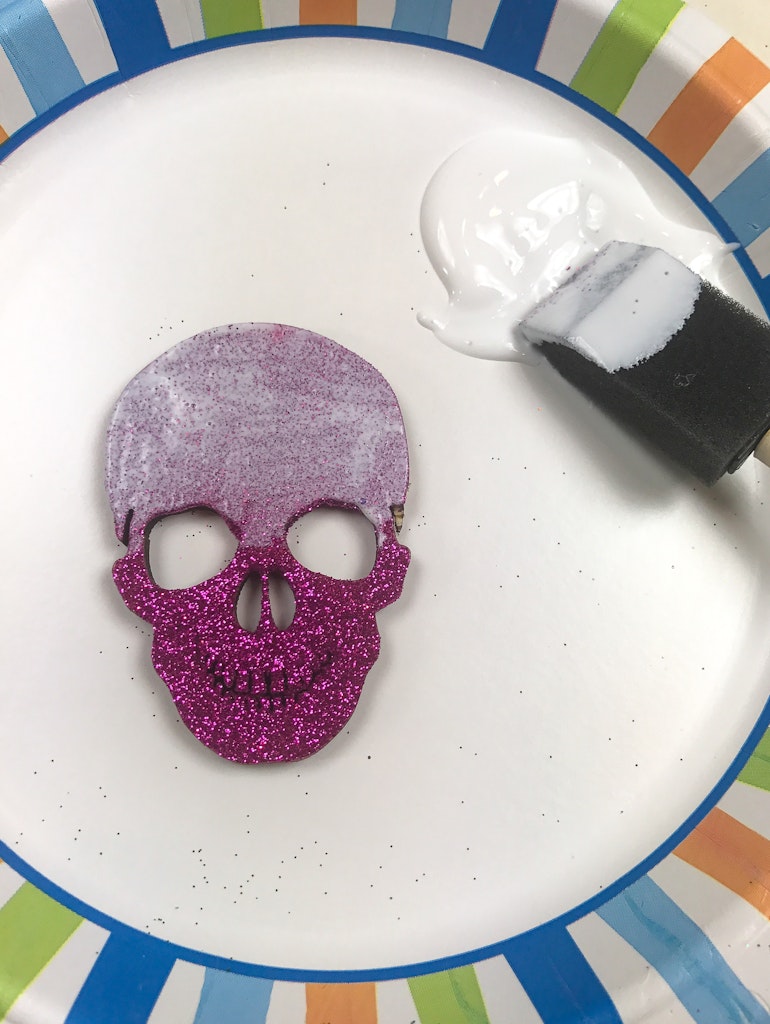
Carefully paint a thin layer of Modge Podge only (not the paint and Modge Podge mixture) on top of the glitter. If the glitter starts to come off, you might want to let the bottom layer dry a little longer before adding the top Modge Podge layer. A little bit of the glitter will come off , but most of it should stay put. It will look milky white while it’s drying, but the Modge Podge will dry clear and help keep that bling secure on your ornaments 🙂
Set them aside to dry for a couple hours.
Once they are dry, you can add ribbon, string or fishing line and start hanging them on your tree!

Happy Haunting!
Check out some of our other Halloween inspired posts here. From DIY costumes to Halloween crafts and decorations, we’ve got you covered.
4 thoughts on “How To Make Halloween Glitter Ornaments”