
DIY Dollar Store Pumpkin Burlap Halloween Wreath for $8
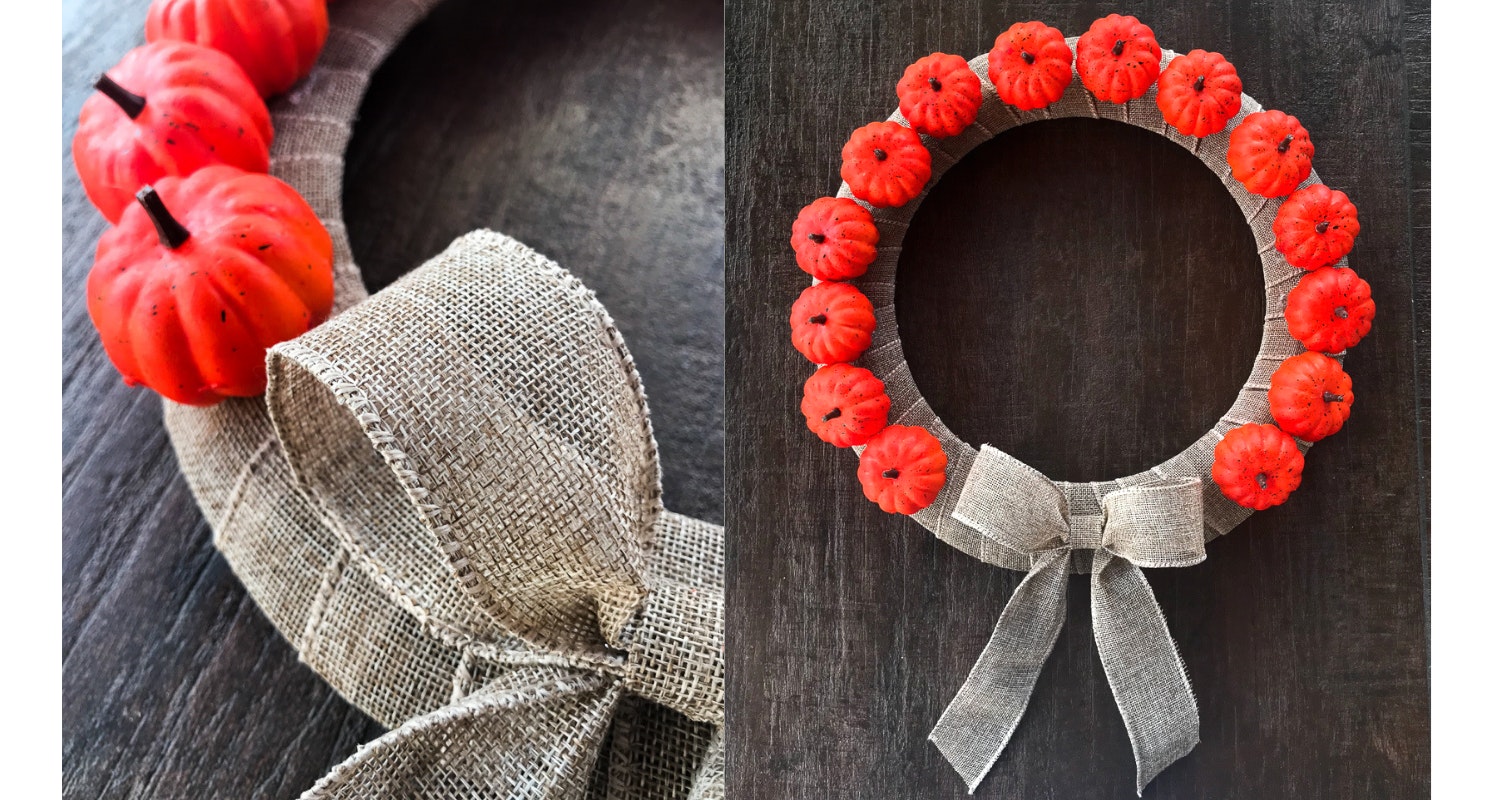
I made this $8 Halloween wreath in less than an hour using supplies I picked up at Dollar Tree. Most of the stores stock the pumpkins in white too if you want a more monochromatic look or you could also spray paint the pumpkins. I had thought about doing a few different spray paint colors and creating an ombre look. I might try that next, but this version is a super quick and affordable Halloween DIY project.
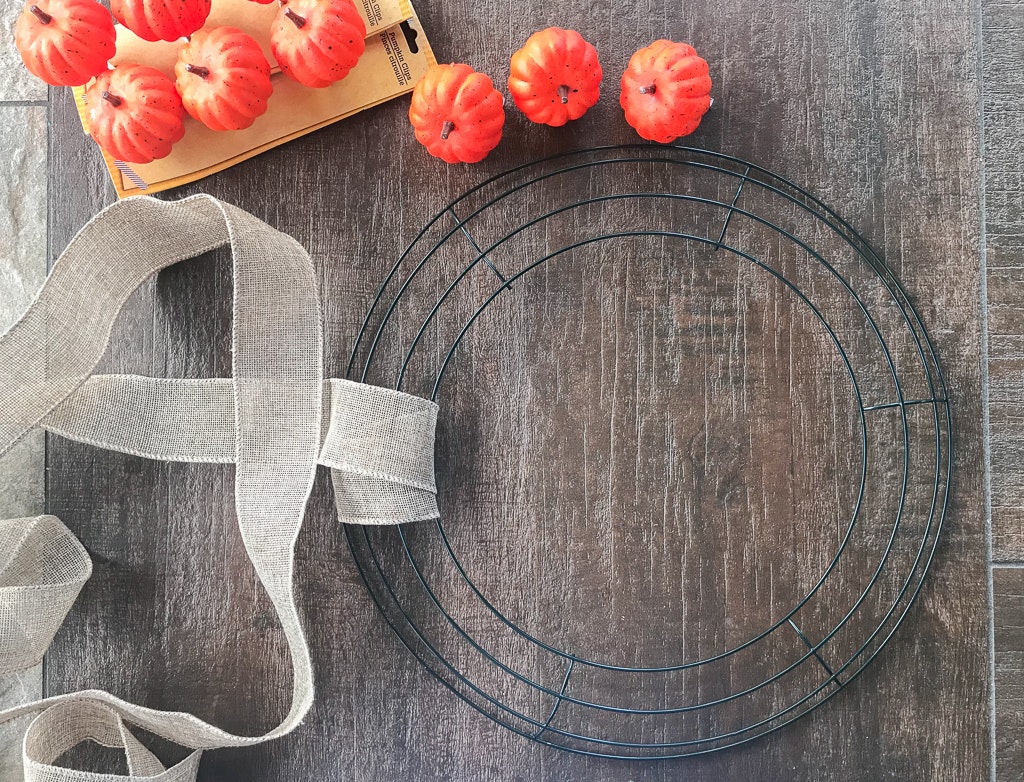
Dollar Store Pumpkin Burlap Wreath Supplies
- Wire Metal Wreath Ring
- 5 packages Decorative Pumpkin Clips (3 to a pack. they carry them in orange and white)
- 2 Spools of Burlap Ribbon
- Glue Gun & Glue Sticks
- Stapler (you can use your glue gun for this step instead if you’d like)
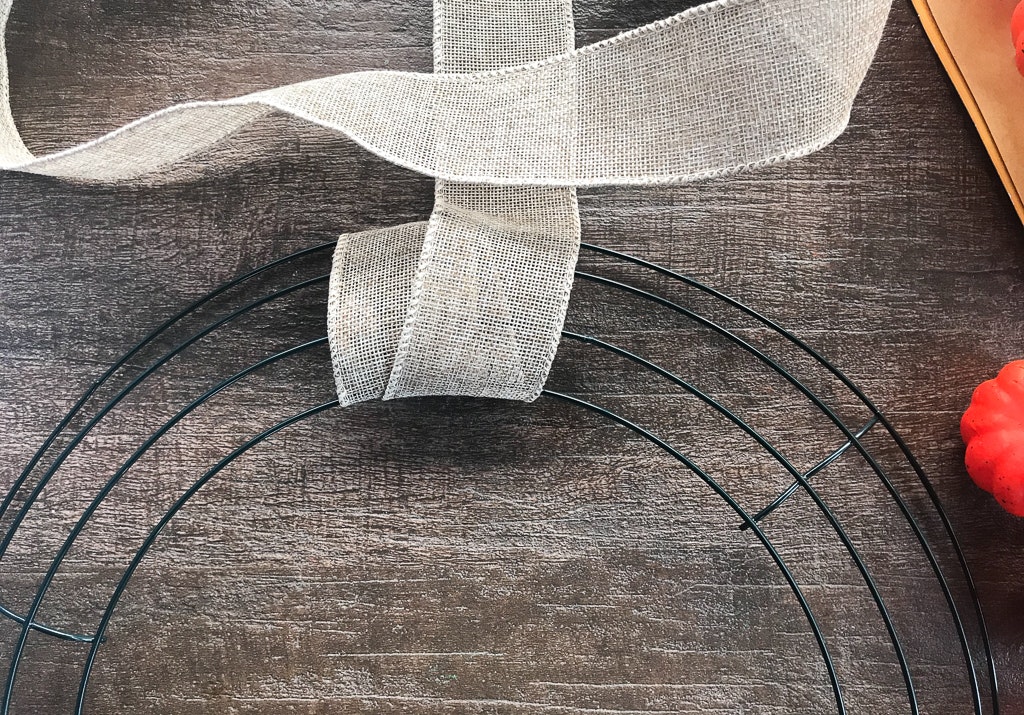
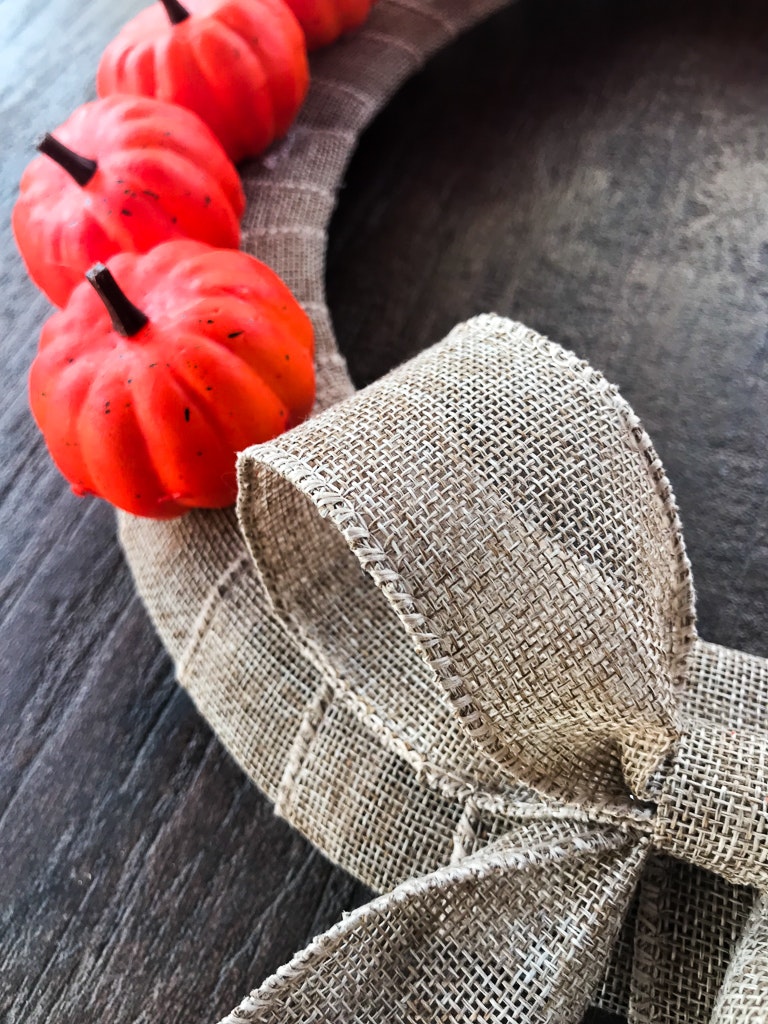
Place a dab of hot glue on the end of your burlap ribbon and secure it to the back of the wreath. Start wrapping the burlap ribbon around the wire wreath form while slightly overlapping the ribbon so you don’t see the wire underneath.
Your first spool of ribbon should get you a little more than half way around the wreath. Secure the end of the first spool to the back of the wreath with a dab of hot glue.
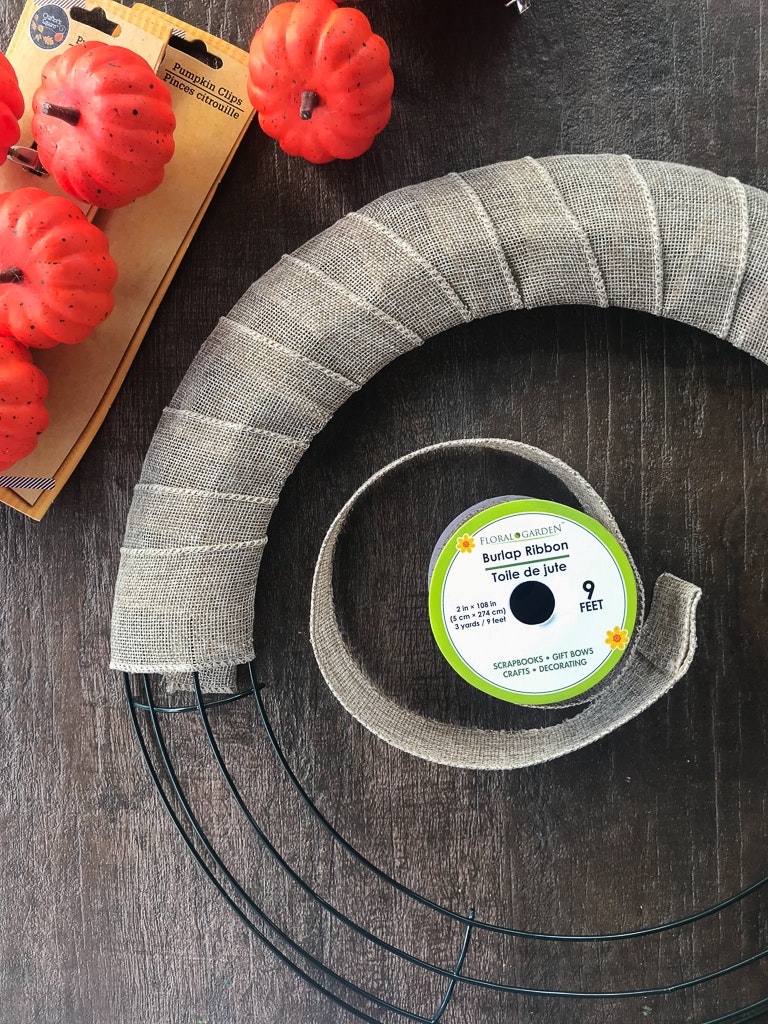
Attach the start of your second roll of burlap ribbon to the back of the wreath where you left off.
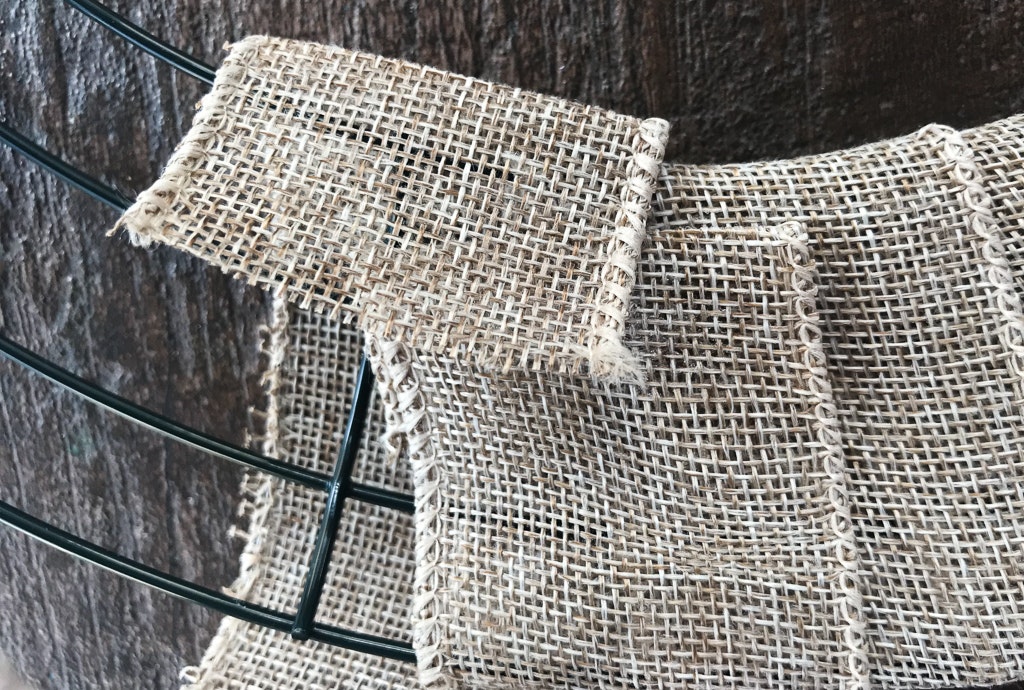
Continue wrapping the ribbon around the wreath form until you’re covered the entire wire wreath form.
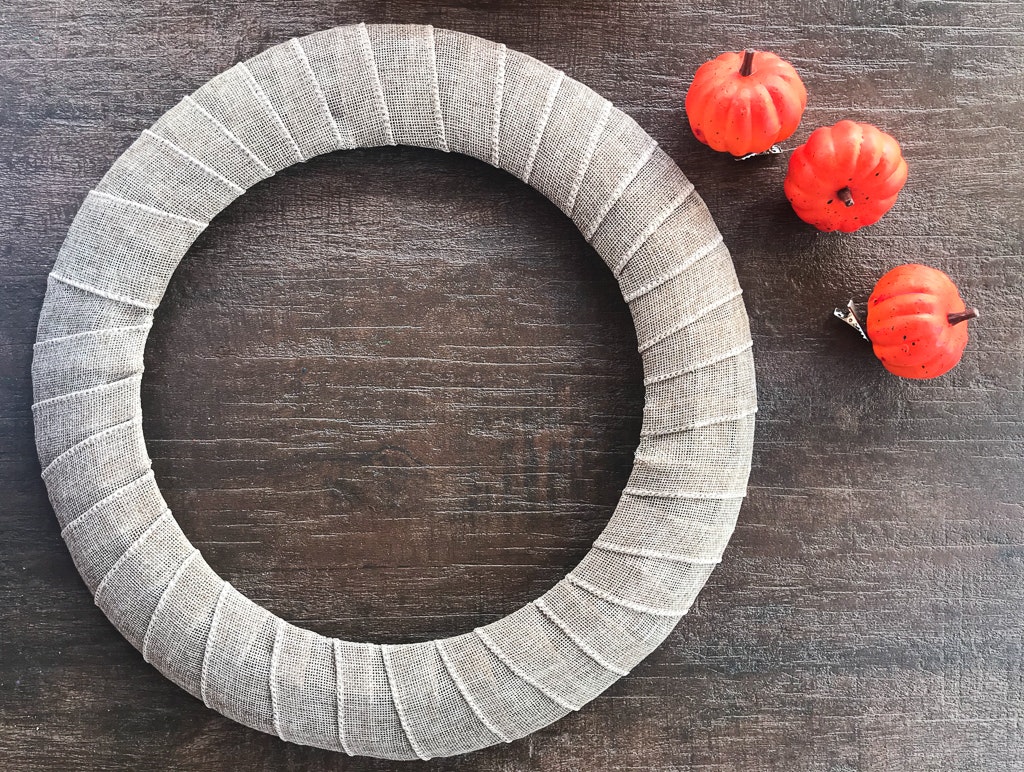
Cut off the extra ribbon and secure the end with a little hot glue to the back of the wreath. I used the extra ribbon to make a bow for the bottom of the wreath.
How To Make The Wreath Bow
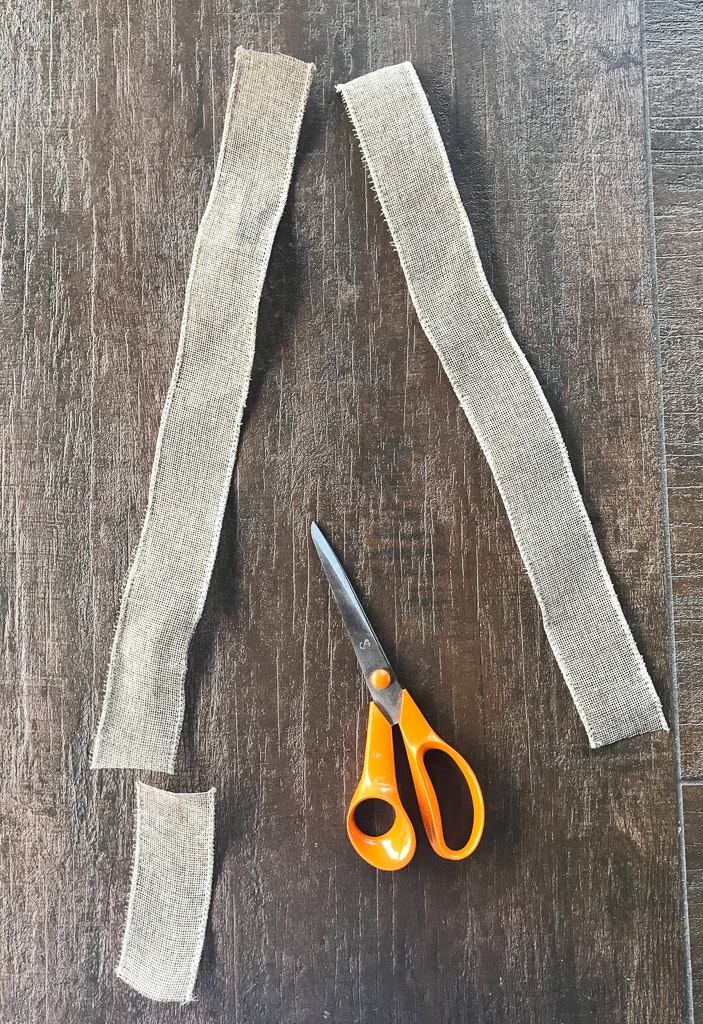
Fold the extra ribbon in half then move it so one side is a few inches shorter than the other. Cut the longer end off at the bottom and cut the two halves apart.
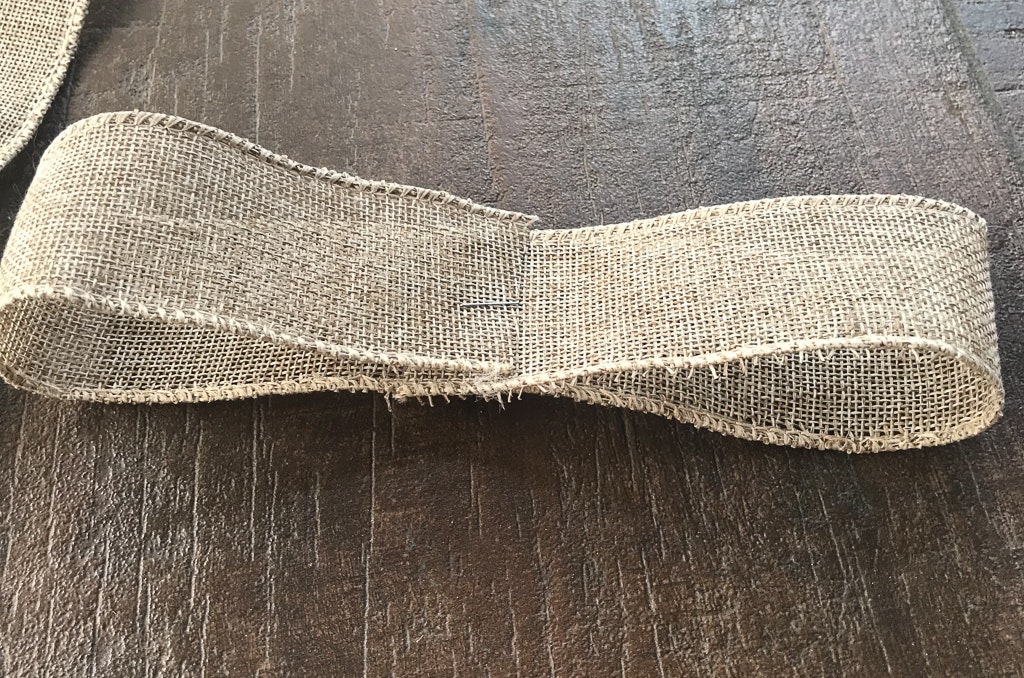
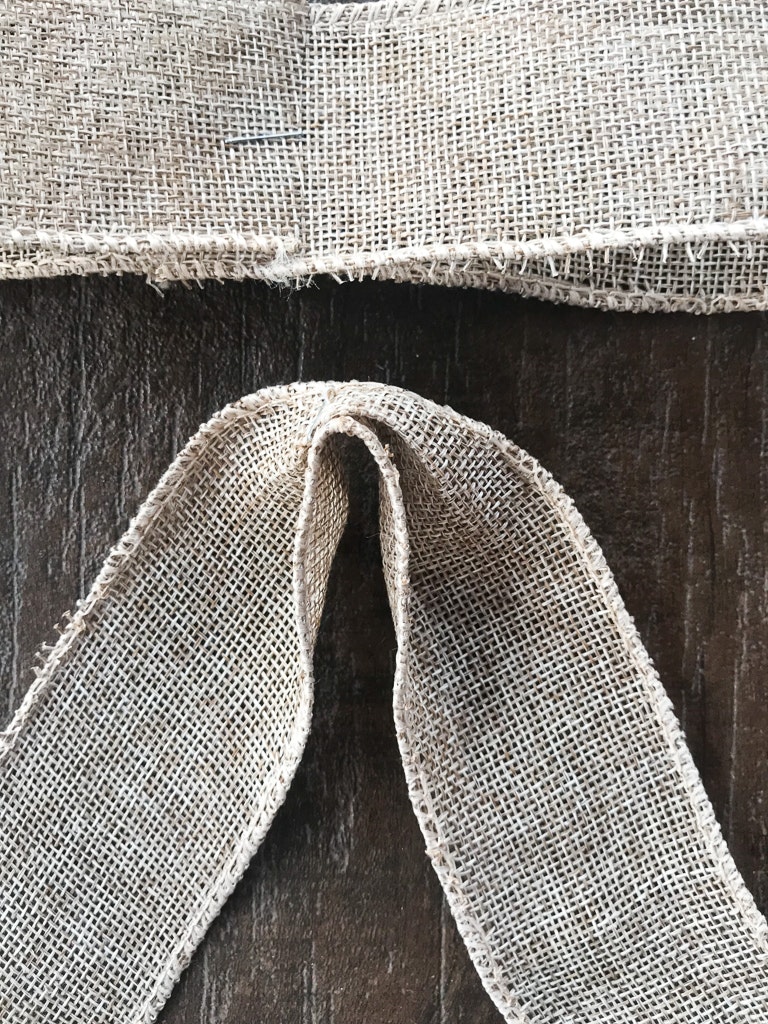
Fold one of the longer lengths of ribbon in thirds bringing the ends to the center of the bow. Staple it in the middle or secure it with a little hot glue.
Take your second piece of ribbon and fold it accordion style then staple or hot glue it to make is stay.
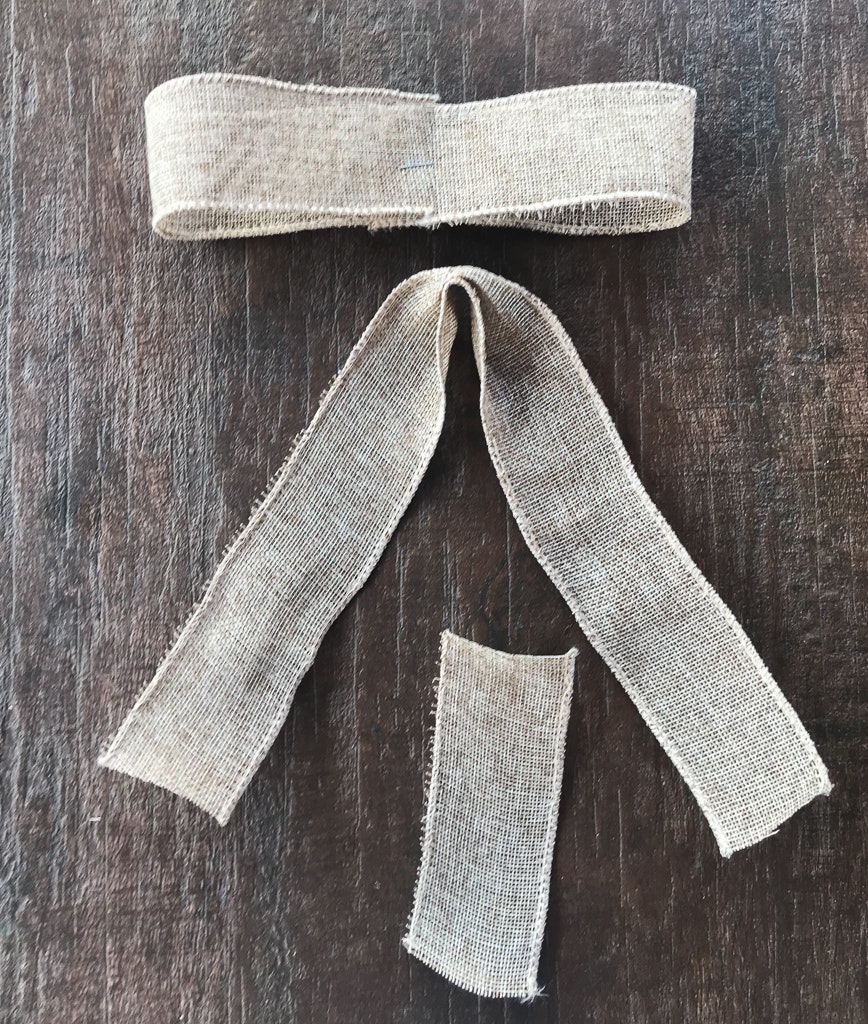
Take the extra little piece of ribbon and fold it in thirds length wise. Fold the finished long edges into the center of the back and secure with hot glue or a stapler. You will use this piece to wrap around the center of the bow to create a finished edge in the center of the bow.
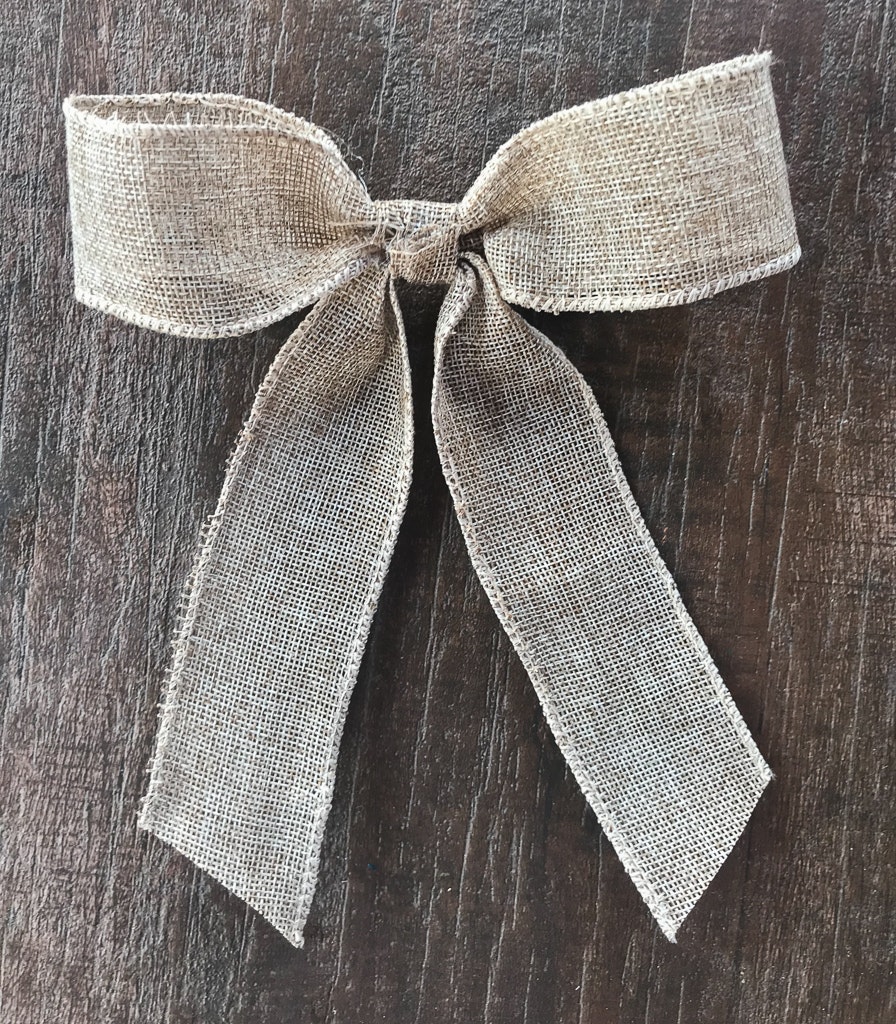
Take the little piece of ribbon you just folded in thirds and place the center of the pleated tails and the center of the bow down on top. Wrap the small piece of ribbon towards the back and secure it with glue. Cut off any extra ribbon.
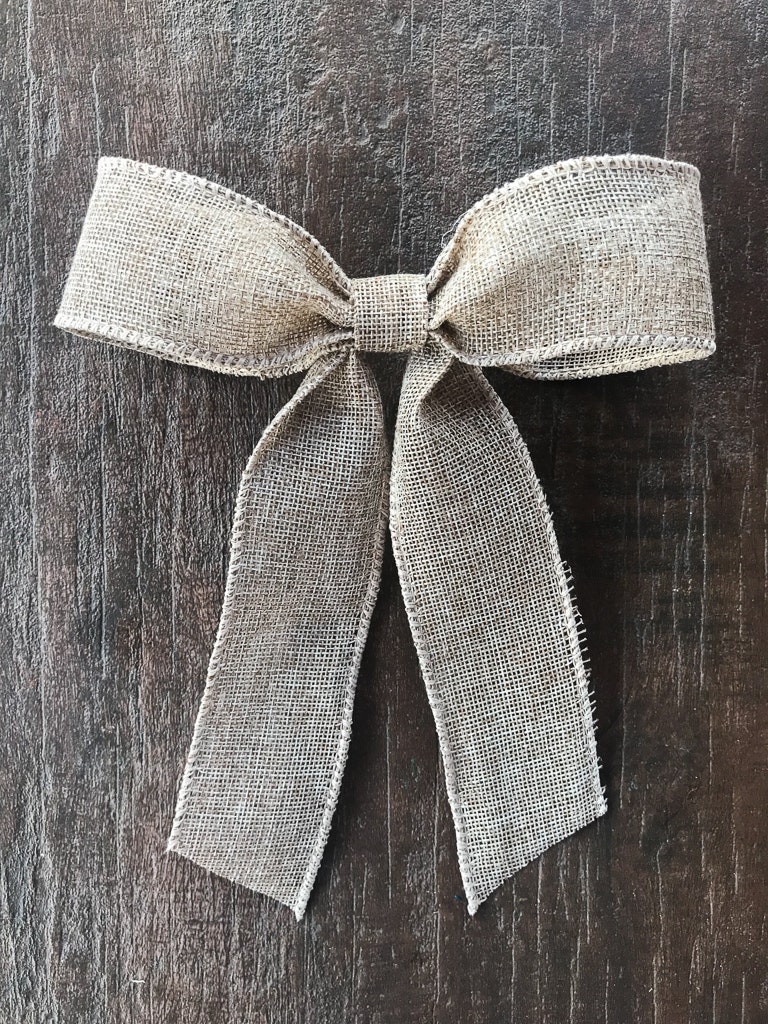
Secure the finished bow to the bottom of your wreath with some hot glue and start placing your pumpkins on your wreath. These little pumpkins come with tiny little metal clips so you could just clip them on. Then you can remove them to use the wreath for other things. I decided to snip off the clips and just glue the pumpkins straight onto the wreath. I would suggest starting at the top and working your way around each side toward the bow at the center bottom of the wreath. You might want to lay them out first before gluing them and make sure you’re happy with the spacing.
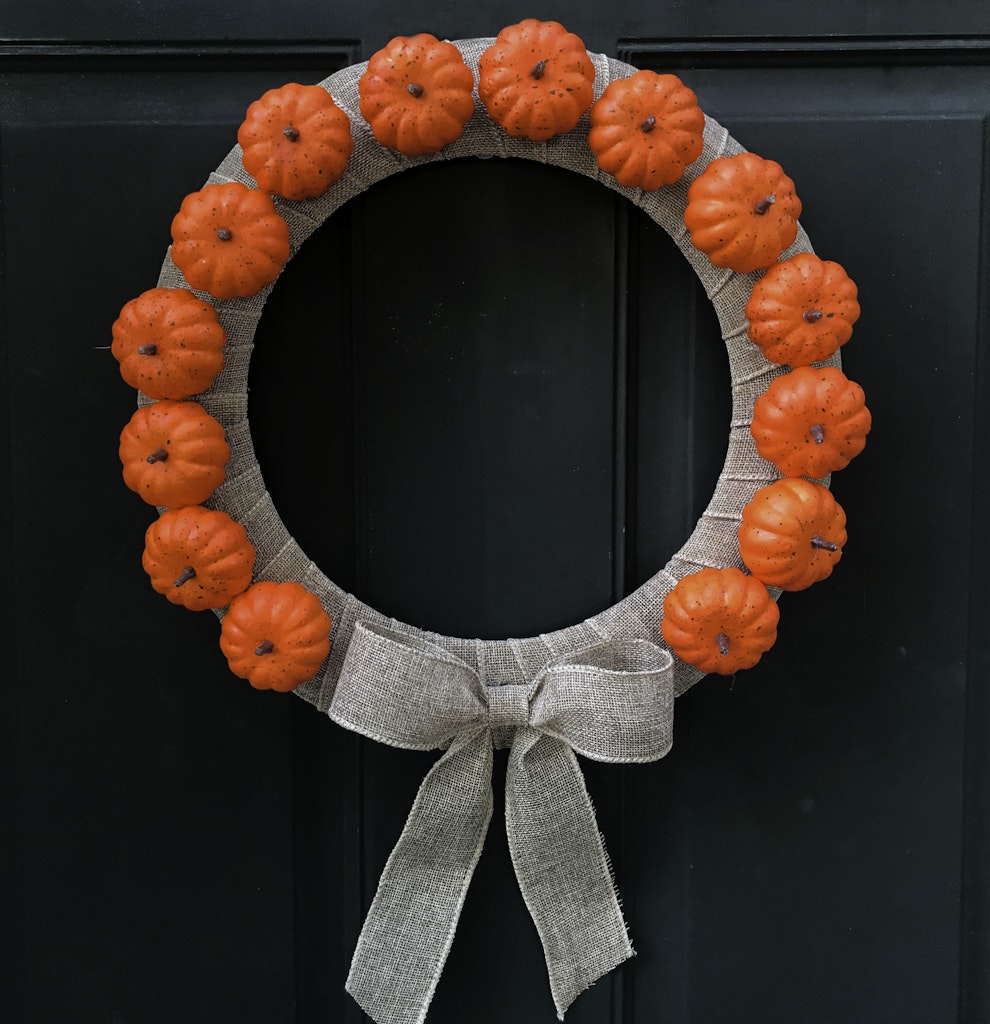
Hang that bad boy up and marvel at your craftiness. If you liked crating our pumpkin burlap Halloween wreath, check out some of our other Halloween crafts like out Halloween Glitter Ornaments.
1 thought on “Dollar Store Pumpkin Burlap Halloween Wreath”