
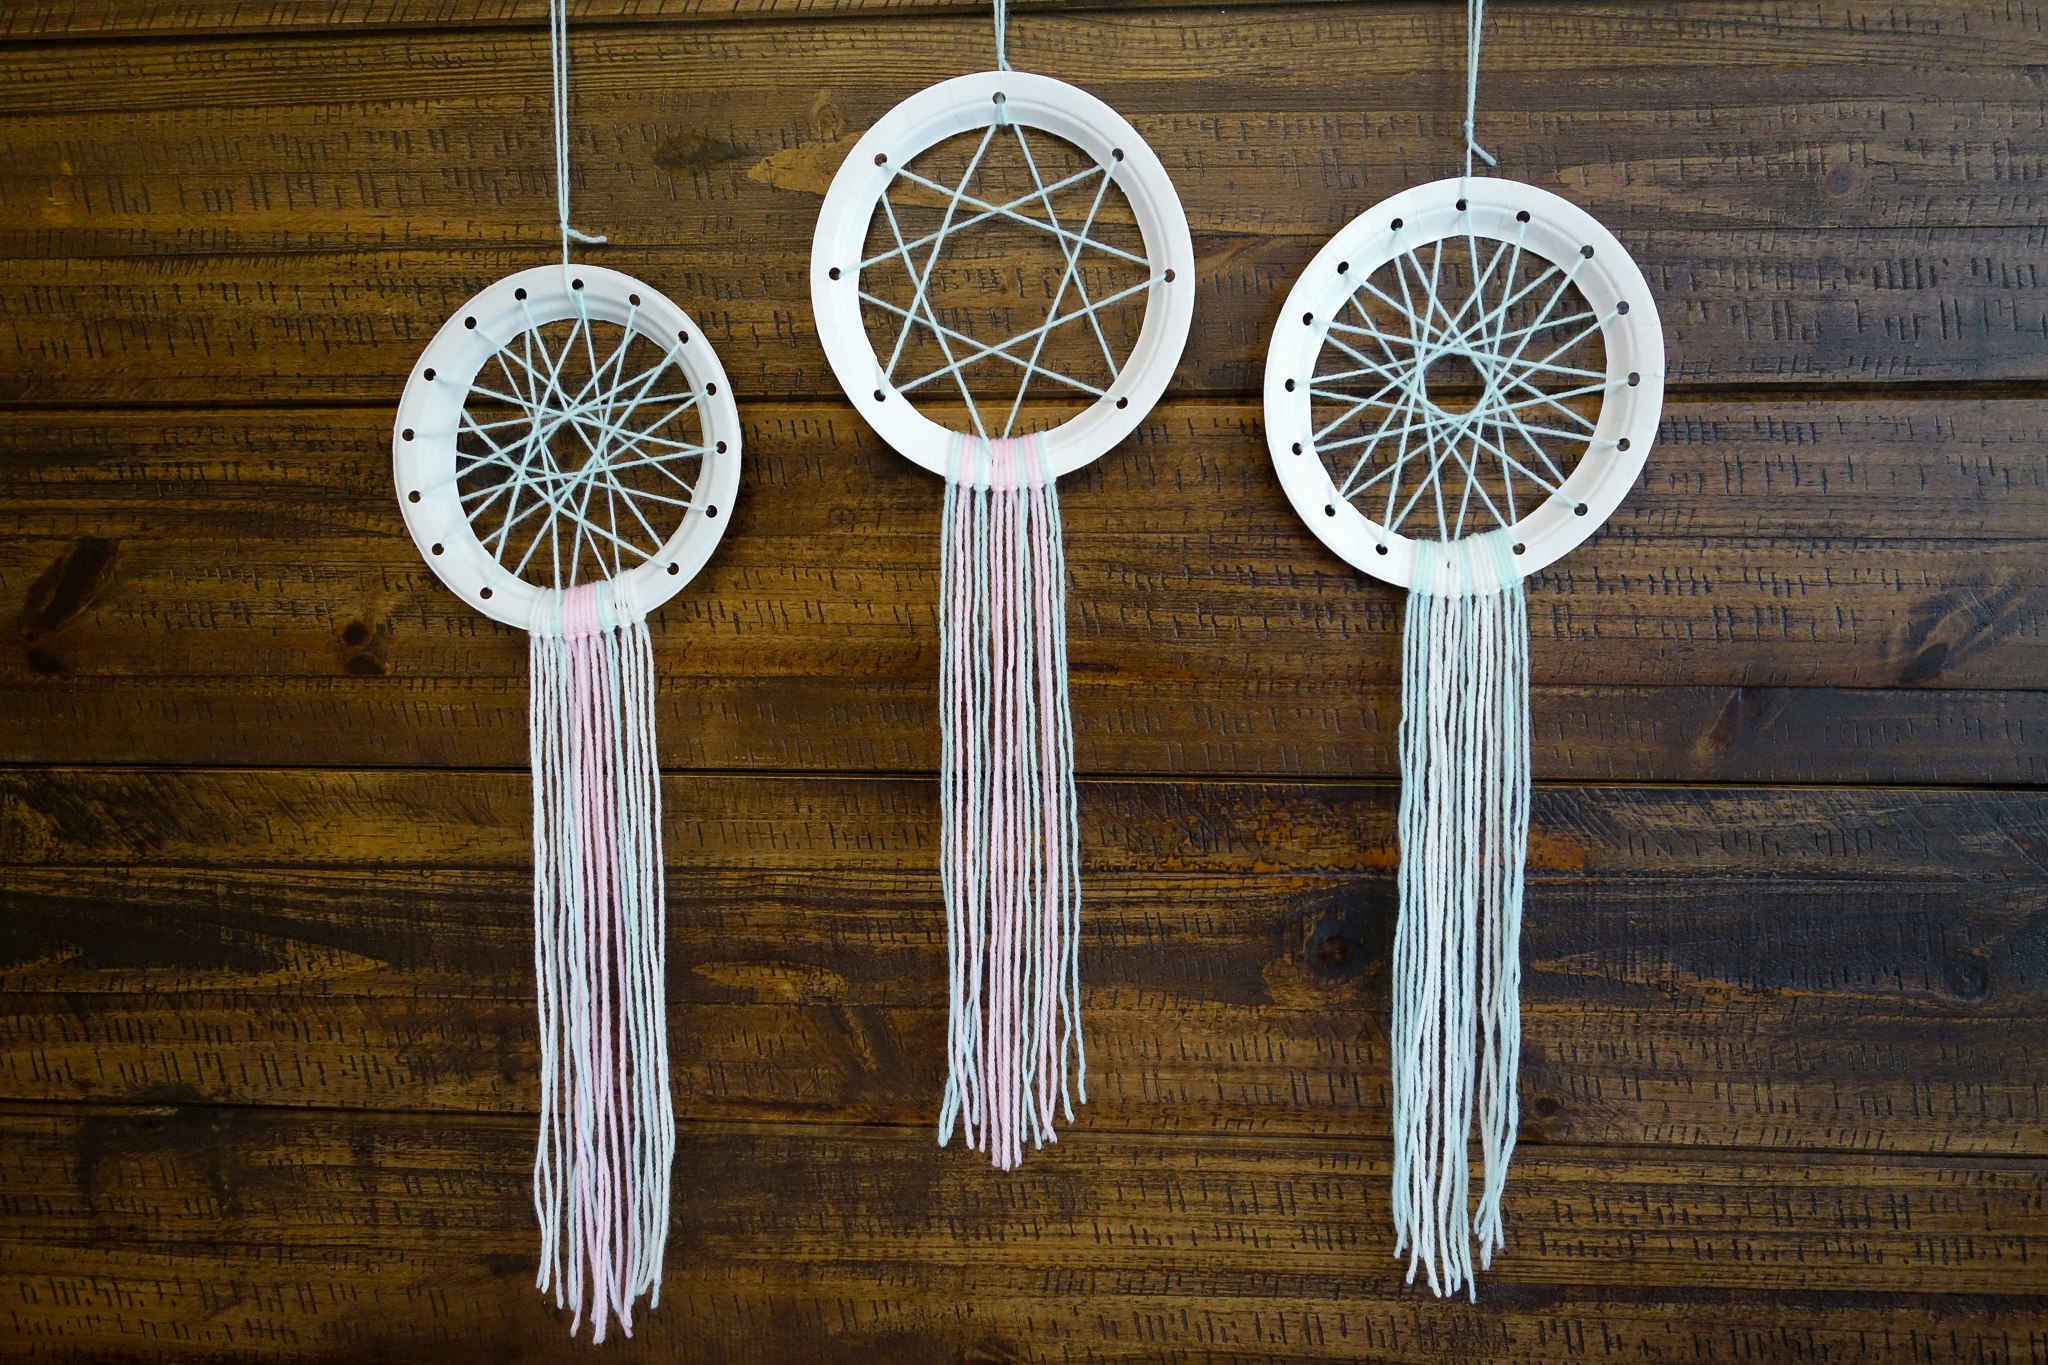
How To Make A Paper Plate Dream Catcher
This paper plate dream catcher craft is a simple project for kids using things you probably have around your house. My daughter requested we make these dream catchers for her room.
With all that’s been going on lately she’s been having a difficult getting to sleep. We hung her new dream catcher near her bed to catch the bad dreams in the web and filter only the good dreams down to her 🙂
If you don’t have some of these supplies then get creative. For example, string, twine or ribbon could be used in place of yarn.
If you’re looking for a tutorial on a more traditional dream catcher, check out our post here for DIY Dream Catcher Tutorial.
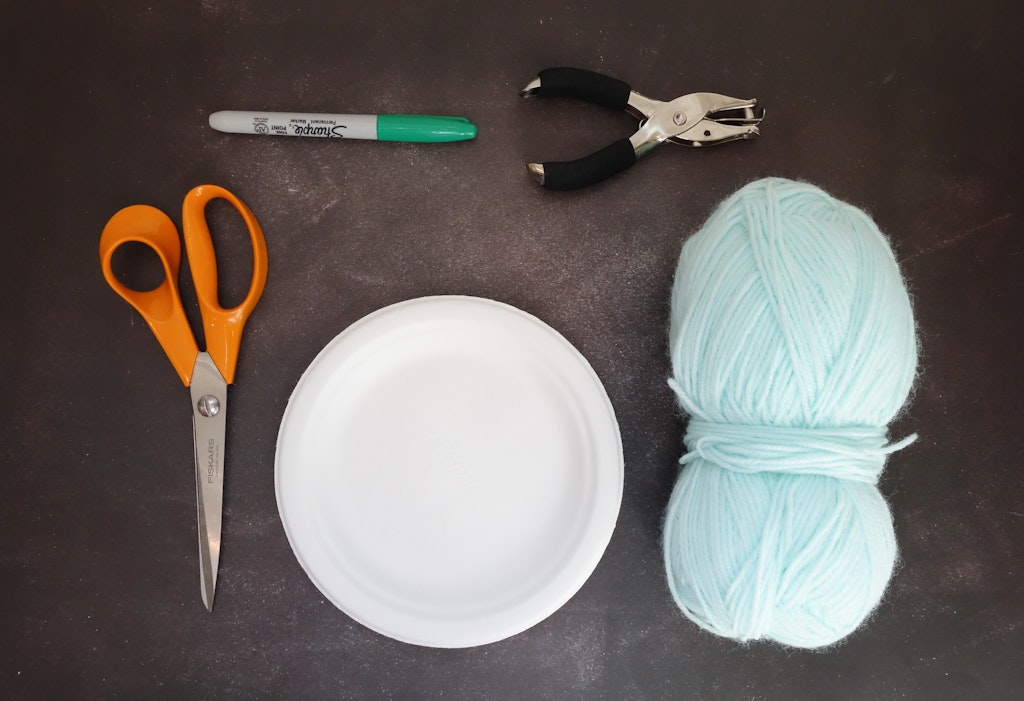
Supplies Needed For Paper Plate Dream Catcher
- Paper Plate – Any size will do
- Scissors
- Hole punch
- Yarn, twine, string or thin ribbon
- Marker, pen or pencil
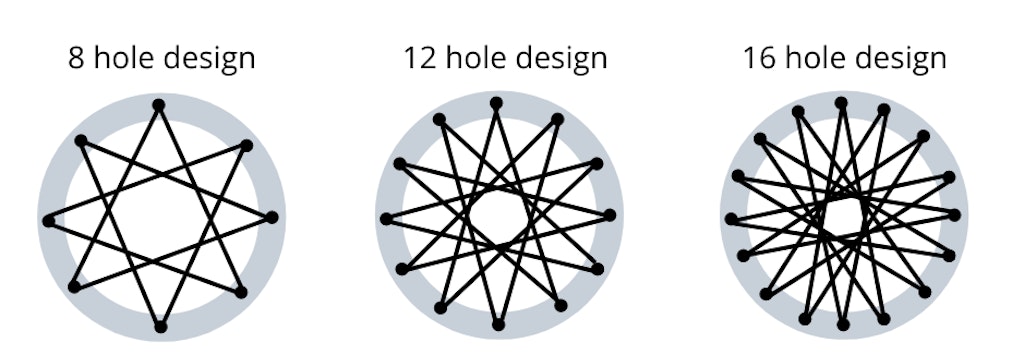
Choose Dream Catcher Pattern
Figure out which design you’d like to try or if your kiddo just wants to create their own design that is totally fine! For the designs we’ve included below you’ll want to decide how many holes you’re going to punch.
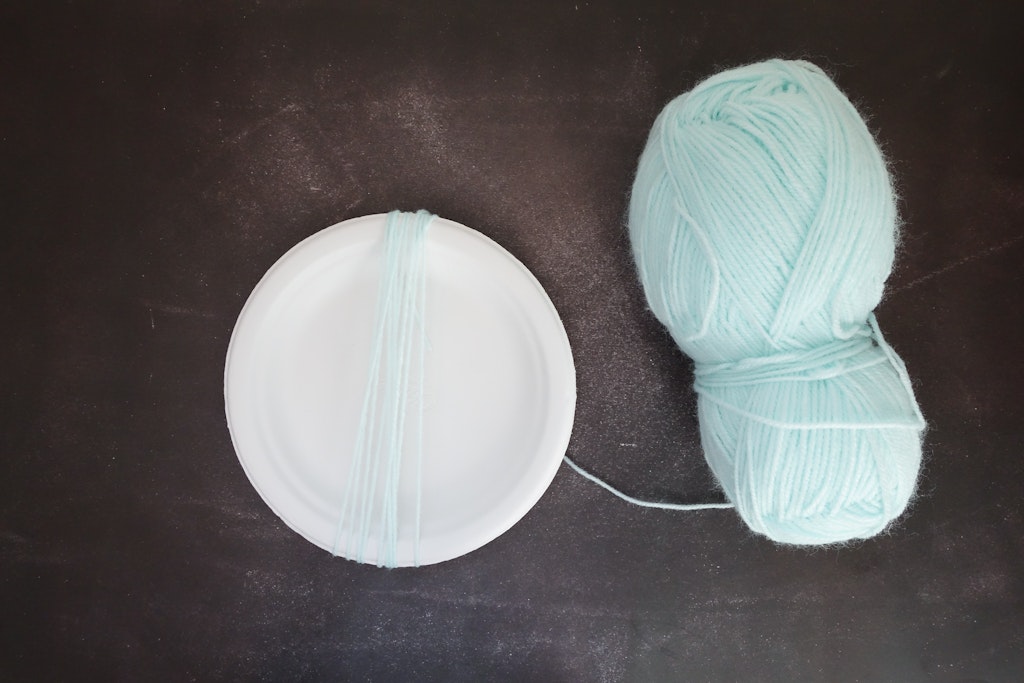
Then wrap your yarn around your paper plate half as many times around the plate as the number of holes you’re going to punch plus an extra 🙂
For example, if you’re going to do the 8 hole dream catcher pattern design, wrap the string around the plate 4 or 5 times to make sure that your string is long enough to weave through all of the holes.
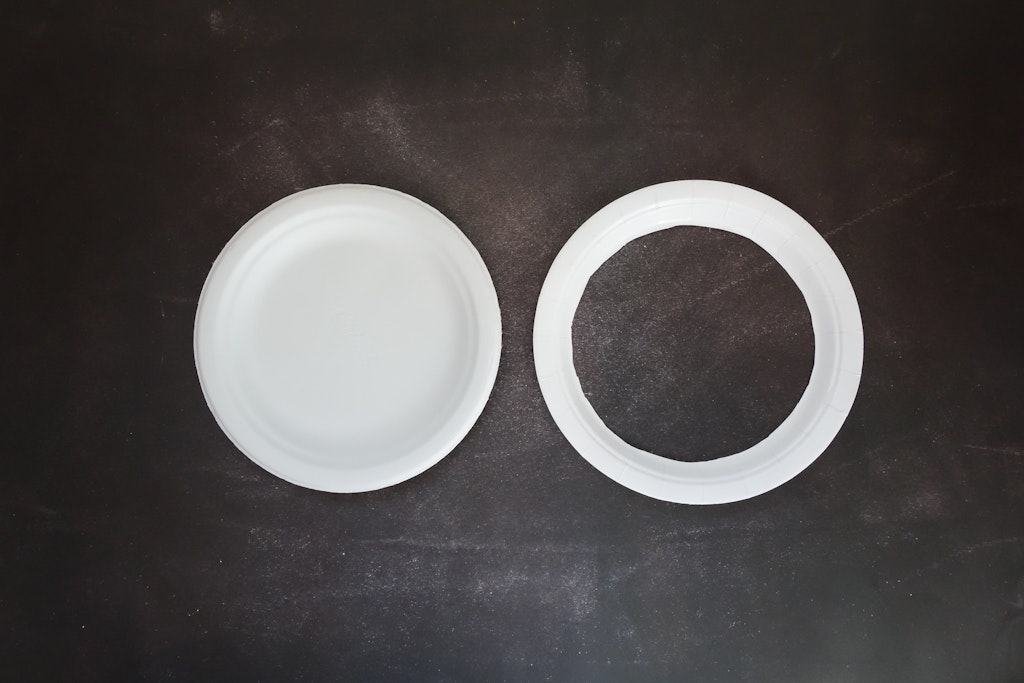
Cut out the inside of the paper plate leaving just the outer rim. You don’t want to cut it too close to the edge or it will be flimsy, especially with the 12 or 16 hole designs.
Map Out Where You Will Cut The Holes
Flip the plate over on the back and draw on dots for the dream catcher pattern you chose. This is where you will punch the holes. The easiest way to do this is to start with four dots evenly spaced out around the plate.
One at the top middle, one at the bottom middle, one on the left, one on the right. Then add dots in between those four dots depending on which design you choose.
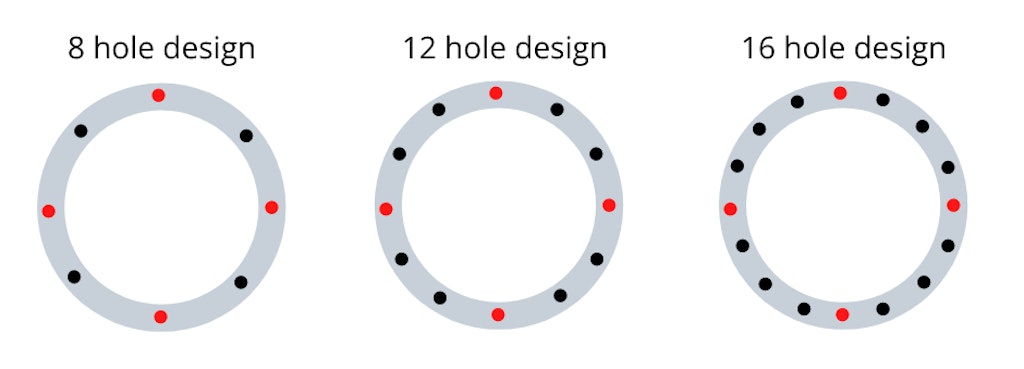
8 hole design, add one more dot in between each of your four dots.
12 hole design, add two evenly spaced extra dots in between each of your 4 main dots.
16 hole design, add three evenly spaced extra dots in between each of your 4 main dots.
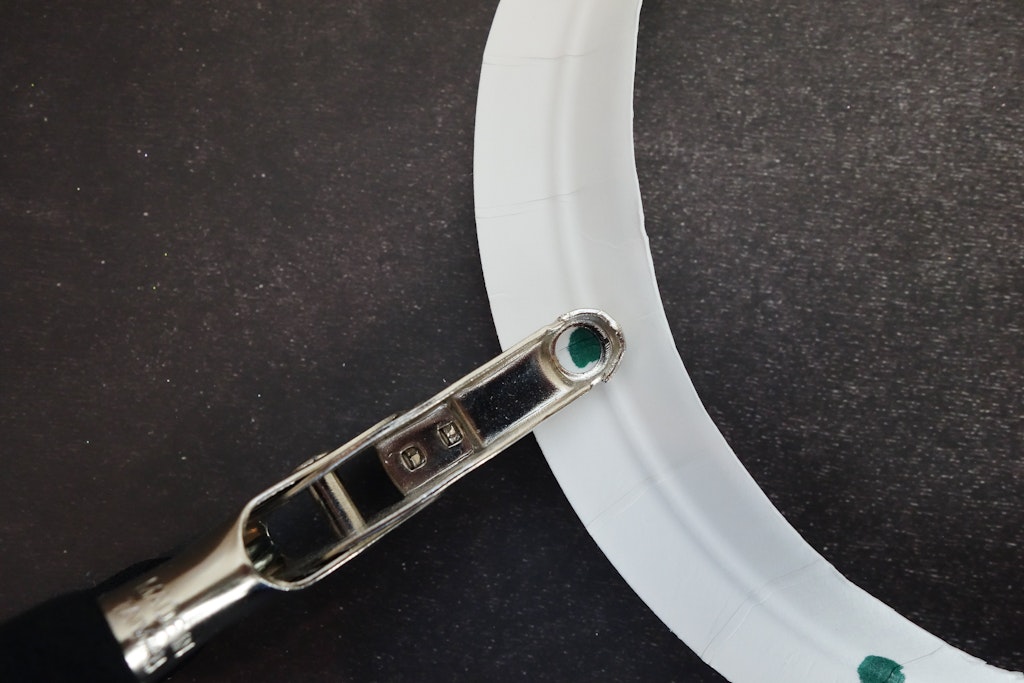
Once you’ve planned out where you want the holes then punch them out with your hole punch.
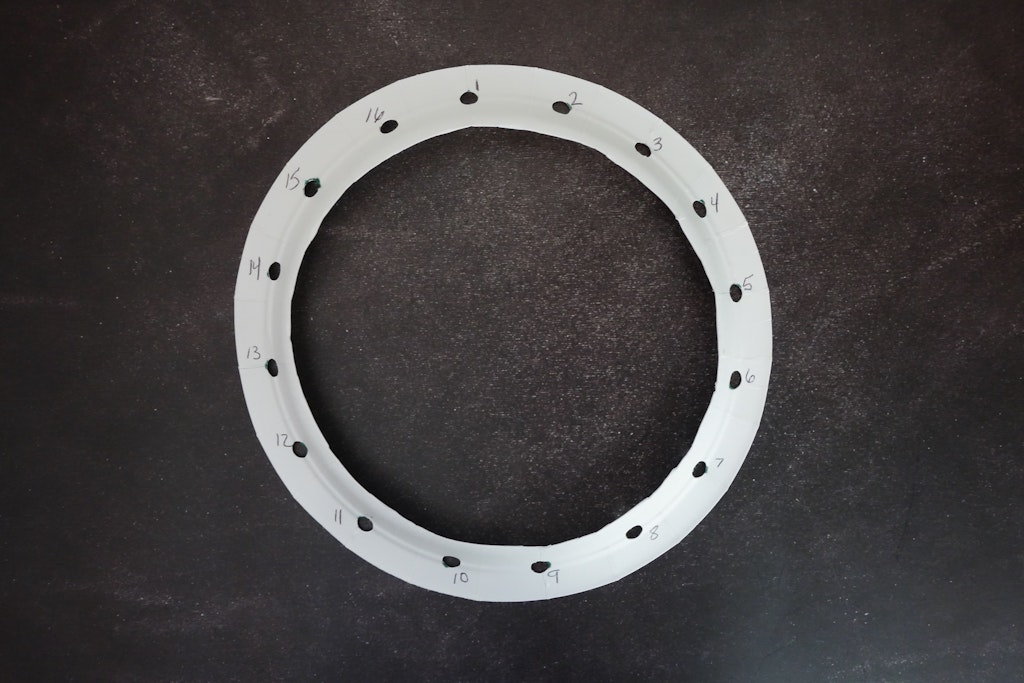
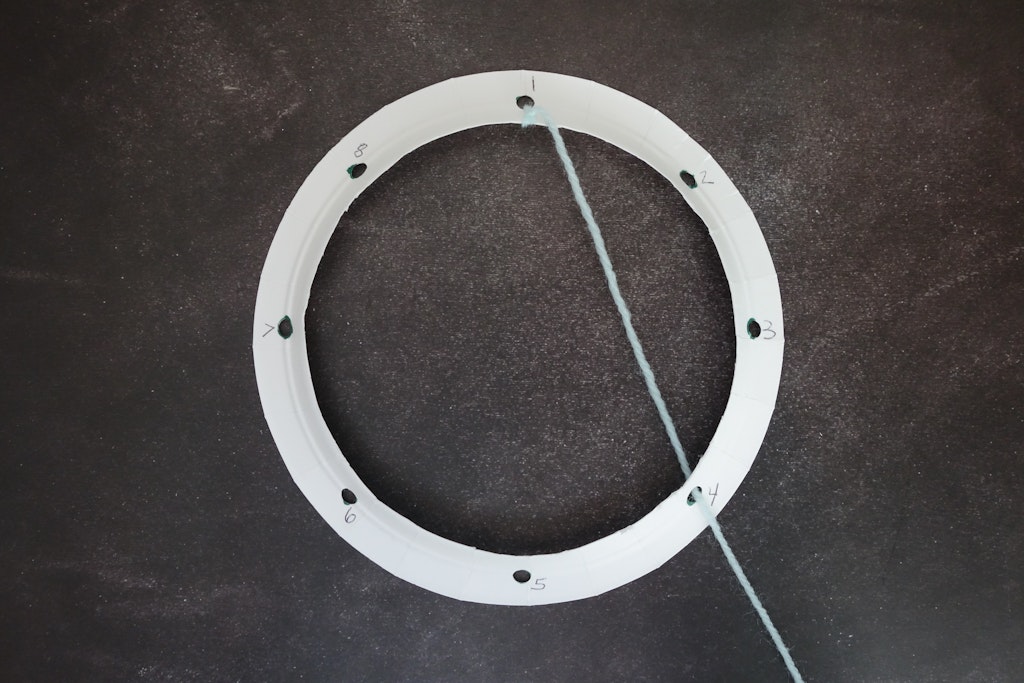
Using a pen or pencil number the holes on the back of the paper plate ring.
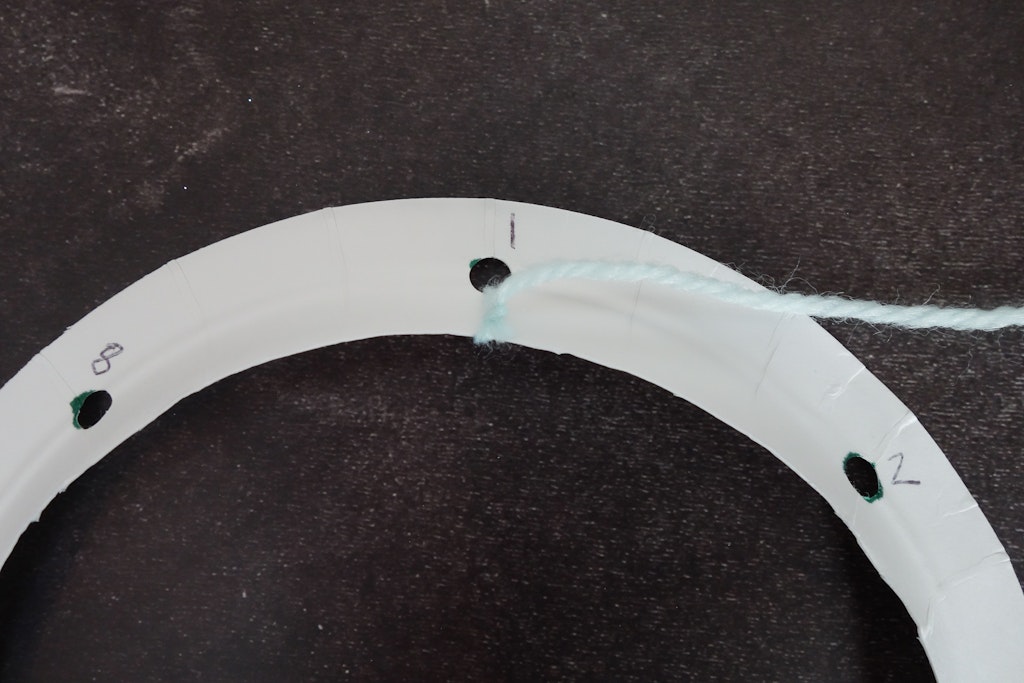
Tie one end of your yarn around the first hole and tie a knot. Look at the charts below and string your yarn through the holes in the order listed.
Weaving The Web On Your Paper Plate Dream Catcher
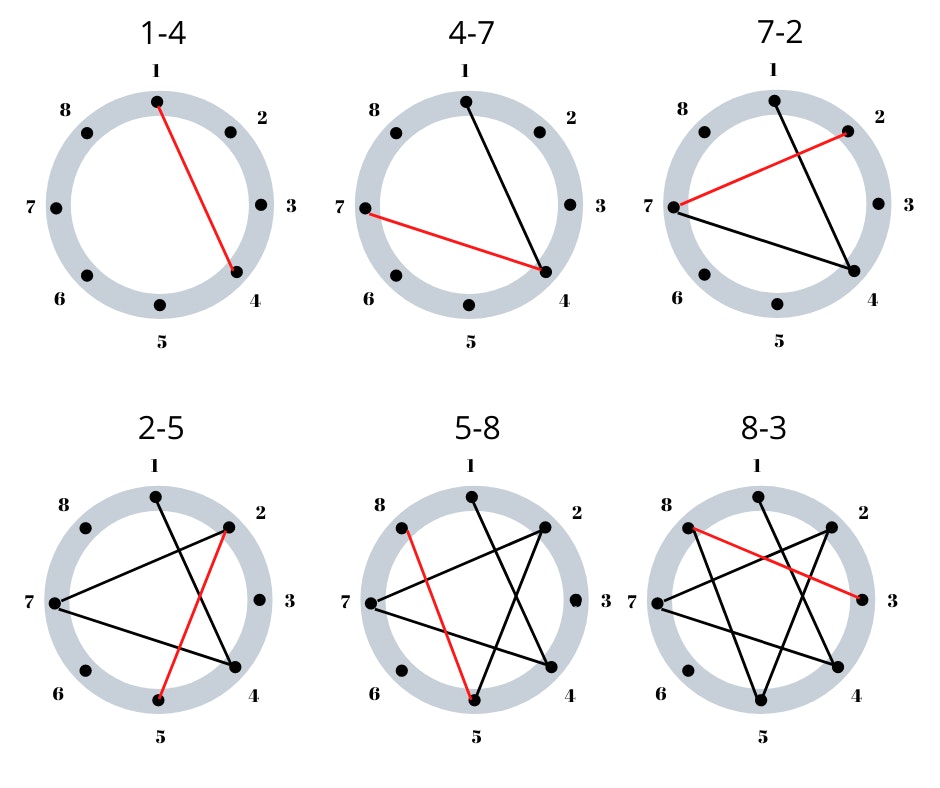
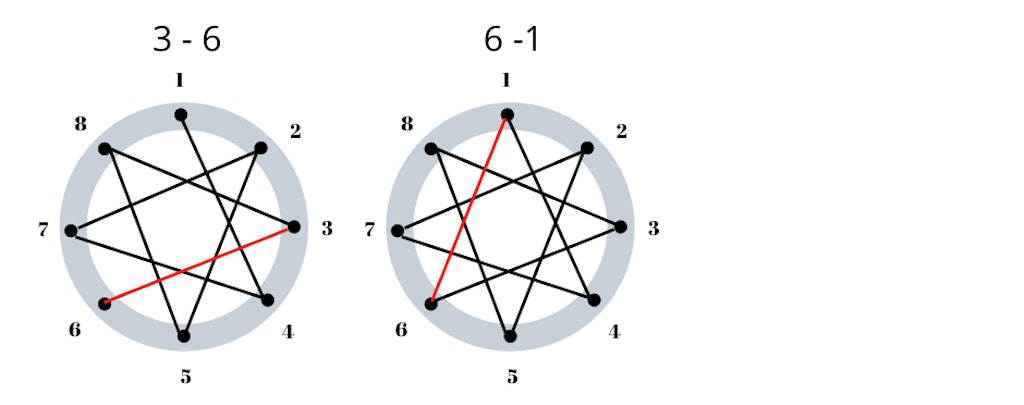
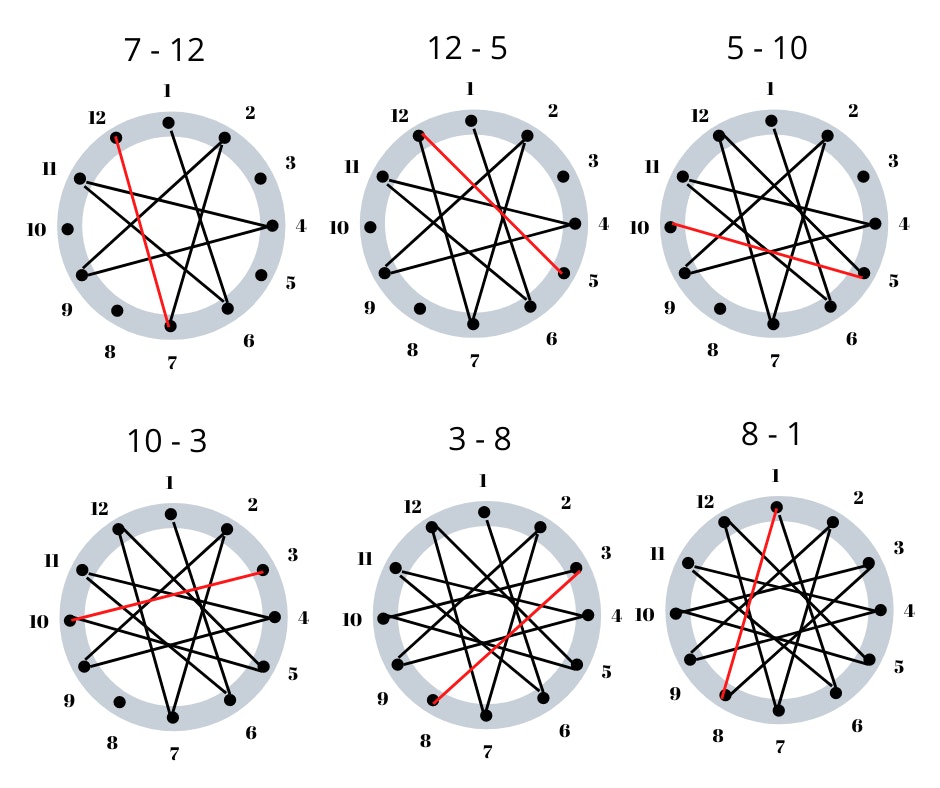
Stringing Directions For 8 Hole Dream Catcher
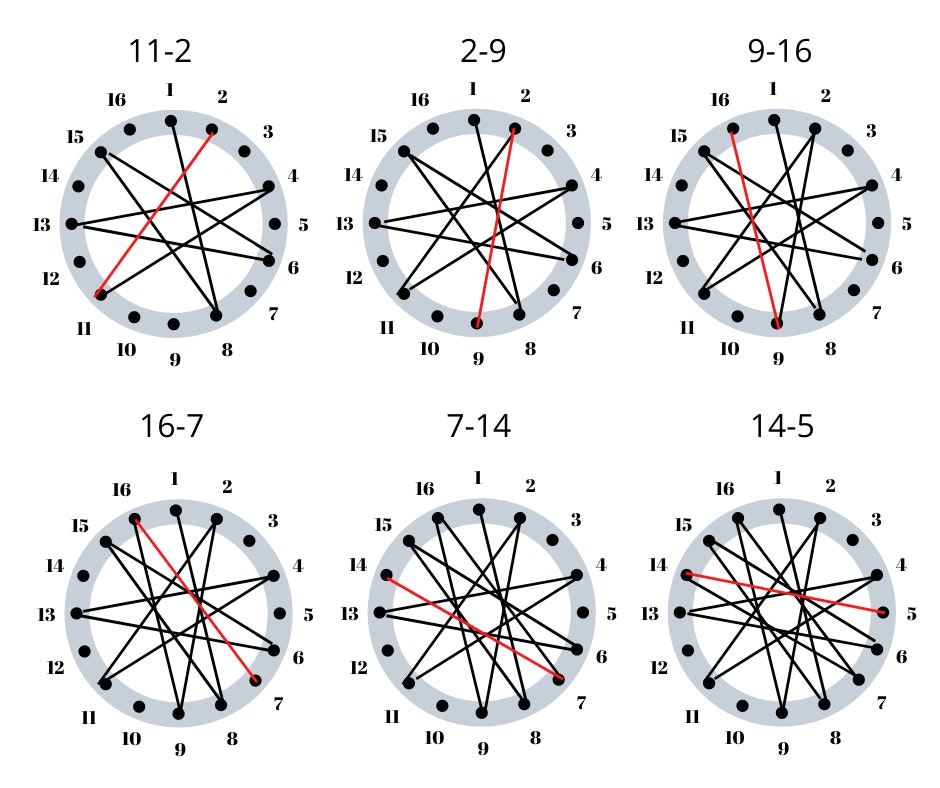
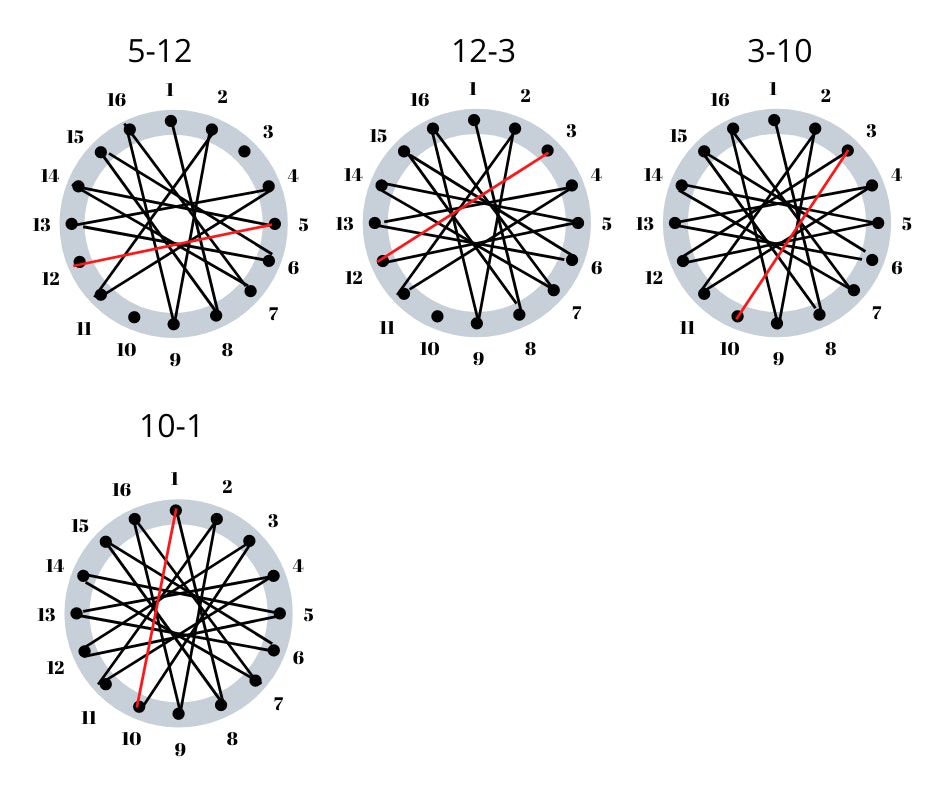
The red lines show the current step and the black lines are the steps you’ve already done.
Weaving Directions For 12 Hole Dream Catcher

Stringing Directions For 12 Hole Dream Catcher

Once you’ve weaved the yarn through the last hole tie the end in a knot around the plate.
Loop a section of the end of the yard and tie it in a knot at the top of the plate to use to hang it up.
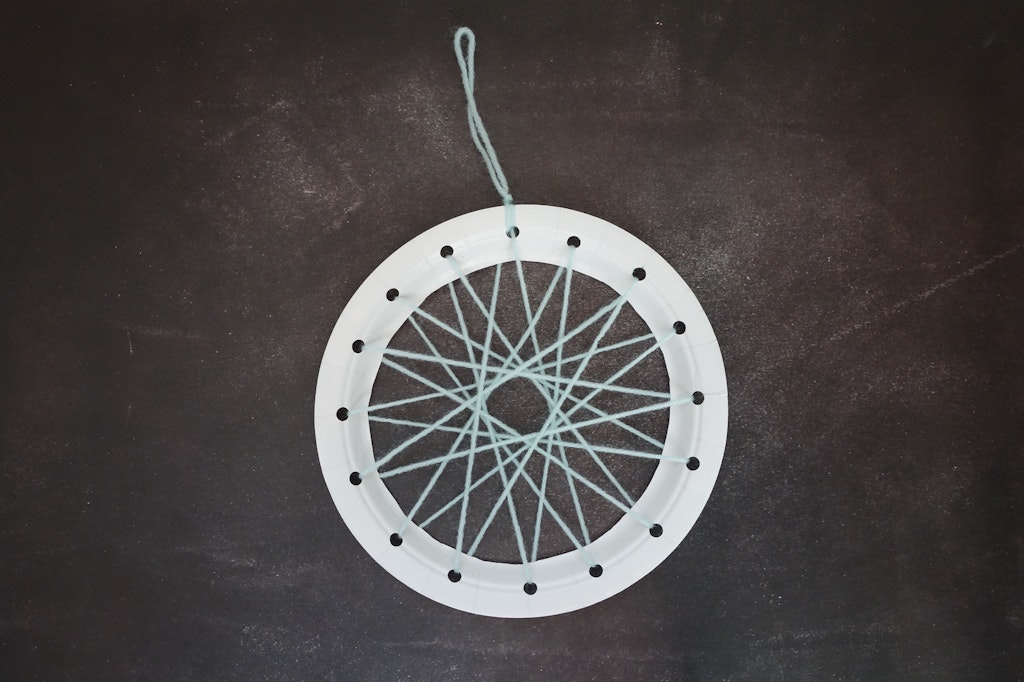
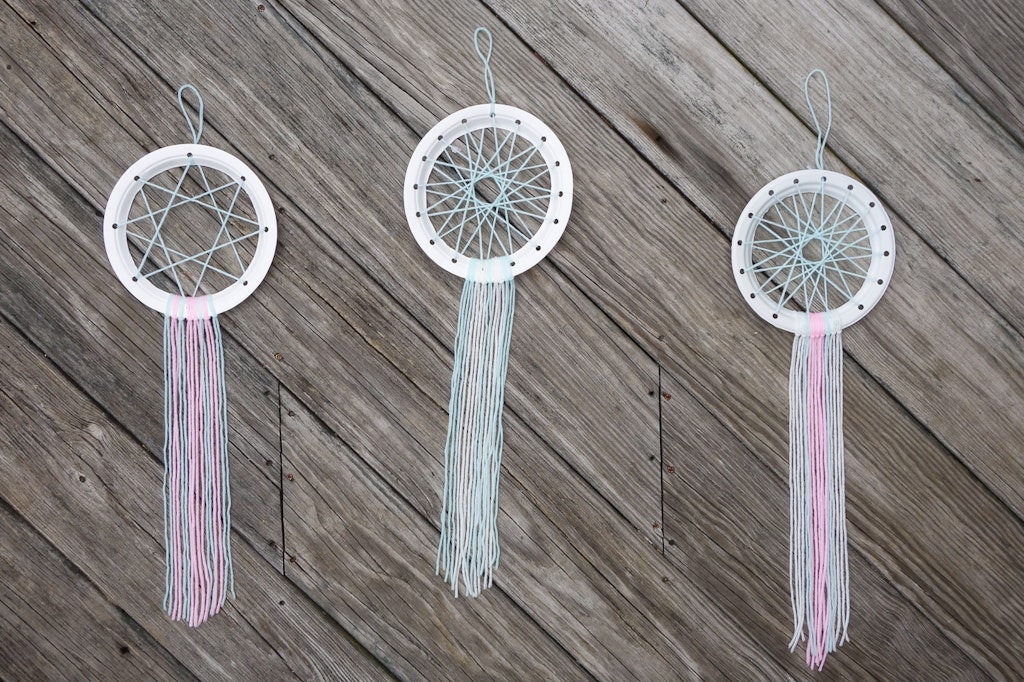
This is a finished version of the 16 hole weave design.
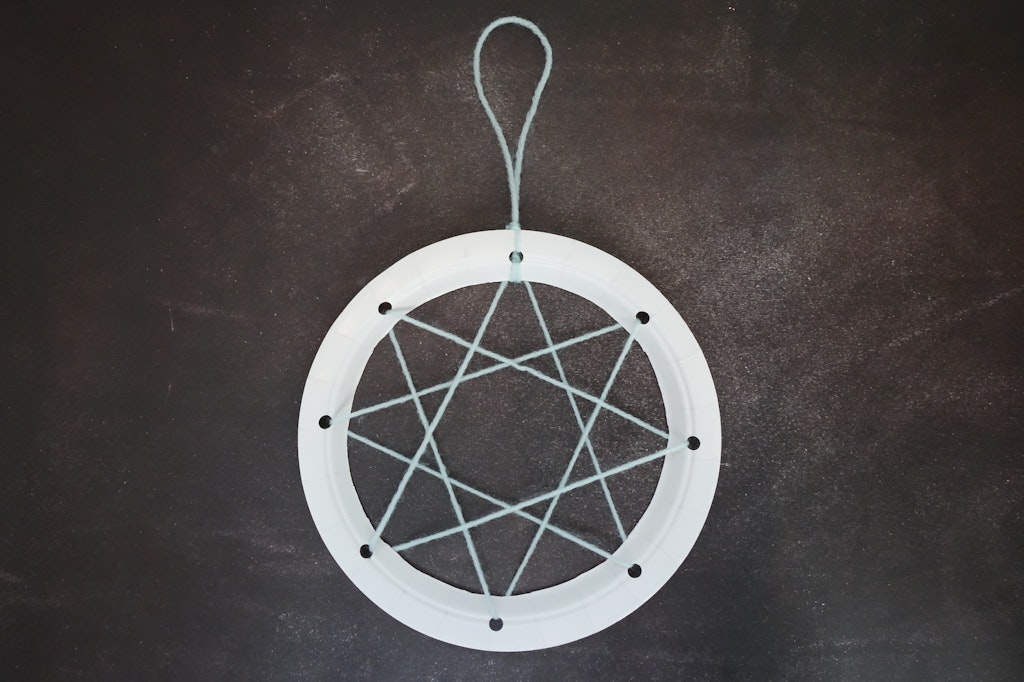
Above is a finished version of the 8 hole weave design.
Adding The Dream Catcher Tails
Now it’s time to add the tails to the dream catcher. Measure how long you would like the tail strings and double that length then cut. Fold the tail in half and grab the middle section of the tail.
Take the middle and place the loop over the bottom rim of the paper plate.
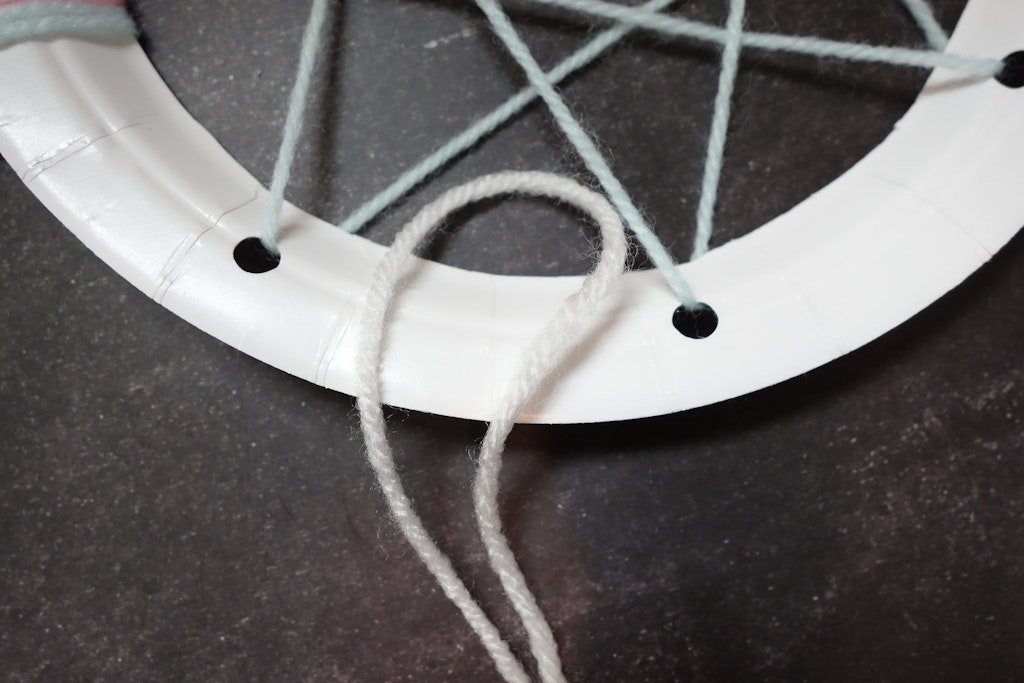
Pull the loop down a little past the plate.
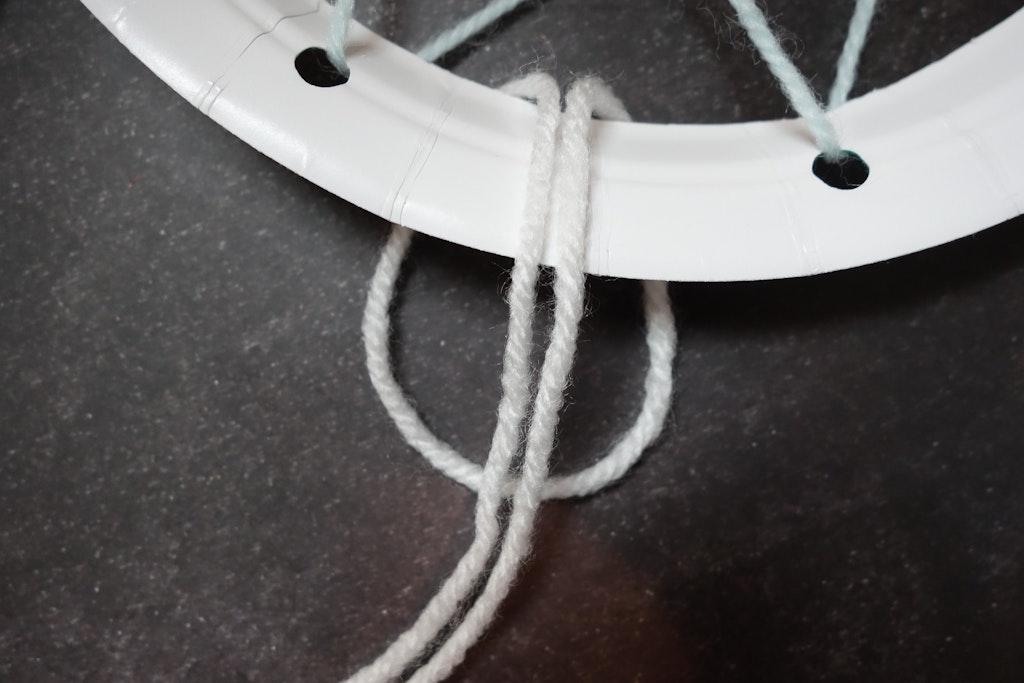
Take the two tail strings and push them through the loop of string that you just pulled down.
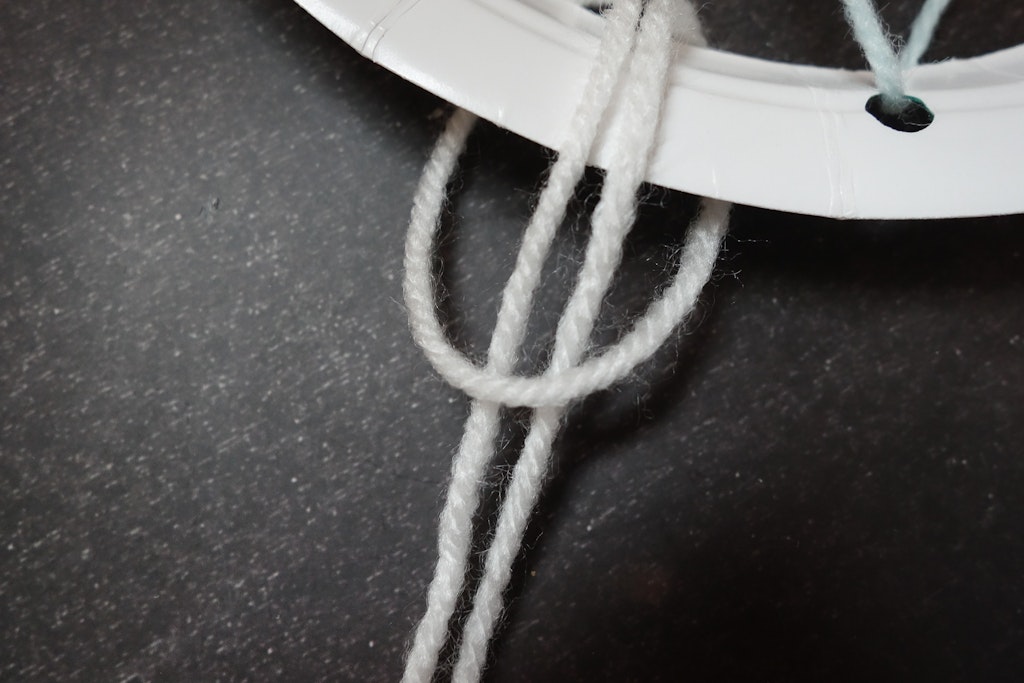
Pull the tail strings to tighten the loop and secure it to the bottom of the plate and continue this step with multiple pieces of yarn.
You can do all one color or if you have multiple colors of yarn you can add an additional color to create a pattern.
Trim the ends of the tails and you’re all done!
Excellent work and direction , thanks
I will for sure would try this one
would love some printable PDF for the templates so I can do on card stock circles at school 🙂 this is a great idea. thanks os much!
Laura which design were you thinking of doing? The 8, 12 or 16 hole one and I can work on that one first 🙂
Yes I have liked the idea of making holes accordingly.
Would you be able to send me a PDF for 8 holes on paper then it becomes easier for students to mark their number if holes on each paper plate.