
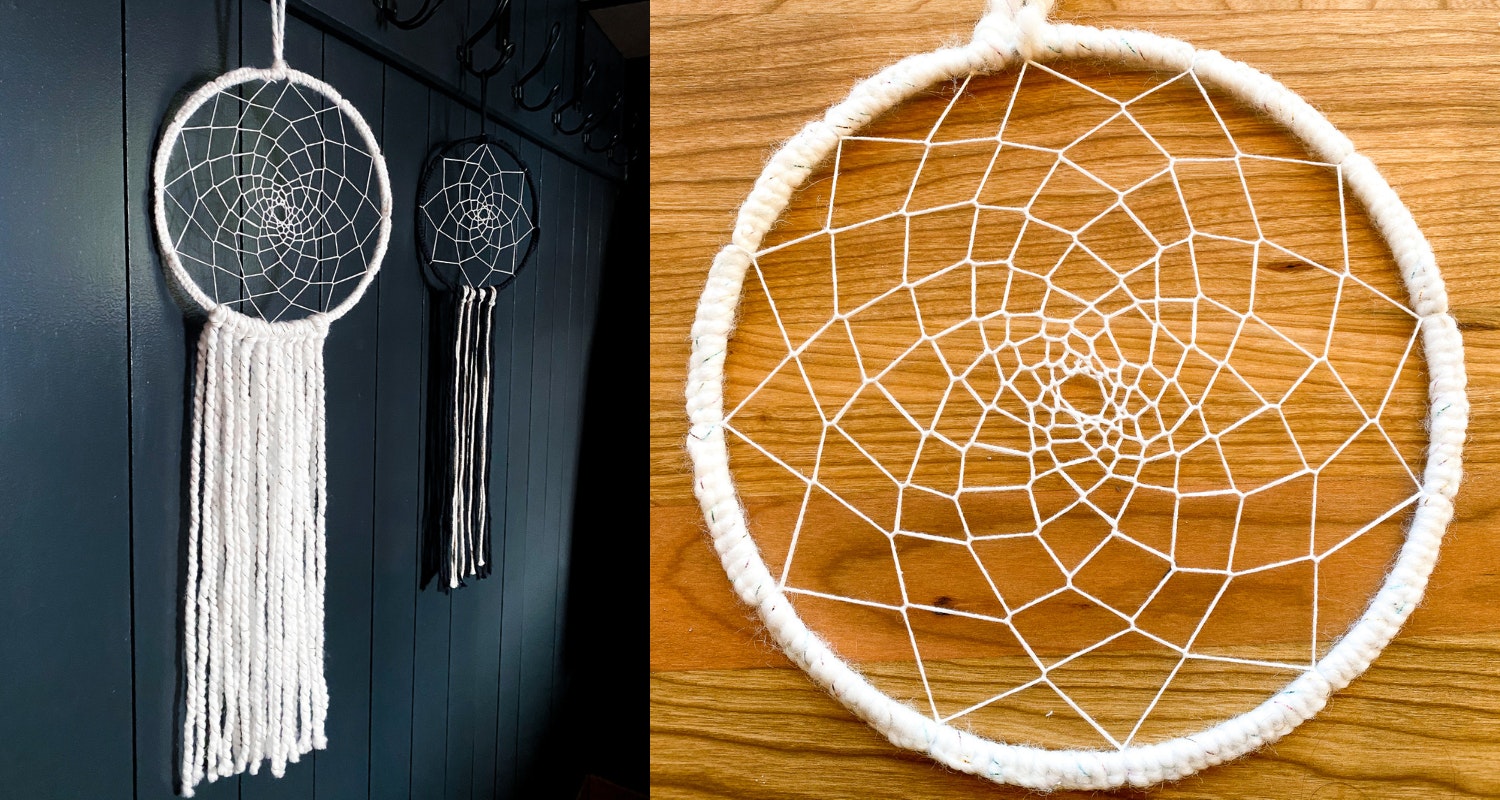
Dream Catcher Pattern And Tutorial
I have always loved dream catchers. After researching the history and legends associated with dream catchers in Native American culture, my daughter and I recently made a version for her room using a few supplies we snagged from the craft store.
A Little History
First I want to share what we learned about the history behind these beautiful creations and their root in Native American culture, specially, the Ojibwe. It is our understanding that according to Ojibwe legend, the Spider Woman was a spiritual protector of the tribe’s youngest members.
Over time it was believed that the Spider Woman had difficulty watching over all of the children as the tribes grew larger and more spread out. In order to continue to protect all of the children they spun dream catchers to hang over sleeping children and continue to protect them.
The dream catcher’s webbing in the center caught and trapped any negative thoughts or dreams just like a spider’s sticky web, allowing only the happy, pleasant ones to pass through to the sleeping children. Dream catchers were placed above the child’s bed in a spot where it would be hit by the morning sun to rid it of any bad dreams that had been stuck in the web during the night.
Each piece of the dream catcher has a different meaning. The hoop was traditionally made of willow and signifies the circle of life. The web was woven to look like a spider web. Some webs were attached at eight different points on the hoop because of the spider’s eight legs. Feathers were usually hung from the hoop to gently guide the dreams to the children below.
We created our own version of the dream catcher for our home. If you’re looking for a more simple version of the craft for kids check out our paper plate dream catcher tutorial.
Supplies
Get creative with your dream catcher. You can really use a variety of different materials to create different looks.
- Metal Ring – we used 7″ size
- Material to wrap around and cover ring – we tried a few different materials. We used some yarn that we picked up in the knitting section of the craft store and tried using macrame cord as the wrap. We found ours at Michaels but you can find similar on Amazon too. You could also use something like this leather lace.
- Embroidery thread for web
- Scissors
- Material for the tails – We chose to use the same material we used to wrap the ring, but you could use thin strips of fabric, ribbons, etc.
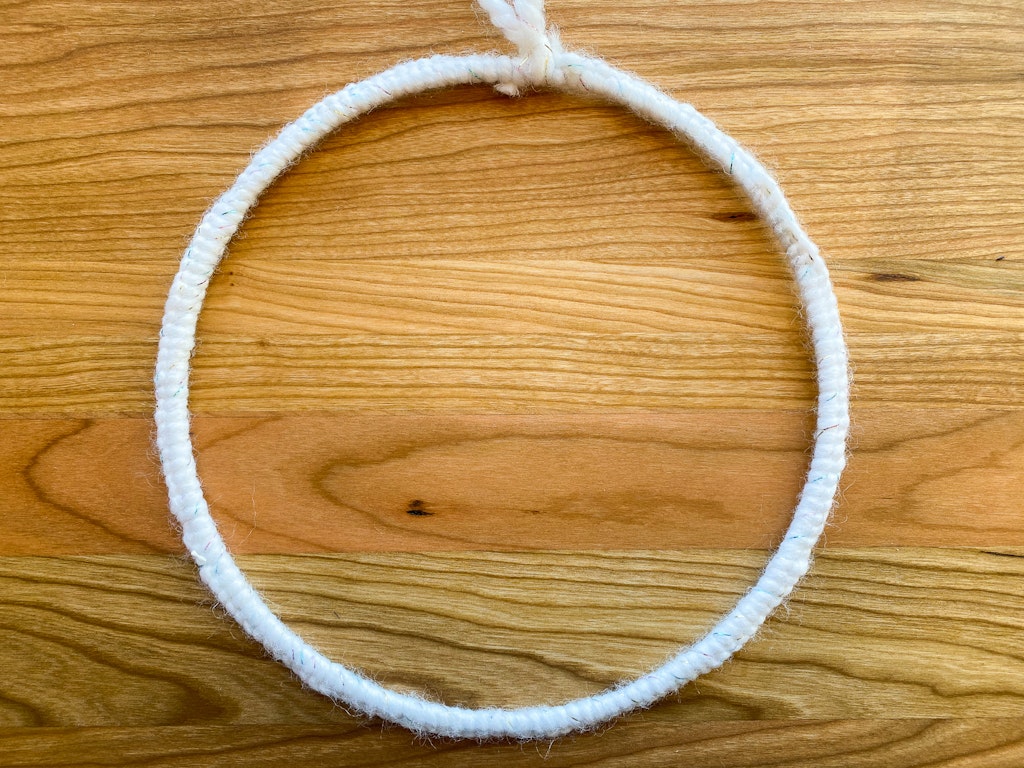
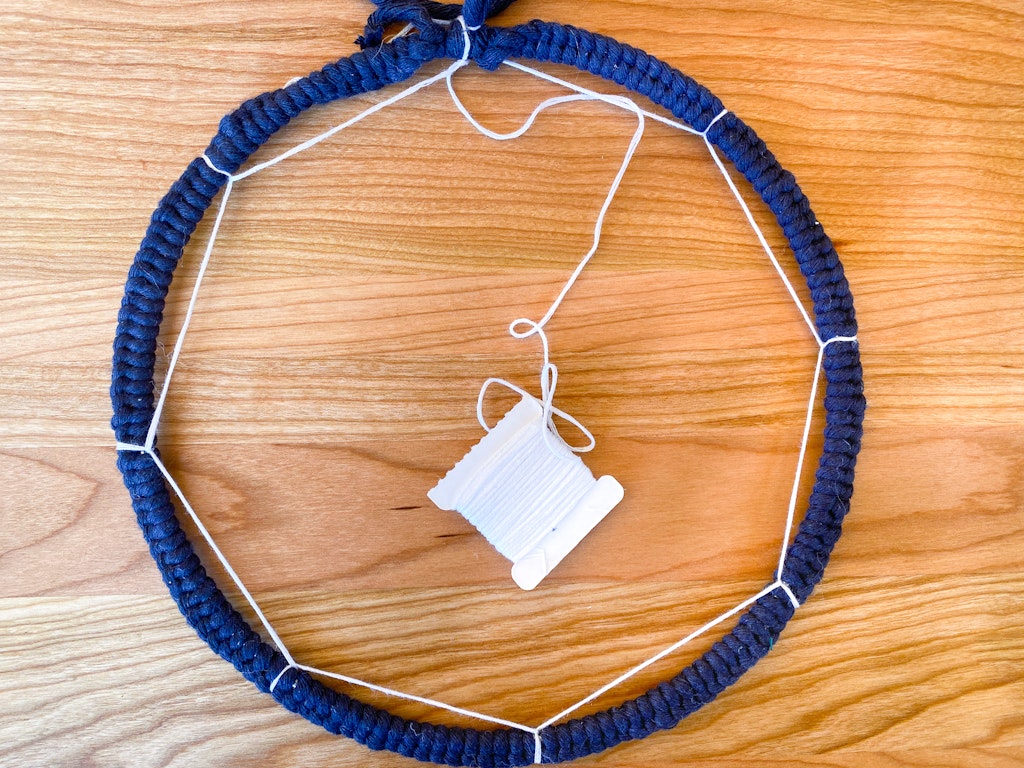
Wrapping The Hoop
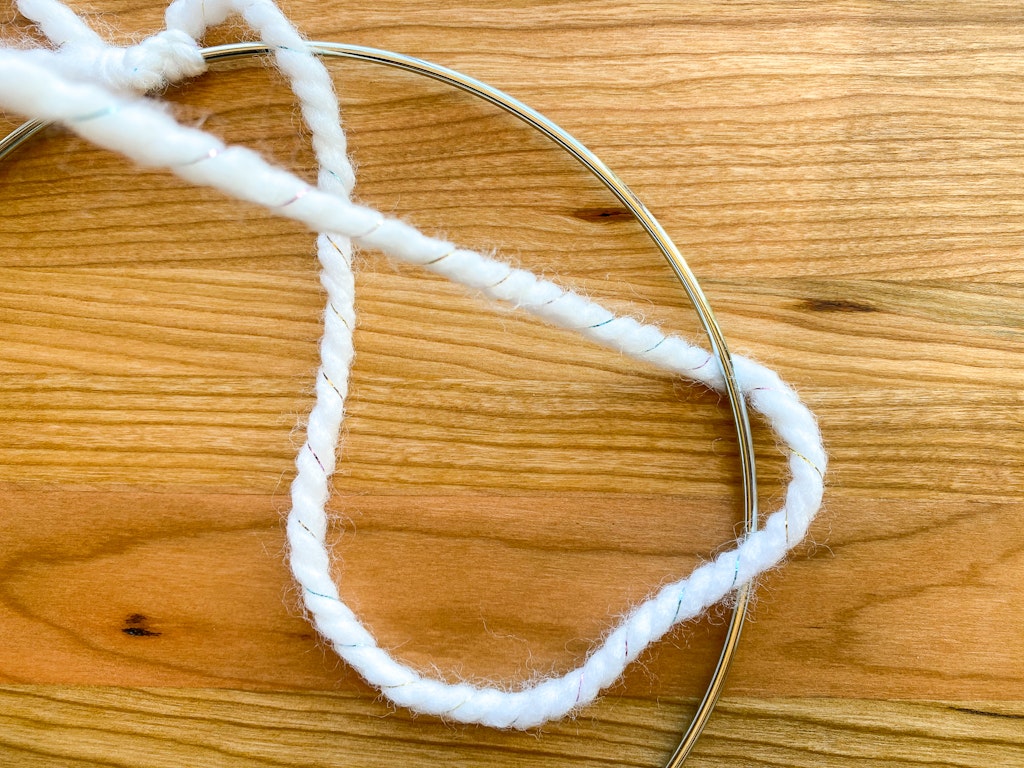
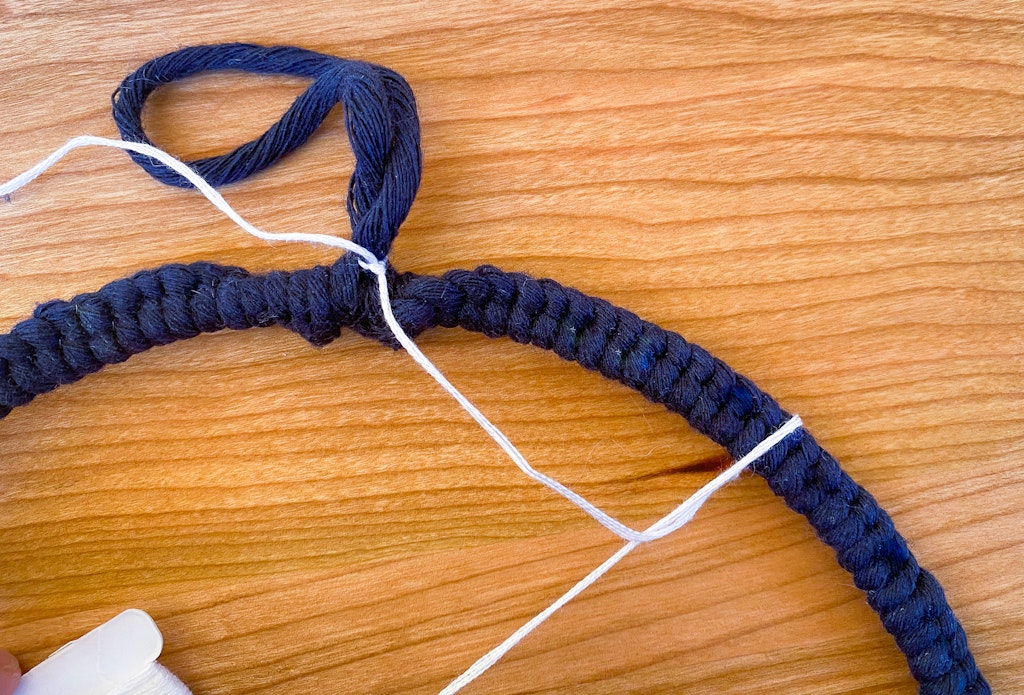
Take a section of the yarn or whatever you’re using to wrap the hoop and tie a loop onto the loop. The loop will be used to hang the dream catcher. Trim the loose end but keep the other end attached to your yarn. You can just spin it around the hoop, especially if you’re using something like leather cording. We knotted the yarn around the hoop to make it a little thicker.
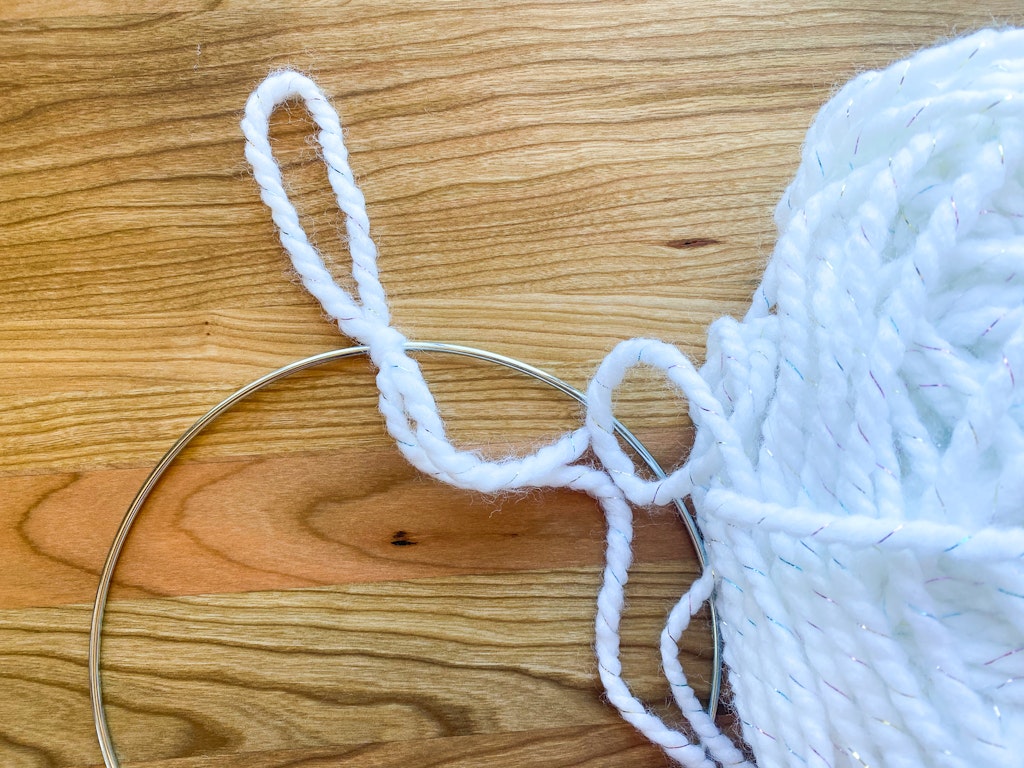
To do this pull your yarn down in front of the hoop and across making an “L” shape.
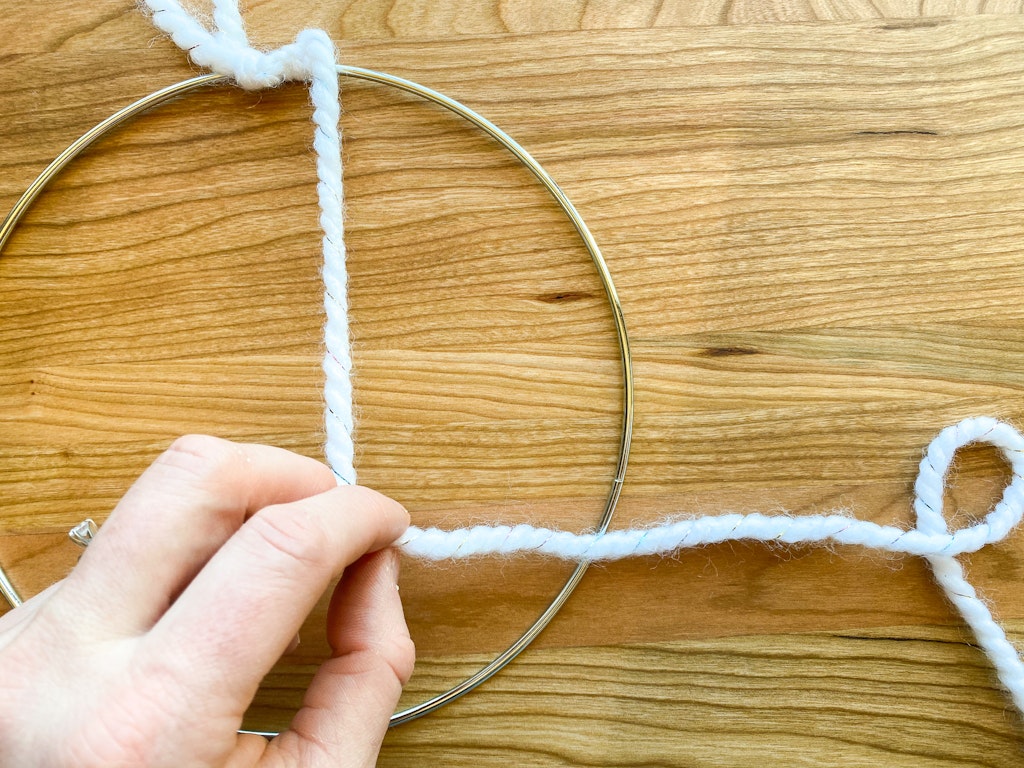
Take the yarn from behind the loop and through the center of the “L” you just created.
Pull it straight up and back toward the line of knots.
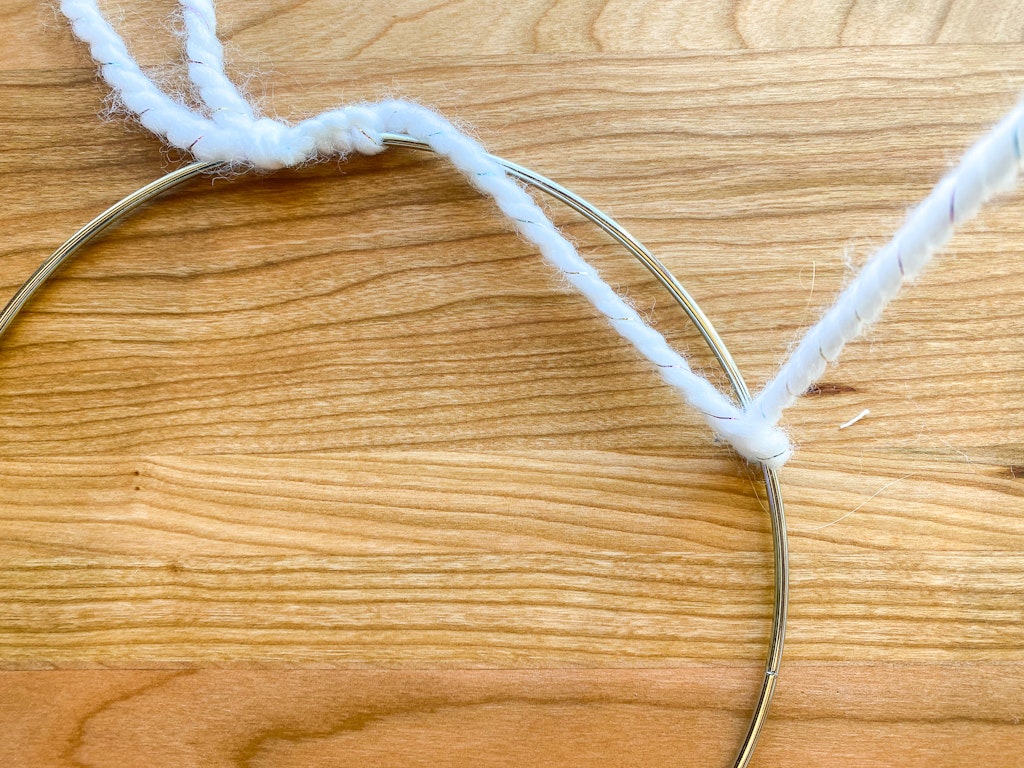
Next, pull the knot tight.
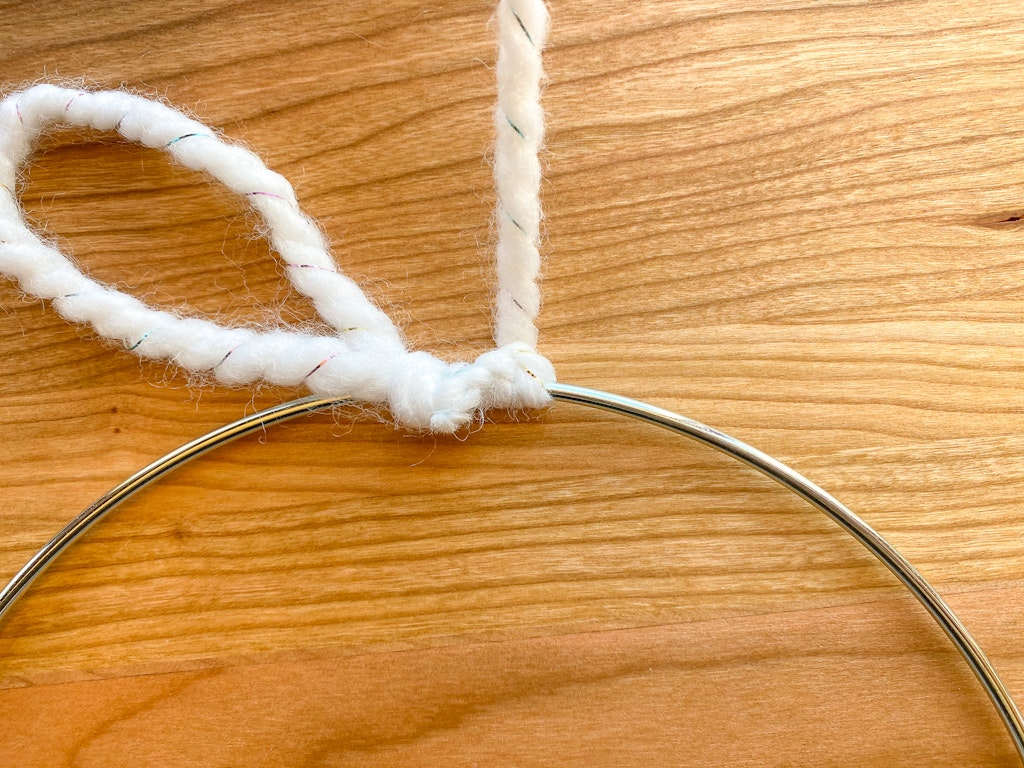
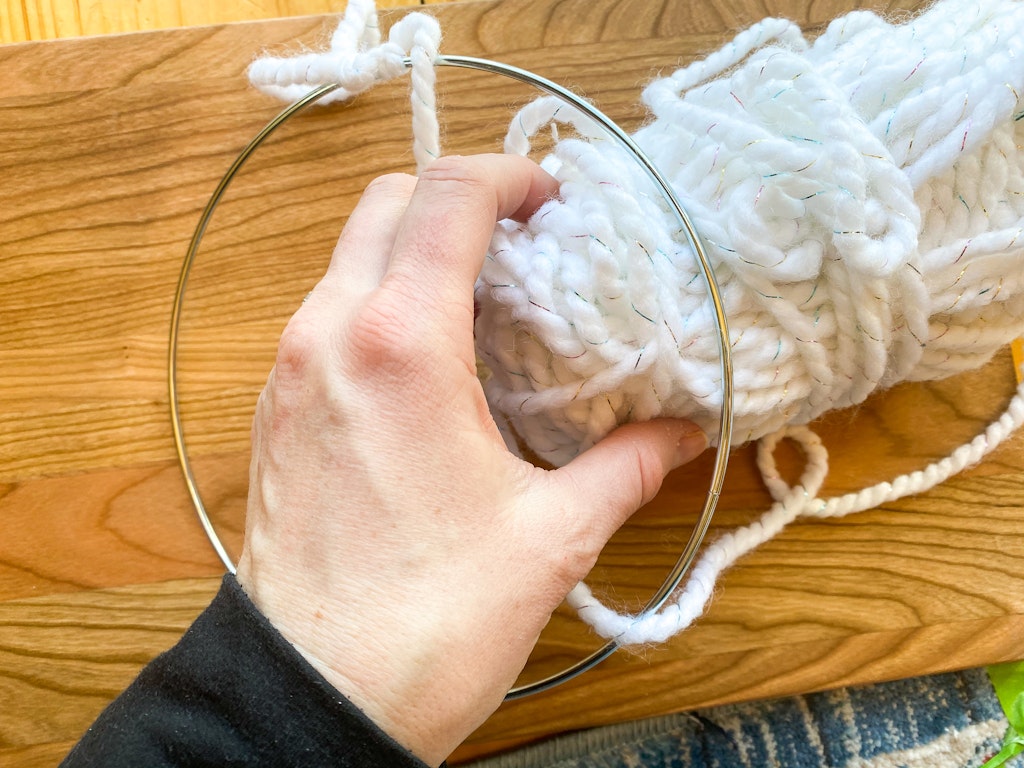
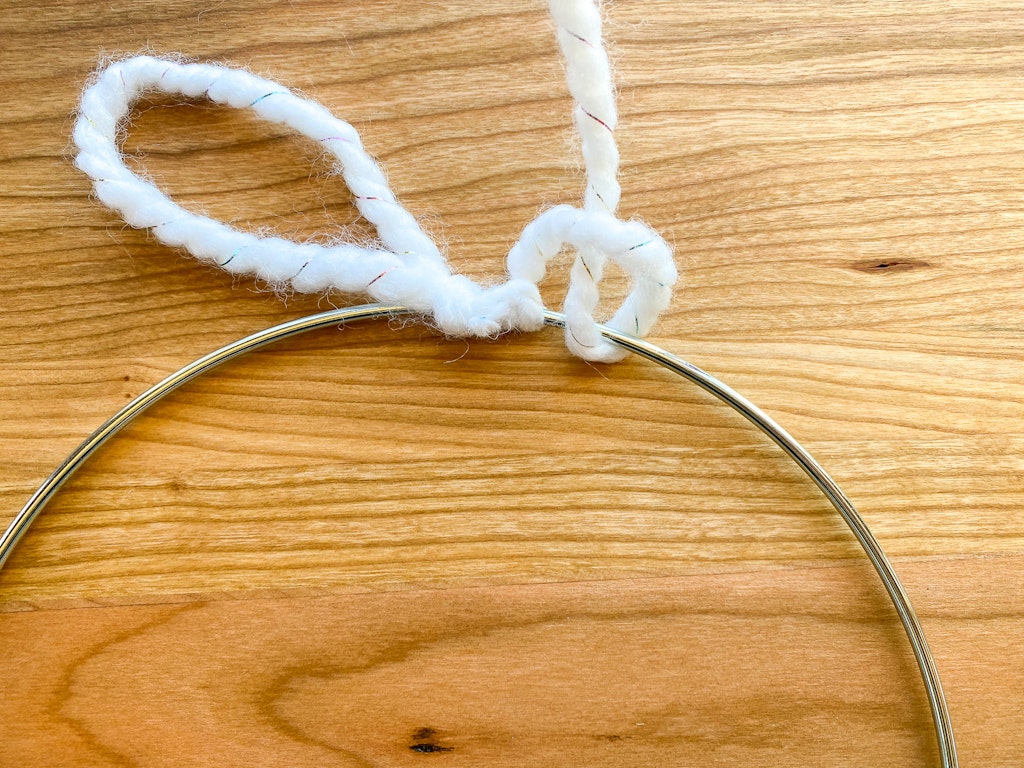
Repeat this over and over until you’ve wrapped around the entire loop.
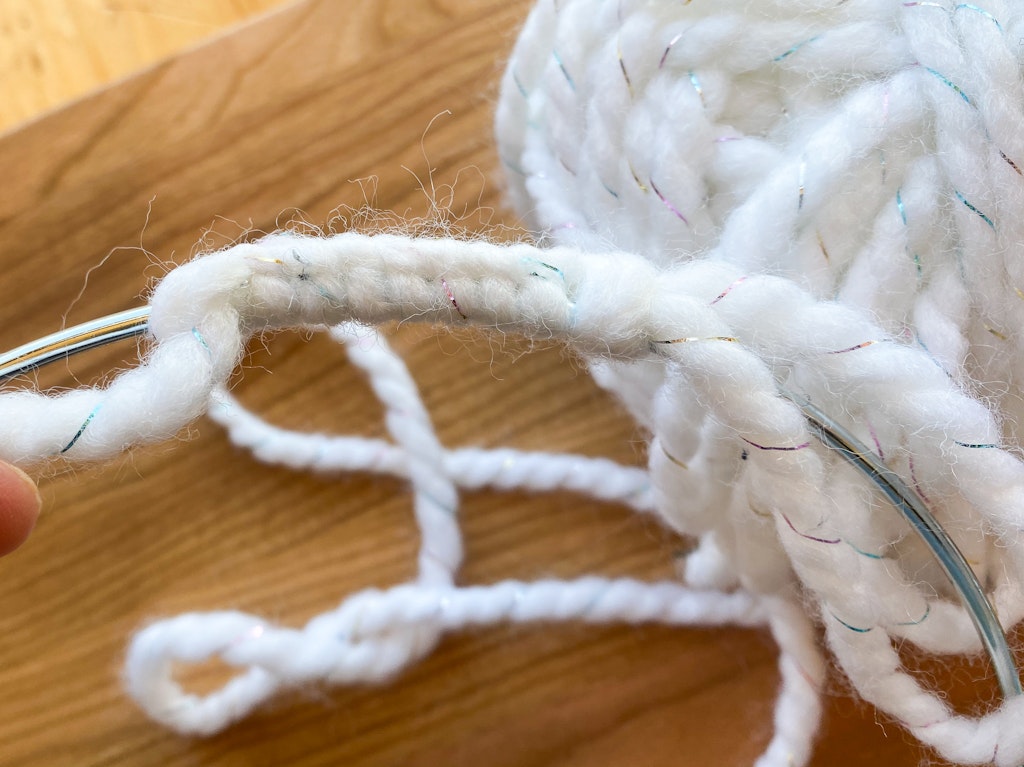
Knot the end and cut off the excess.
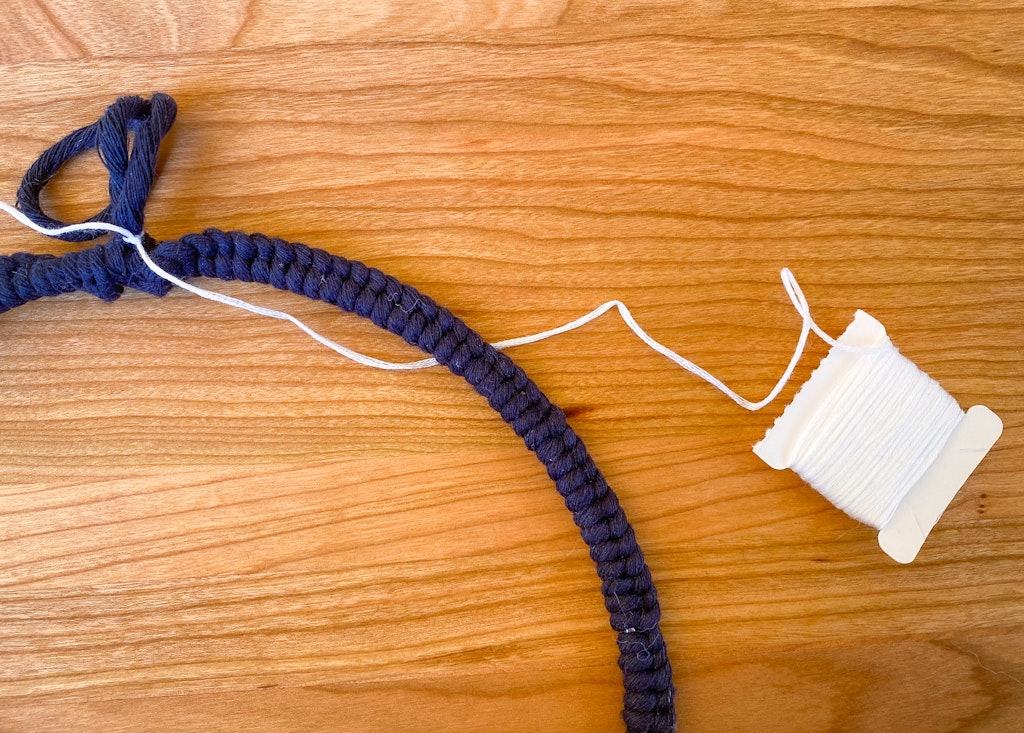
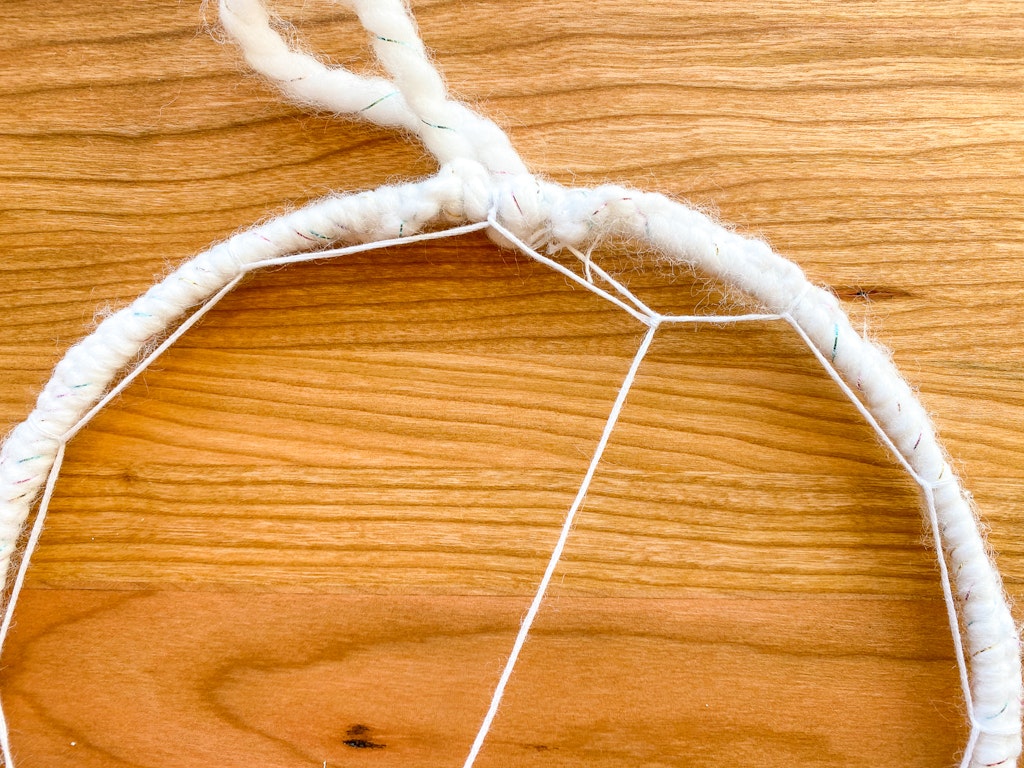
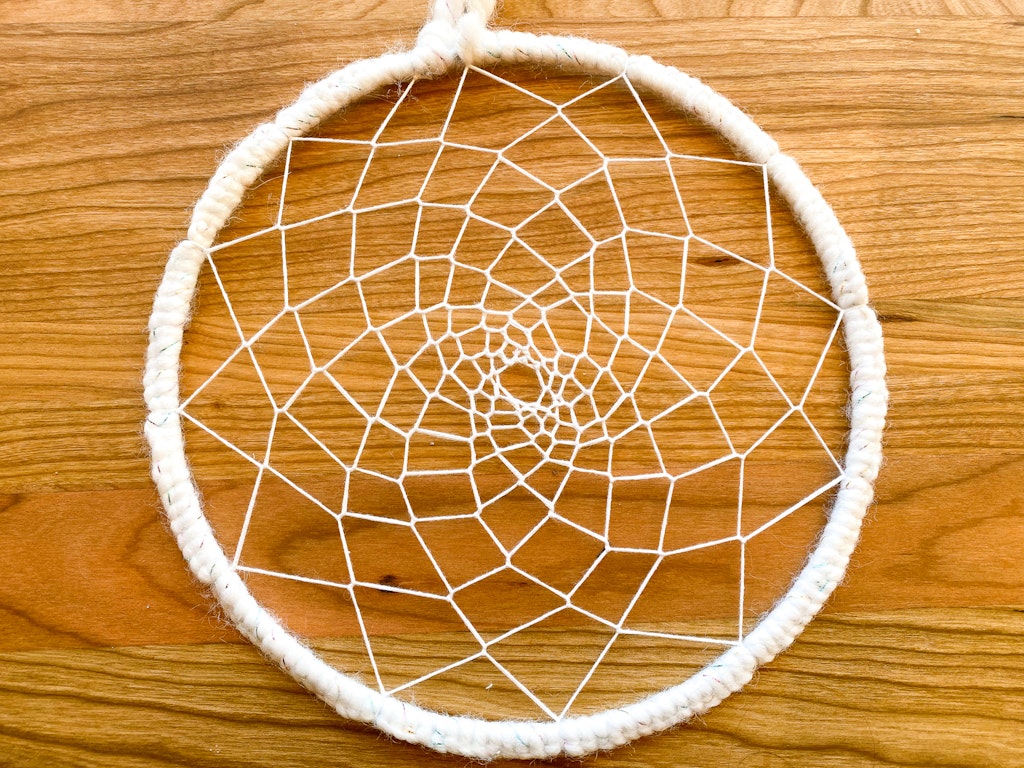
Adding The Web – Dream Catcher Pattern
Attach the end of your embroidery floss to the top of your hoop. Before you start the first row of web decide how many sections you will add. We drew it out on a piece of paper and lined up the hoop to get a better idea of where we should add each knot evenly around the hoop. You can shift it around a bit as you’re going to so don’t stress out. We did one dream catcher web pattern with 8 points and another pattern with 12. The one with 8 was much easier to weave.
Once you’ve decided where to place your first “knot” run the embroidery thread under the hoop at that point.
Feed the thread back over the hook and under the little loop you just made.
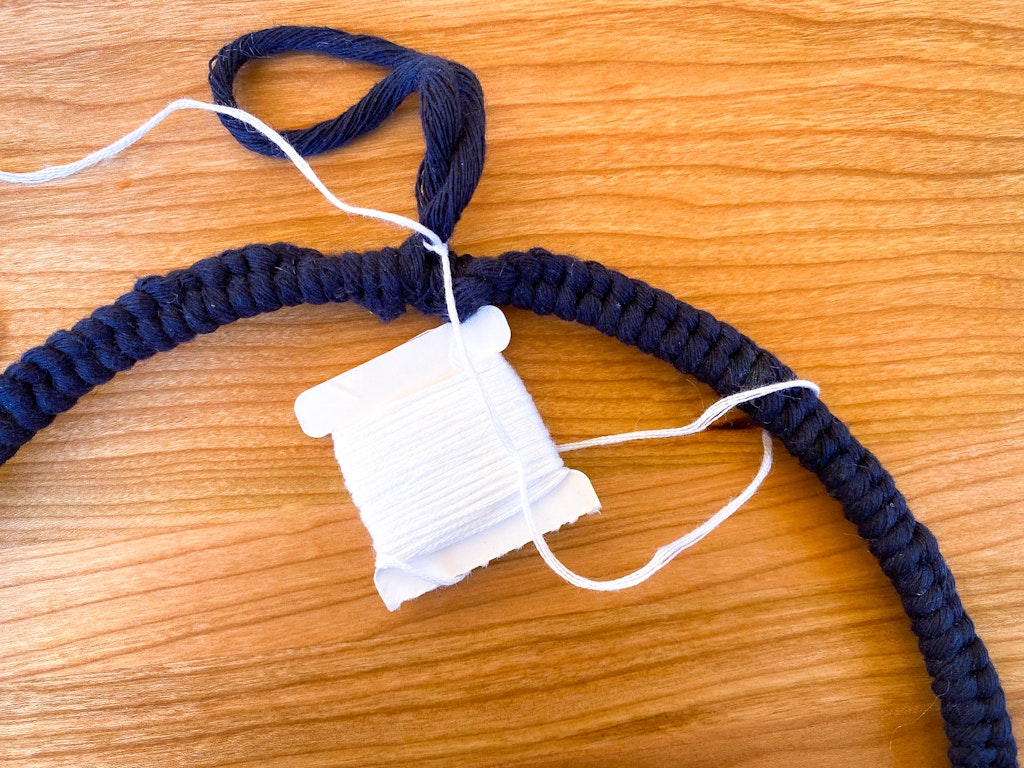
Pull it through toward the center and pull it tight.
Repeat this round the hoop at evenly spaced intervals until you reach the top again.
For your second row repeat the same steps tying your “knots” in the middle of your last web sections.
Continue around until you meet the top again then repeat with the third row and so on until you have a small hole in the middle.
Tie off the center with a knot.
Adding The Tails
We used the same material that we used to cover the metal ring but we’ve seen other dream catchers done in beautiful ribbons too.
Figure out how long you’d like the strings to be then double that length. Fold them in half.
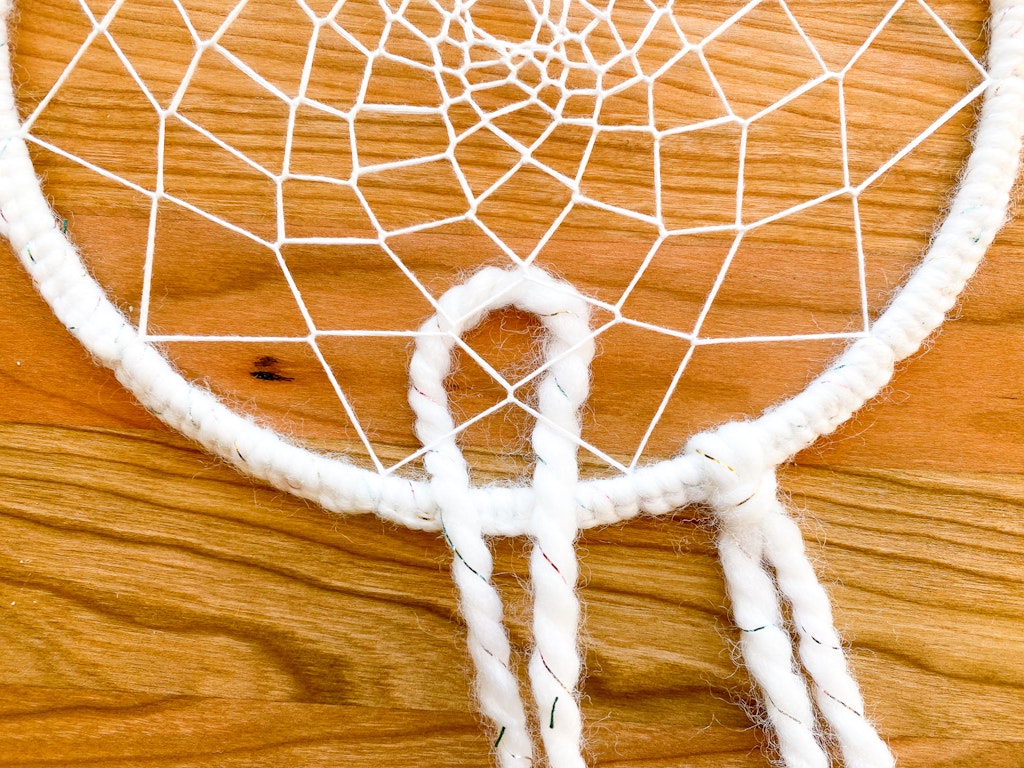
Take the folded center of the string and place the loop over the hoop toward the back of the dream catcher. Pull the top of the loop down around the back a couple inches. The loose ends should be laying on top of the loop right now.
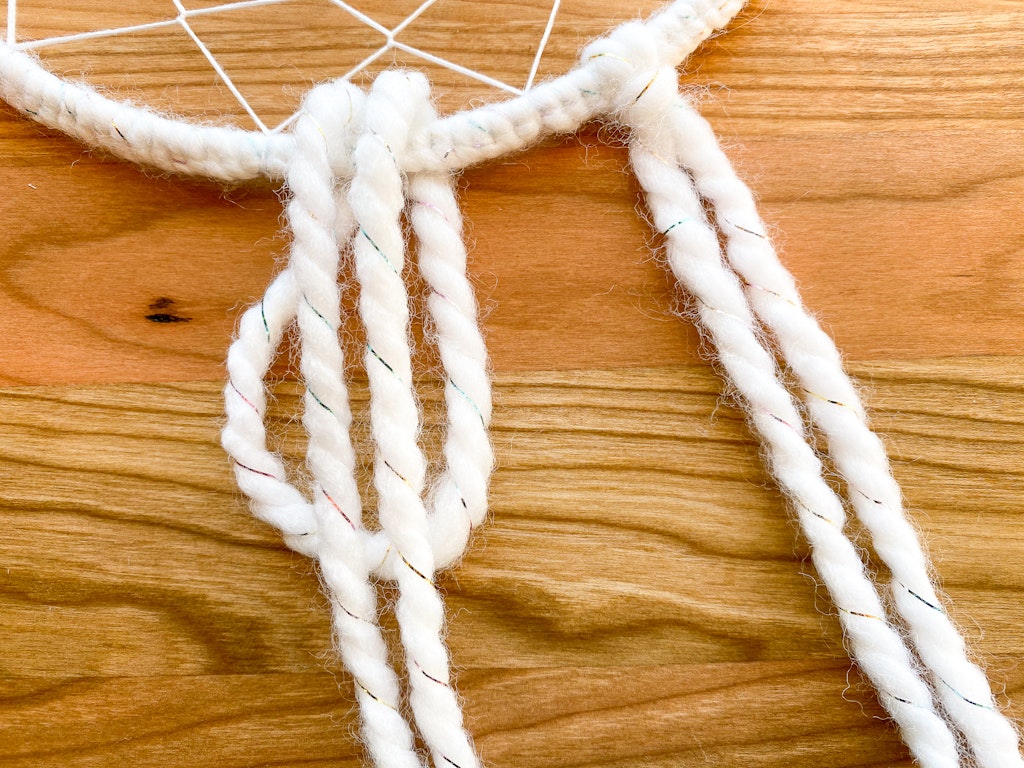
Pull the loose ends down to tighten the knot.
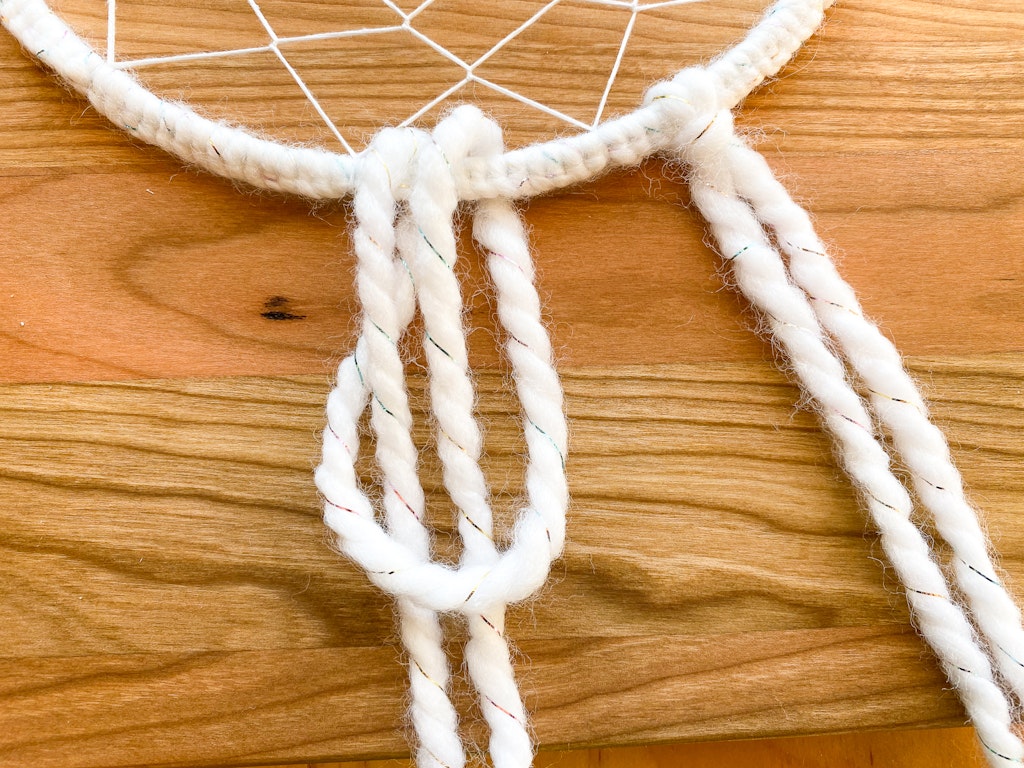
Repeat this with as many tails as you’d like. Trim all the tails to the same size.
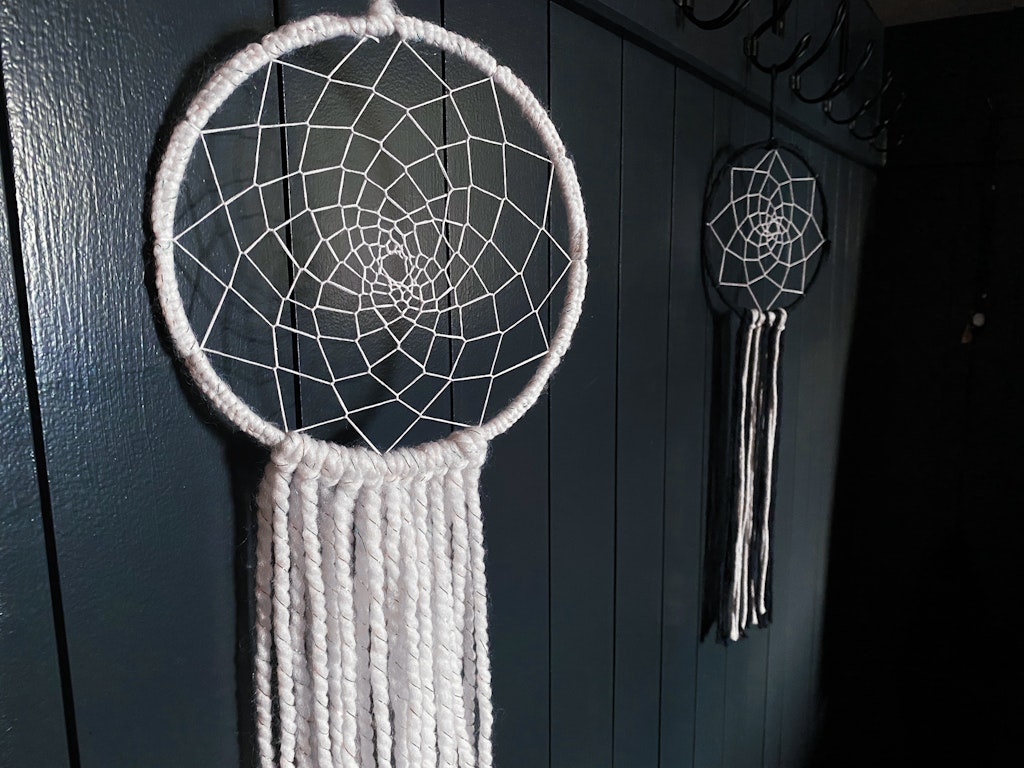
Hang up your beautiful dream catcher!
1 thought on “DIY Dream Catcher”