
How To Make Macrame Feathers
These simple DIY macrame feathers only require a few supplies that you can find online or at your local craft store. They are a great macrame project for beginners like moi 😉 I’ve seen these around and wanted to try my hand at them.
You can scale them to all different sizes to use them for projects like keychains, home decor items and even jewelry. I wanted to use them on a dream catcher project I’ve been working on in place of traditional feathers.
First let’s go over the supplies. You can make macrame feathers out of yarn, cotton string, embroidery thread. You’ll get different results with each.
Keep in mind that the thicker the cord, the more difficult it will be to tie the knots tightly. We used this 3mm cotton macrame cord in various colors.
Supplies Needed For Macrame Feathers
- Macrame cord 3mm or thinner. You can also use yarn or embroidery thread.
- Sharp scissors
- Macrame comb or brush – We used this one from Michaels but you can also use a pet brush like .. Yup you read that correctly HA We tried out this one from Amazon but you can find them at many big box stores in the pet aisle. You can also use a classic hair comb
- Self healing cutting mat – This is definitely not necessary, but if you don’t have one they are super helpful for a bunch of different craft projects. I found this mini one at the dollar store, but they are available at craft stores and online. You could use a piece of thick cardboard or something similar instead.
- Some masking or painters tape to tape down your project while creating it.
- Spray starch like this fabric stiffener
Determining The Size Of Your Macrame Feather
Keep in mind that you trim off excess at the end and it is much easier to work with longer strips of the cord than shorter ones, especially with the thicker cord.
First measure out how long you want he spine of the feather to be then double it, leaving extra room at the top to tie a knot.
If you want a longer loop at the top to hang your feather, estimate that in there too. You’ll want one long strand folded over like this one below.
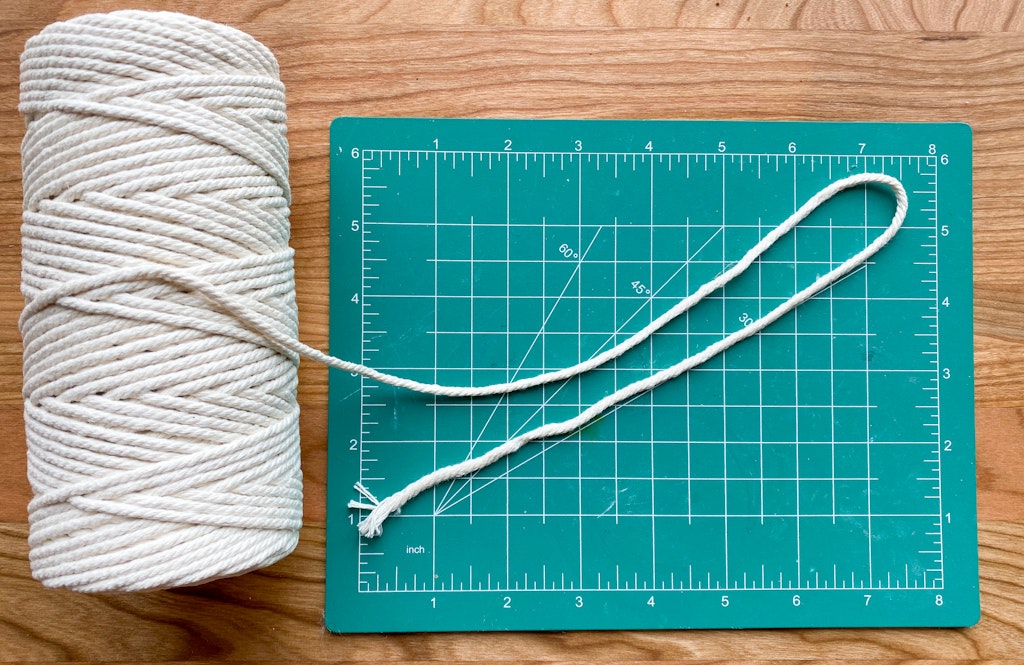
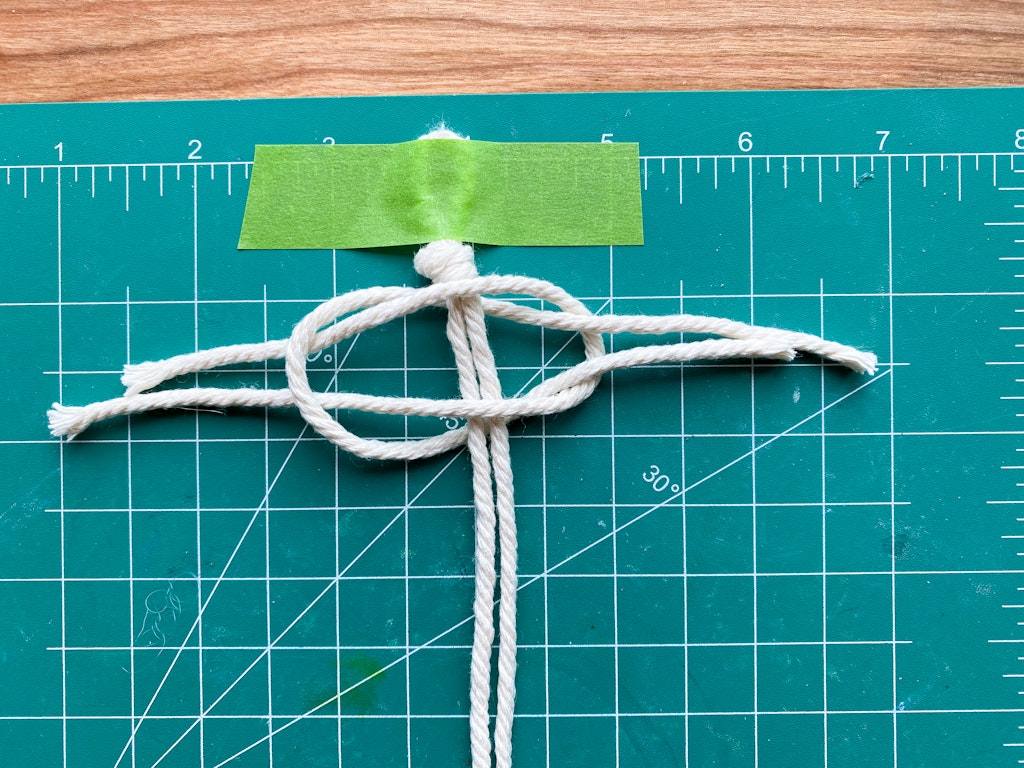
Snip off your desired length fold it in half and tie your knot at the top of the middle of the strand as pictured below.
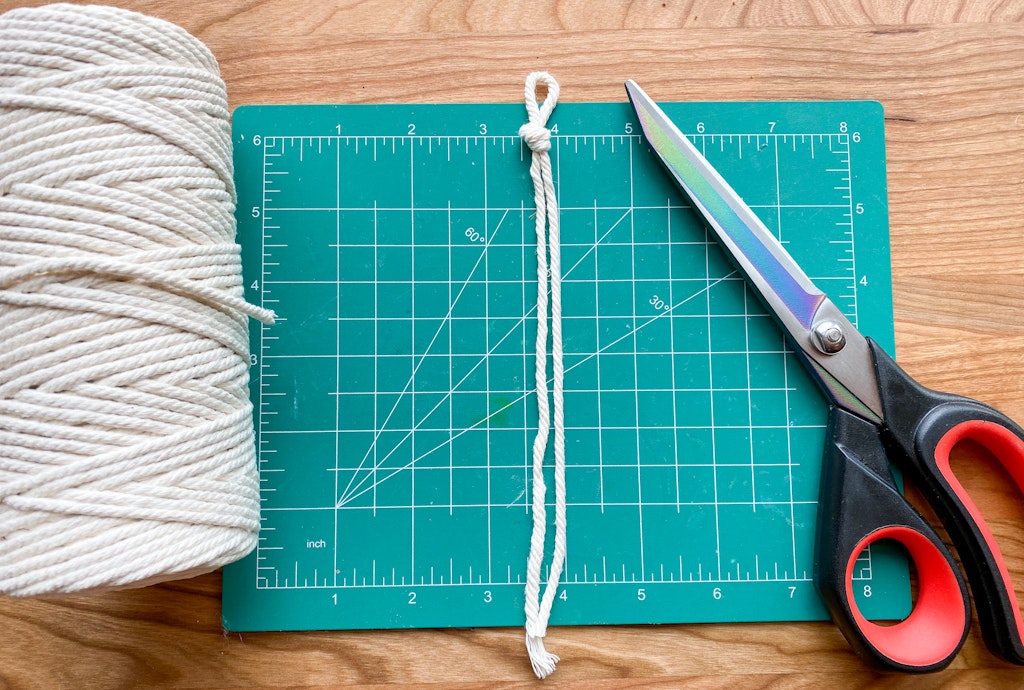
It might be helpful to tape down the loop at the top to your cutting mat or cardboard to keep it in place while you’re making it.
Now cut mini strips of macrame cord or yarn, whatever you’re using, to form the sides of the feather. The size of each strip should be a little more than double what you want the one side feather since you will be folding the strips in half to create one side of the feather.
For example, if you want the total width of your feather to be about four inches wide, cut strips that are about 4.5 to 5 inches long. Each strip will be folded in half to create these loops on each side of the feather.
You can cut longer strips to use near the top and middle. Then use small strips where you would naturally trim more off of the feather.
I keep it simple and cut the same size strips then trim off the excess to form the shape of the feather. I have a little more waste, but I also don’t accidentally add shorter strands in the middle.
The number of strips will vary depending on how large/long you plan on making your feather.
Fold one of your strands in half and slide it under the long cord.
Creating The Macrame Knots
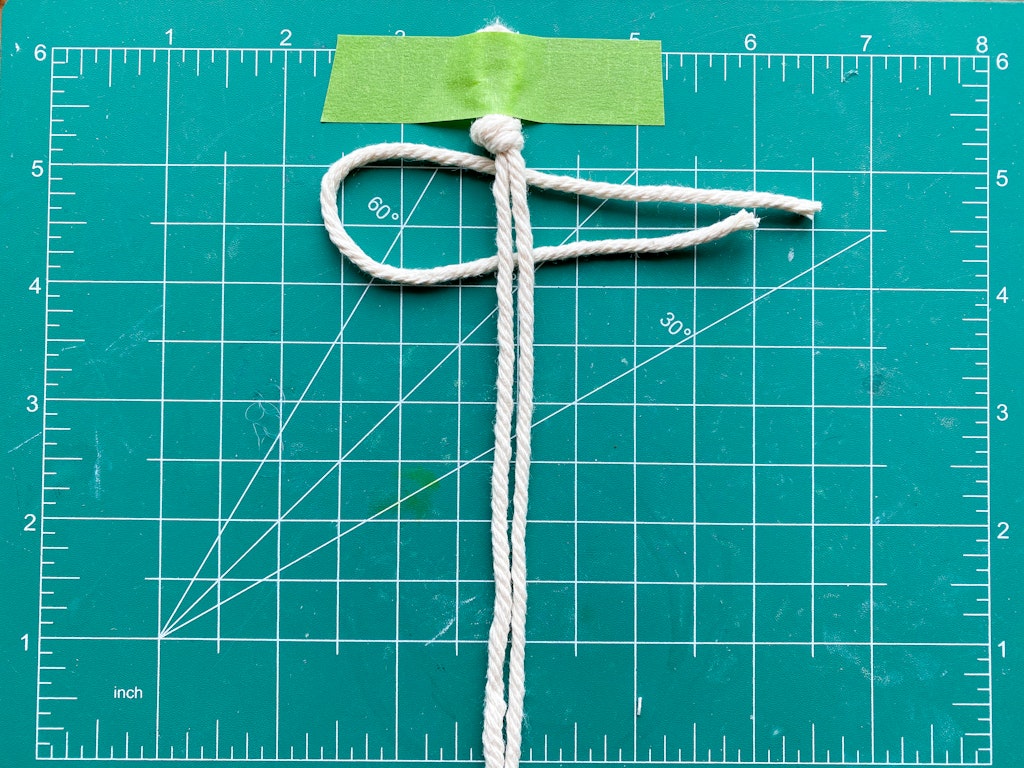
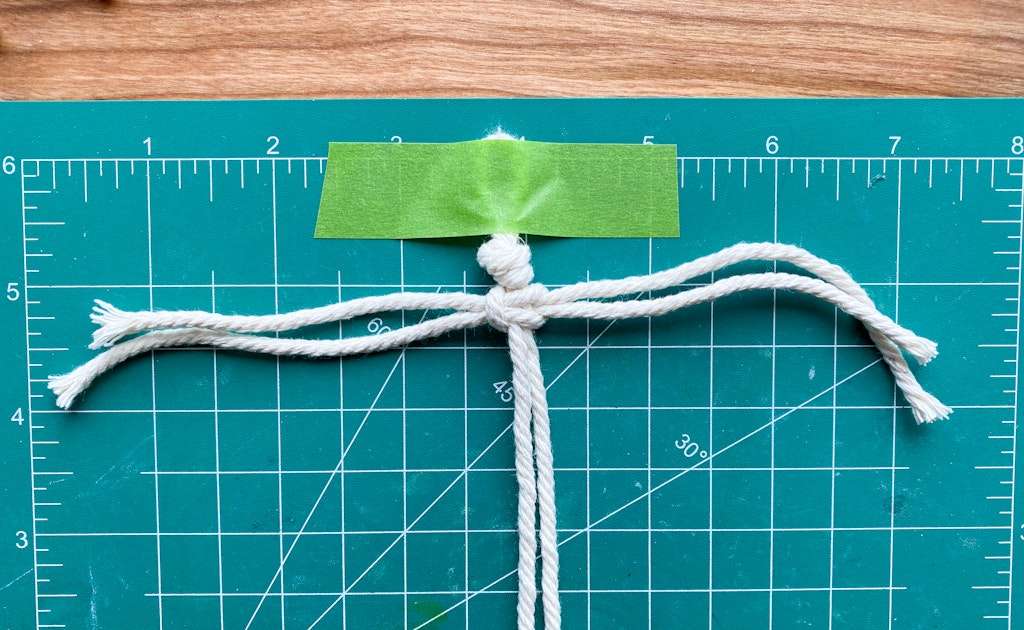
Fold a second strand in half and slide the loop under the tails of the first strand, over the middle of your main strand and tuck the tails of the second strand through the loop of the first strand.
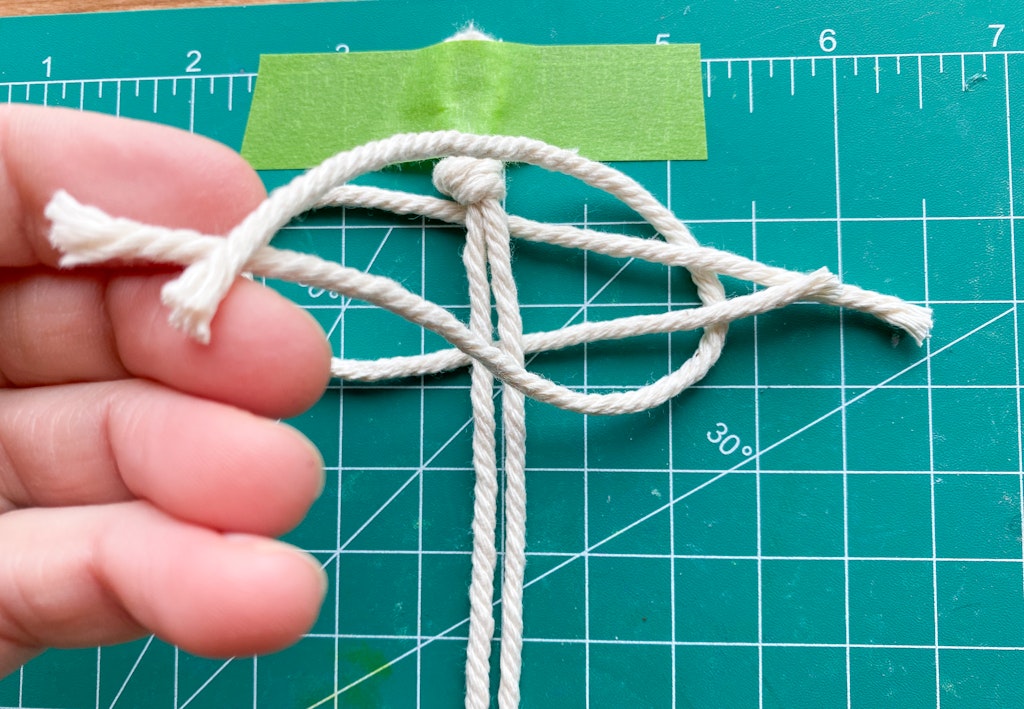
It should look like this.
Gently pull both sides to tighten the knot in the middle. Slide the knot you just created up the main strand as far to the top as you can.
Ok now here’s where you have a design choice. You can continue one of two ways (that i know of at least HA!)
Option 1. Continue the above steps placing your loops on the same side to start and same side to finish as you did above.
This will create a uniform look with all of the “top knots” on one side of the spine of the feather like shown below.
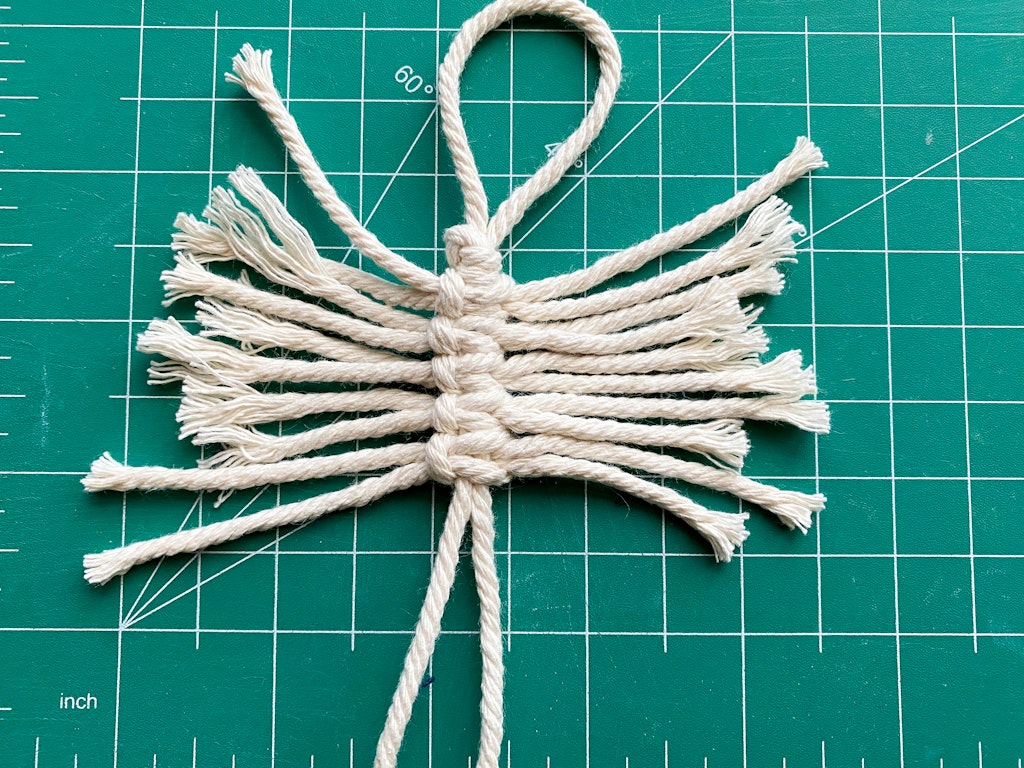
Option 2. Alternate which loops you start with. For example, in the step above you placed your first loop under the “spine” of the feather with the loop on the left side.
To alternate sides you would then start with the loop under the spine on the right side for the second row like below.

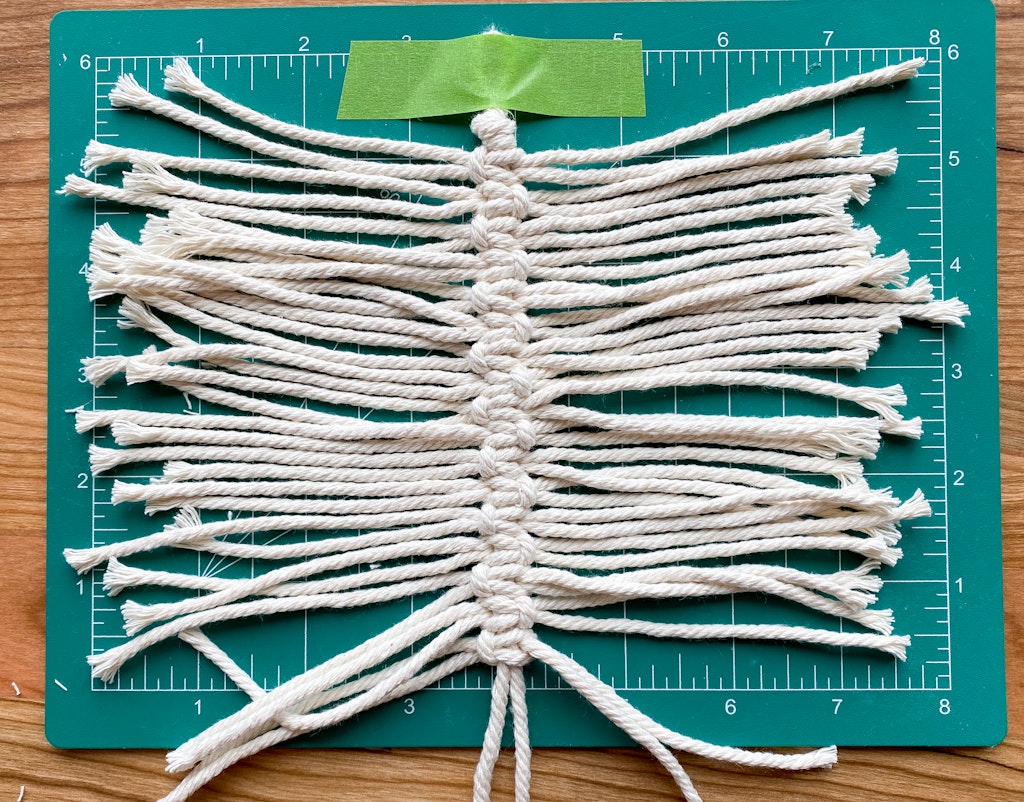
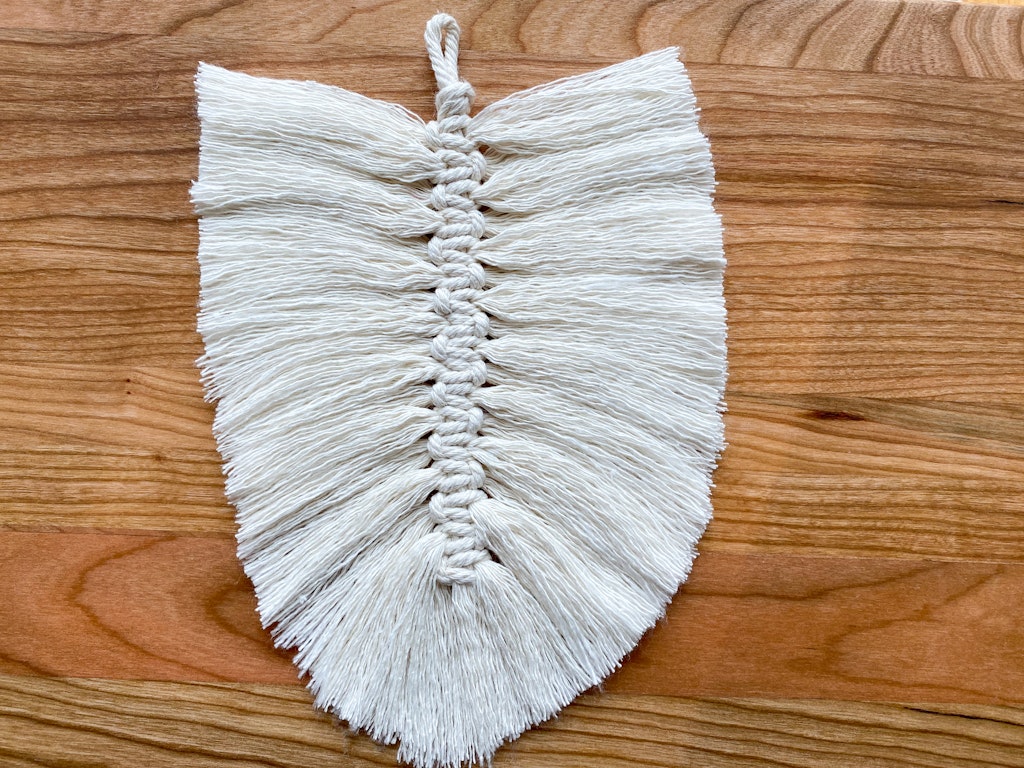
When you alternate sides the middle of the feather will look like this below.
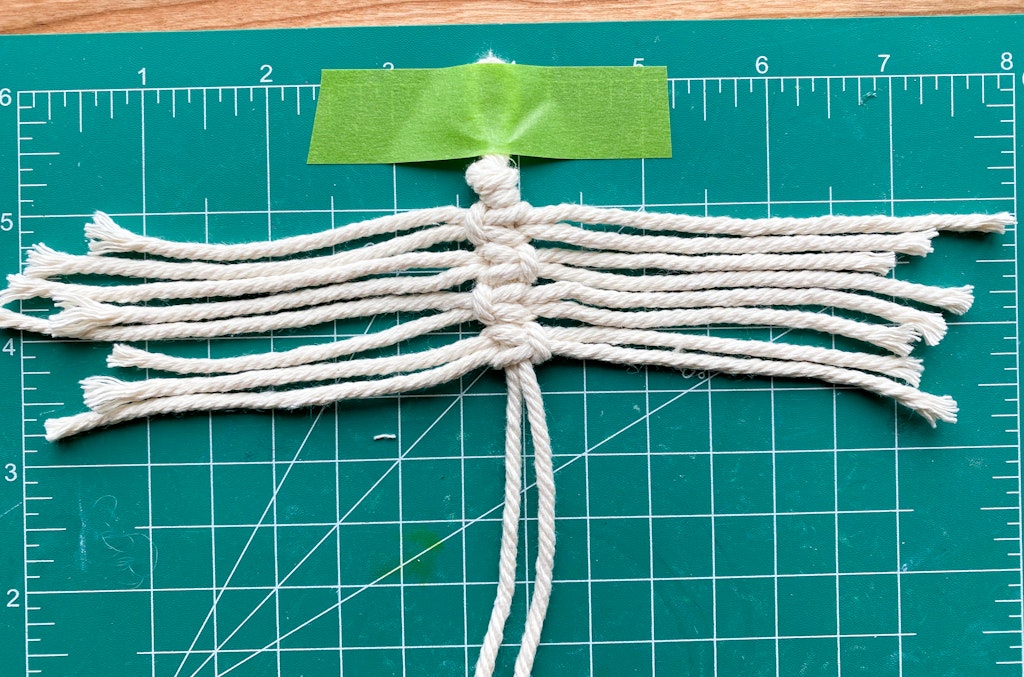
Continue adding strands using method 1 or 2 until you reach the desired length of your feather. Make sure to tighten each knot as you go.
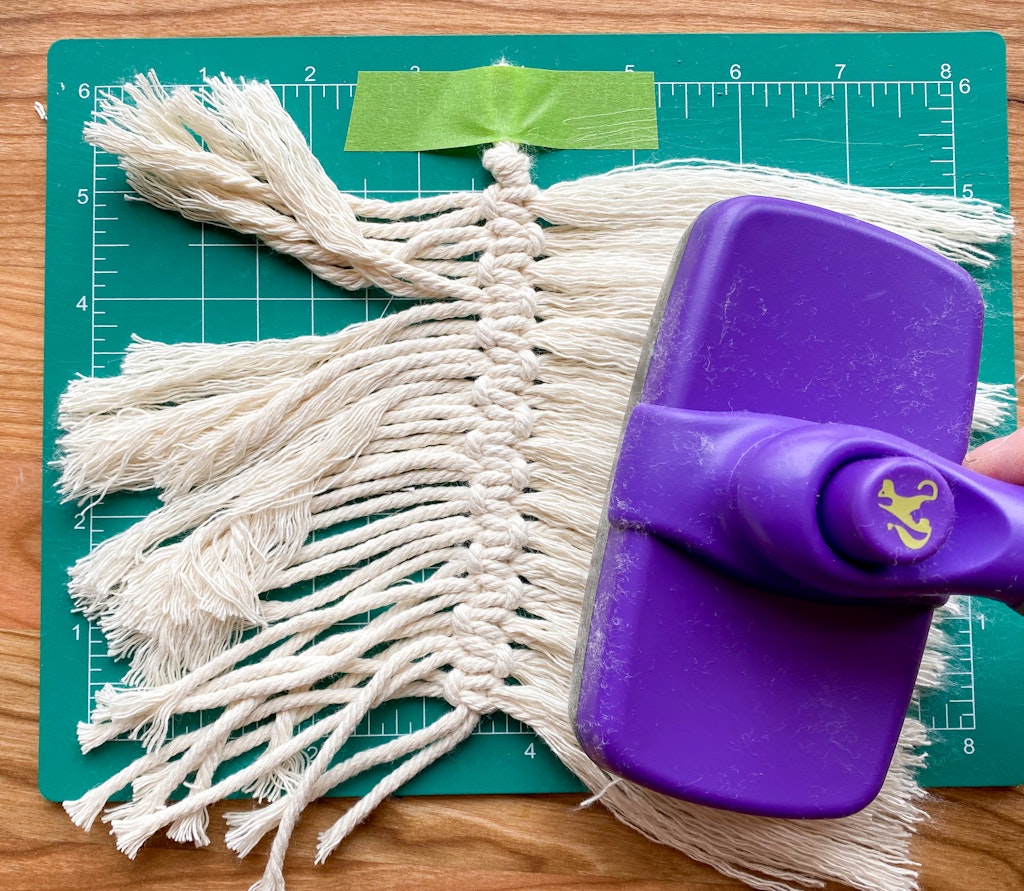
Brush Out Your Macrame Feather
Now the fun part. 🙂 Take your macrame brush, comb, pet brush whatever and start brushing out the strands carefully. Hold the knots down as you work your way out towards the ends so none of the strands come loose.
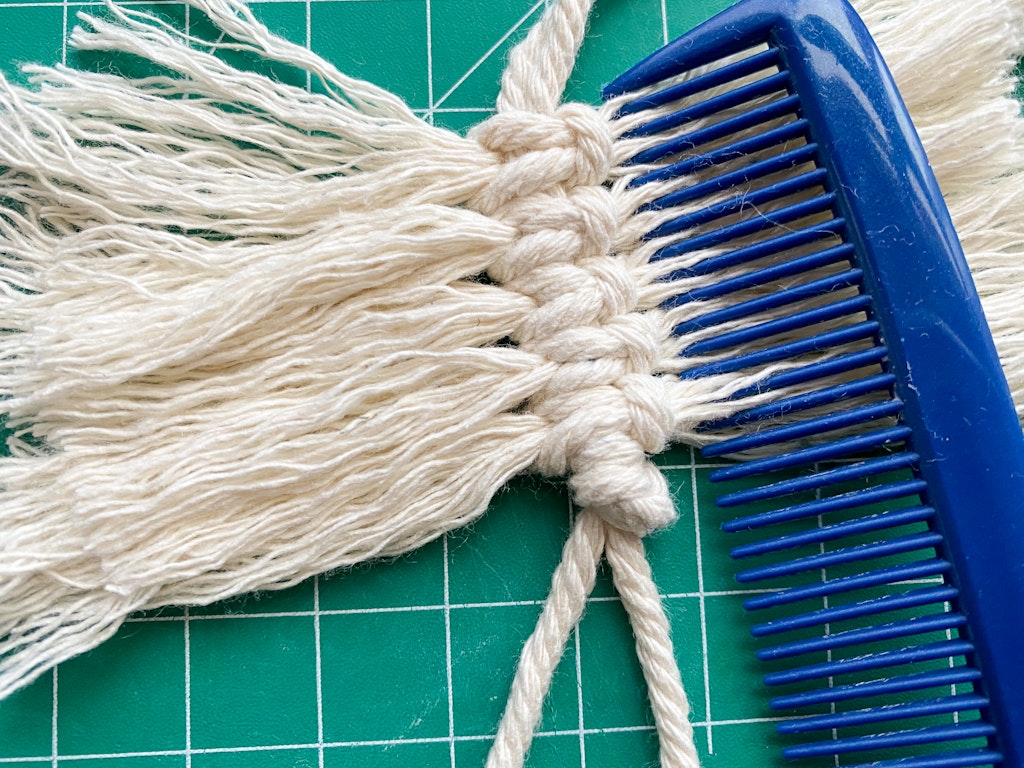
It helps to use a regular comb to get in close to the knots if you’re having trouble with the other tools.
Flip the feather over and brush out both sides.
Trim The Sides
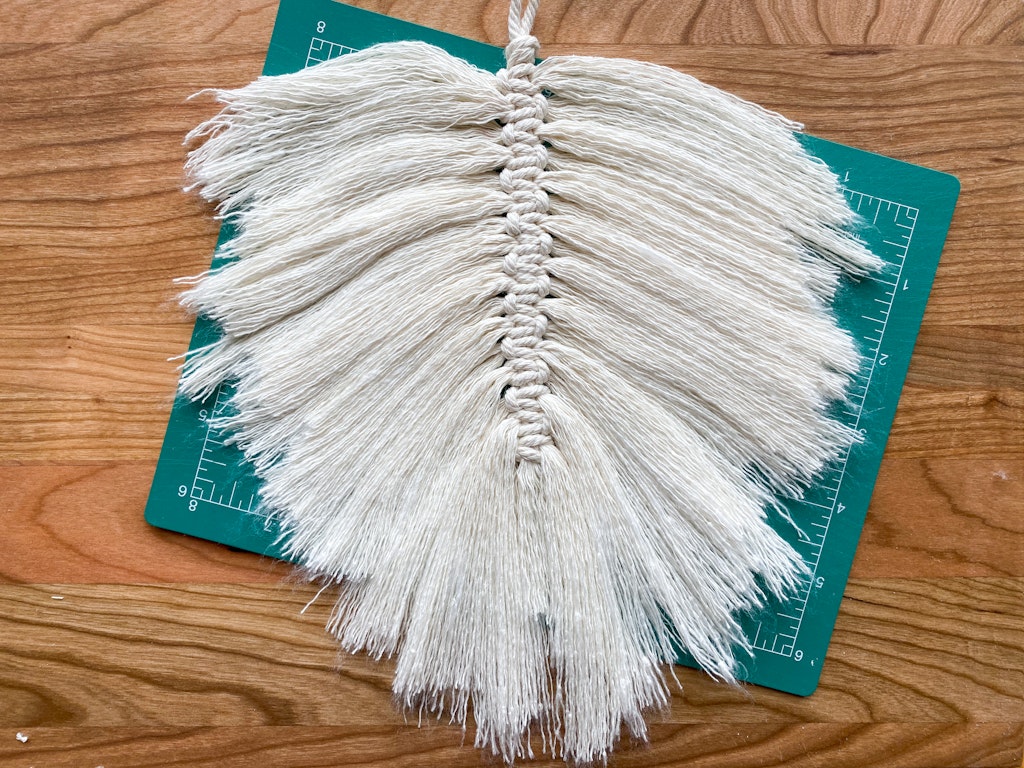
Take a sharp pair of scissors and trim the sides of your feather to even them out and shape the sides.

The finished product should look something like this. It could actually use a little extra trimming that I’m noticing right now but hey nobody’s perfect. hahaha.
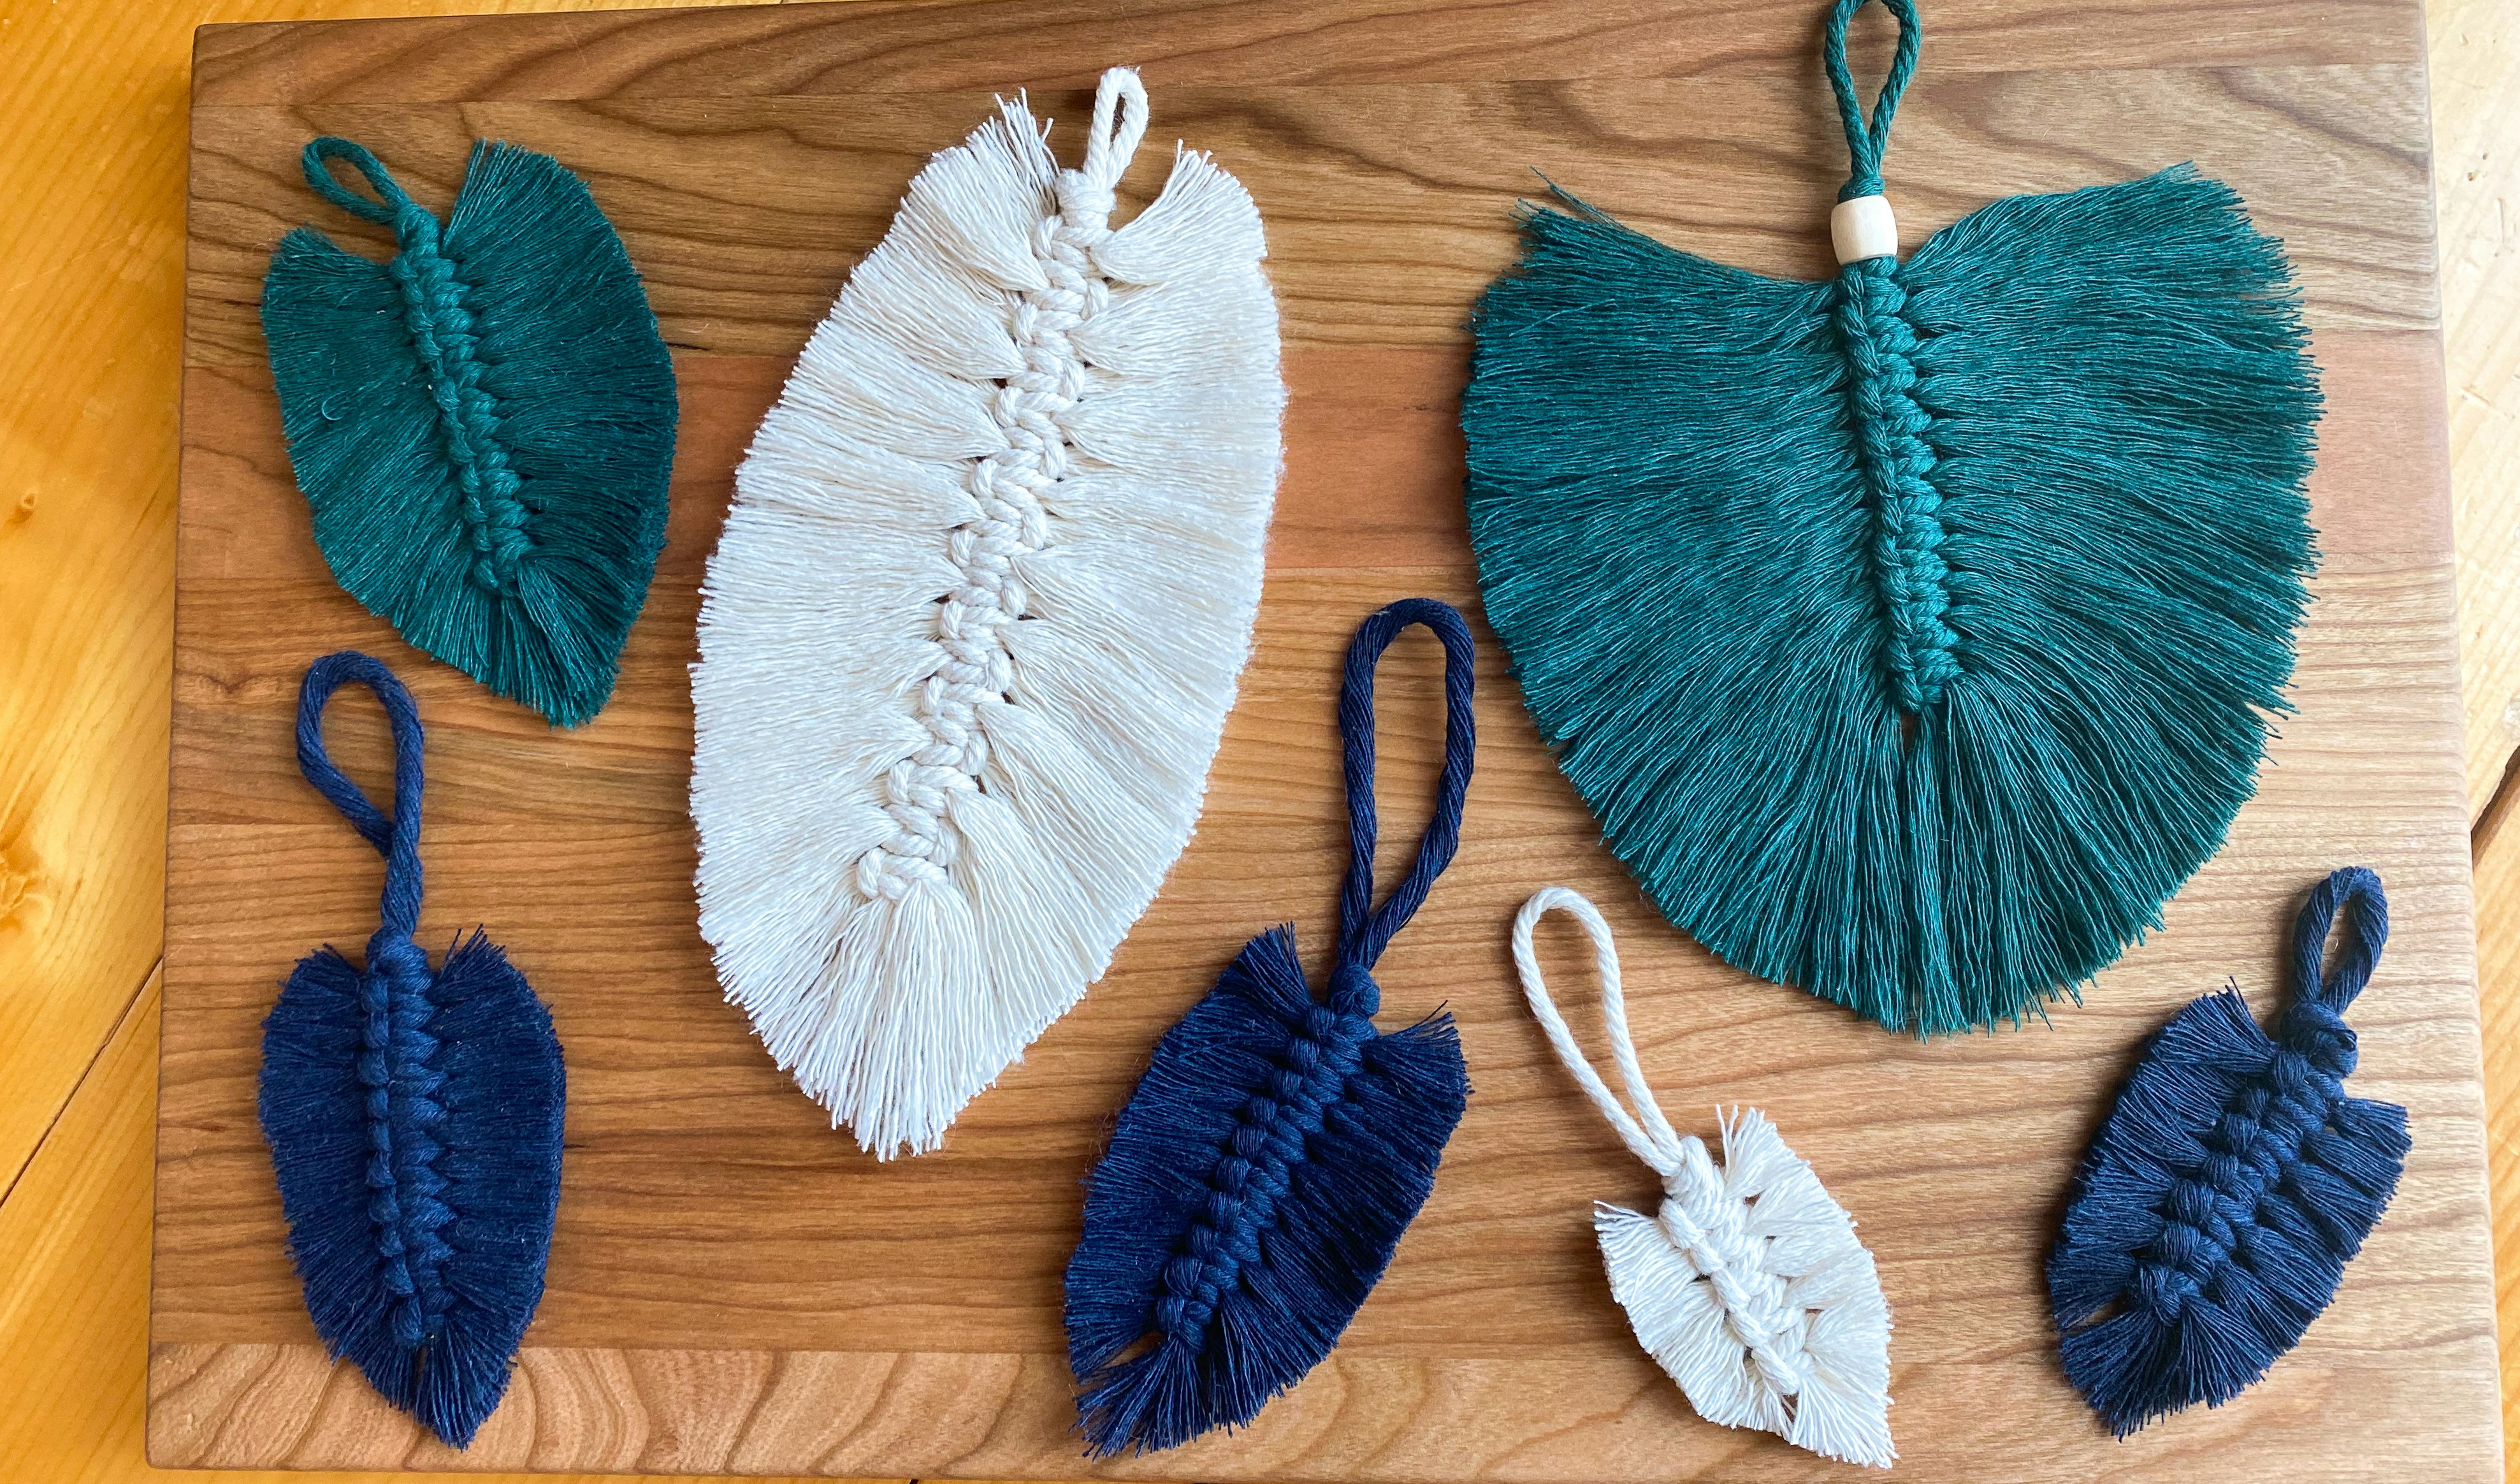
I made this green feather using the knots all on the same side so you can see the difference.

You can add details like wooden beads to your feather too. Just thread them on before you start and add the knot at the top.
Spray your macrame feather with a little fabric stiffener and let it fully dry before displaying it.
We used this same method to create little macrame feathers out of yarn too! We didn’t brush out the yarn feathers, just trimmed the sides to make the shape.
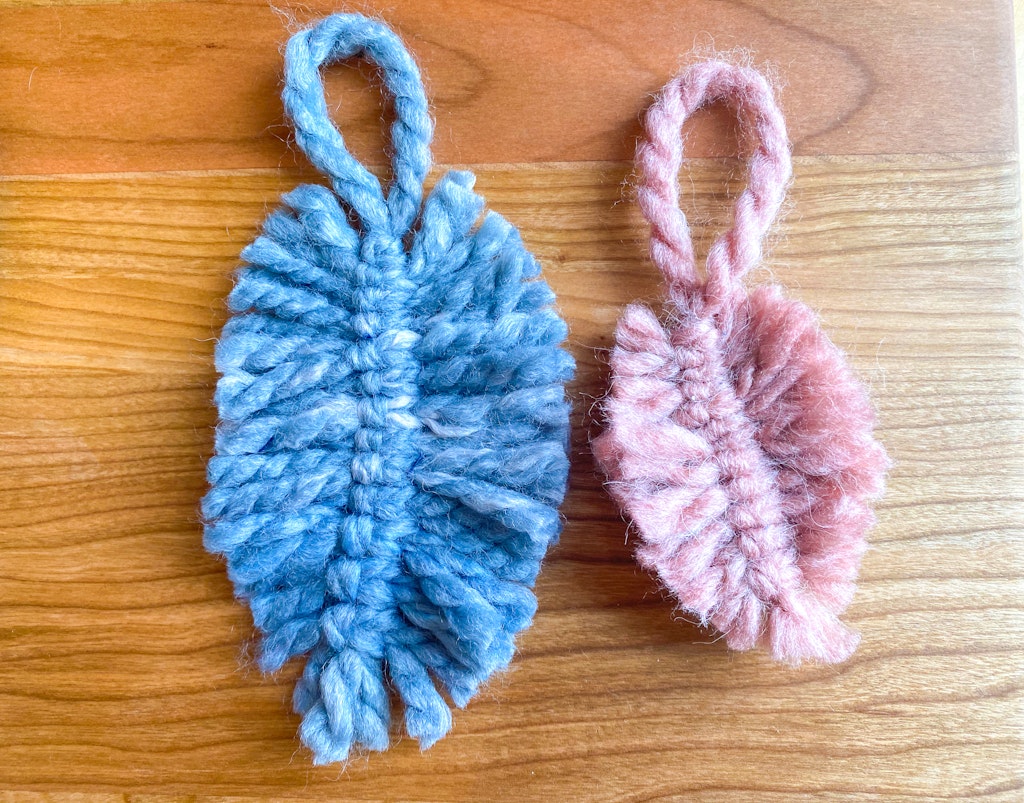
It’s a great idea for beginners who are just learning how to macrame.
Thanks for sharing.
Using a pup brush …I like it.