
Halloween Pumpkin Lantern Decoration
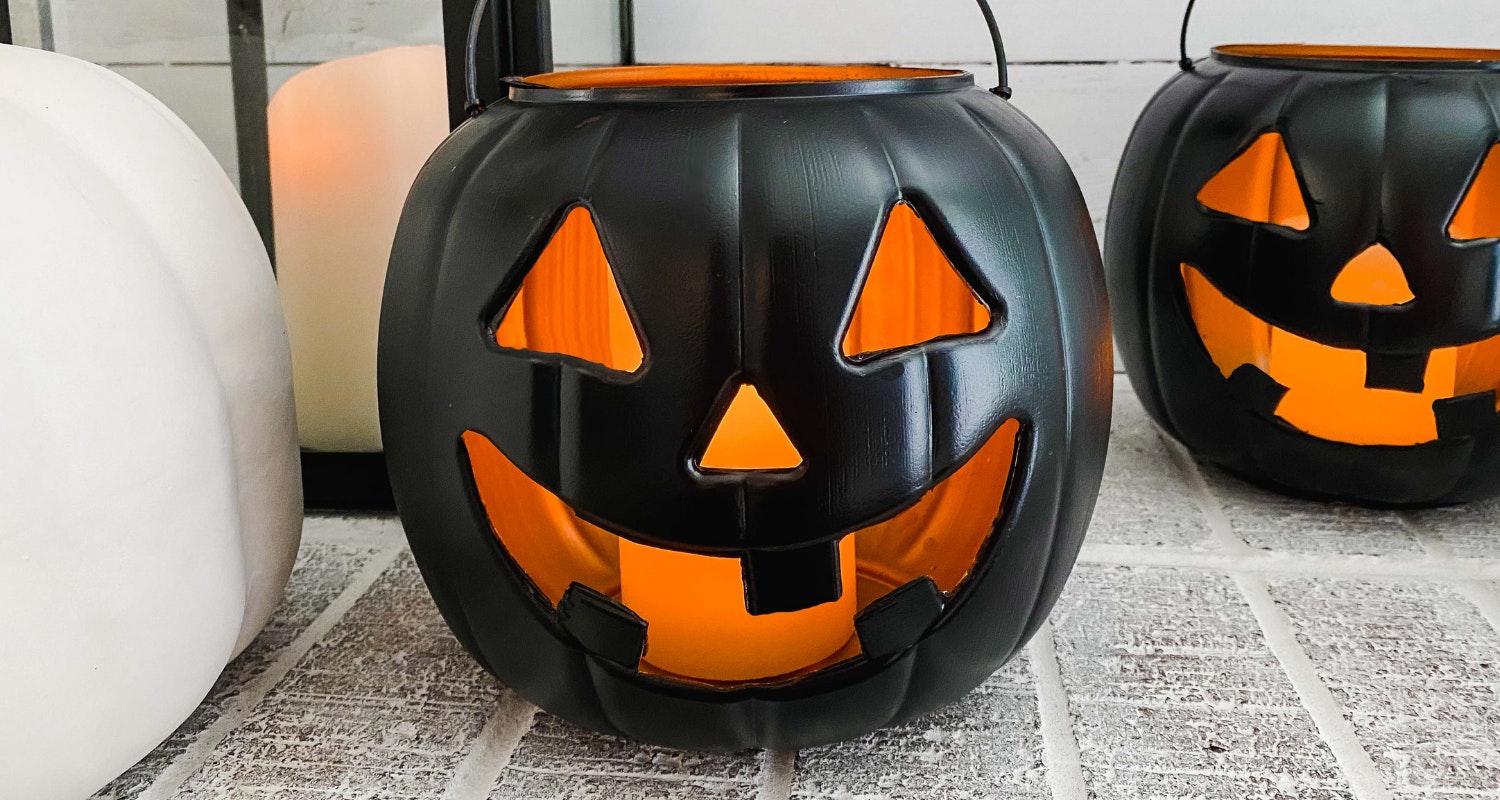
I found these fun black metal pumpkin lanterns at Pottery Barn that I loved everything but the price. After seeing these traditional plastic pumpkin candy pails at Walmart, I decided to make my own.
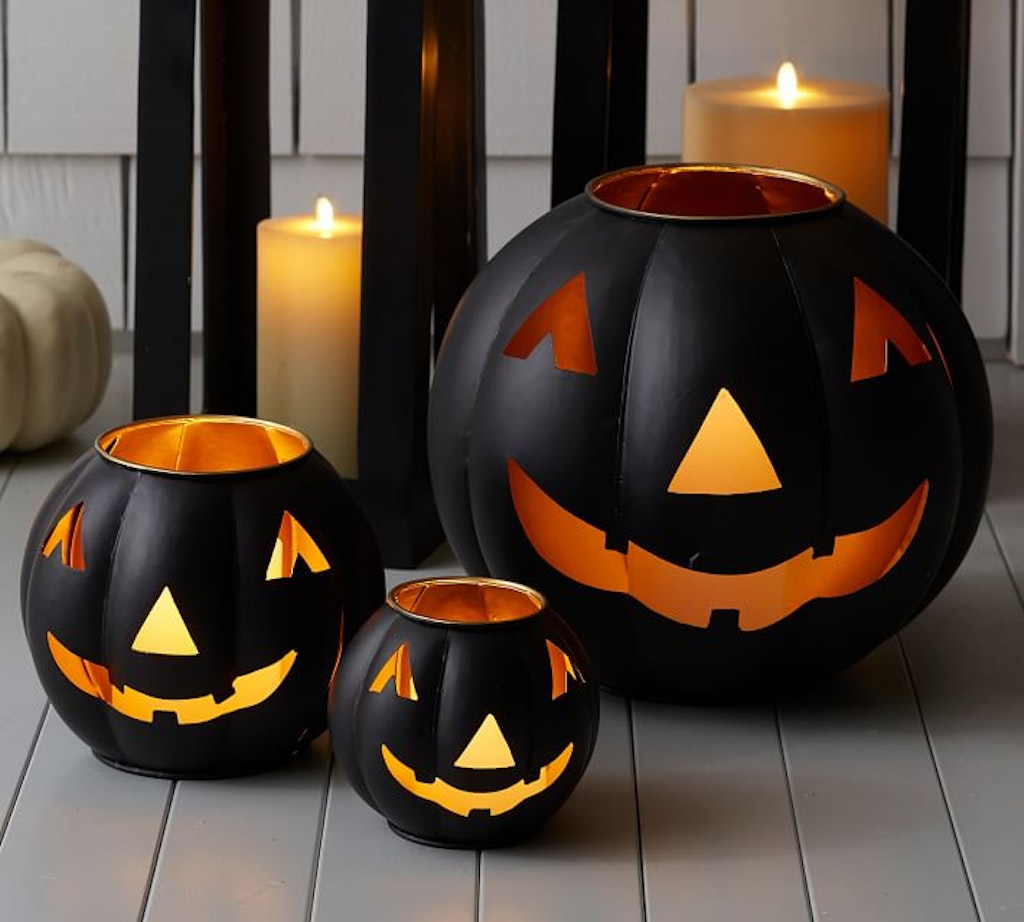
The Pottery Barn metal pumpkin lanterns range in price from $30-$60. These plastic pumpkins I found at Walmart were less than $2. Same look for a whole lot less ya’ll! Make sure to check out some of our other fun DIYs for more Halloween inspiration.
So here is our pumpkin lantern inspiration. The twelve inch one will run you $60. EESH!
Let’s make our own pumpkin lantern for a whole lot cheaper!
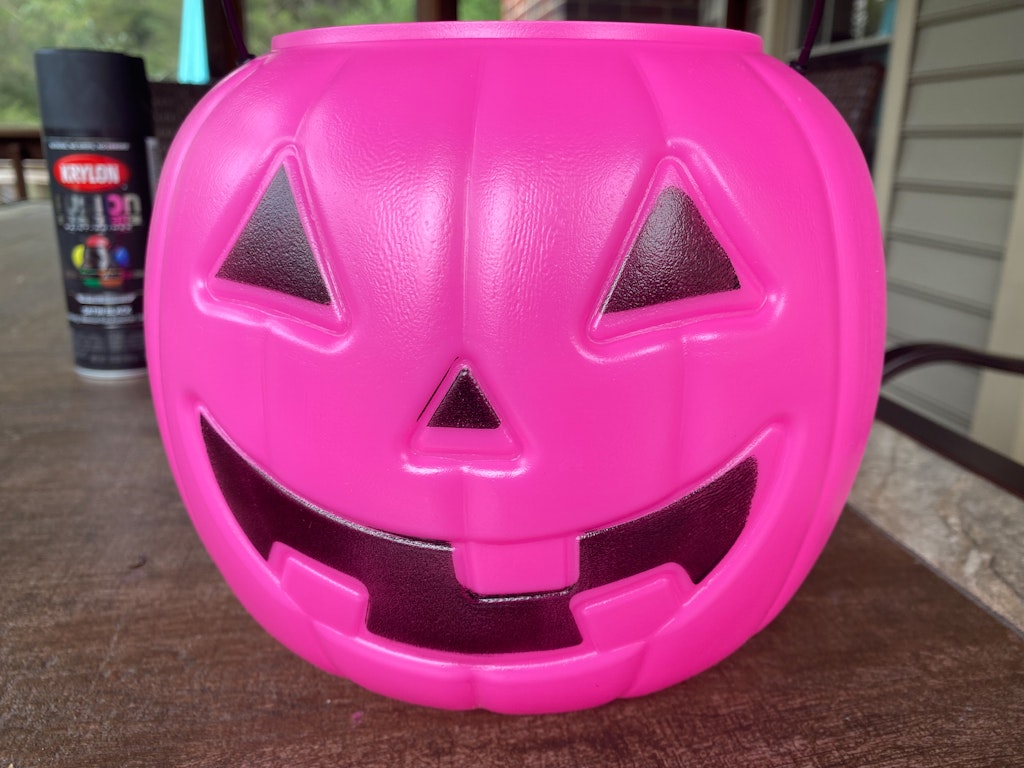
You probably trick-or-treated with these plastic pumpkins when you were younger, you know before you graduated to the pillow case. hahaha.
Pumpkin Lantern Supplies
We found the plastic pumpkin pails at Walmart.
I used the Krylon Max Metallic Gold color for the inside of the pumpkin, but Krylon Fusion Metallic Gold might actually work even better. The Krylon Fusion Metallic Copper color is great as a different option for the inside of the pumpkin.
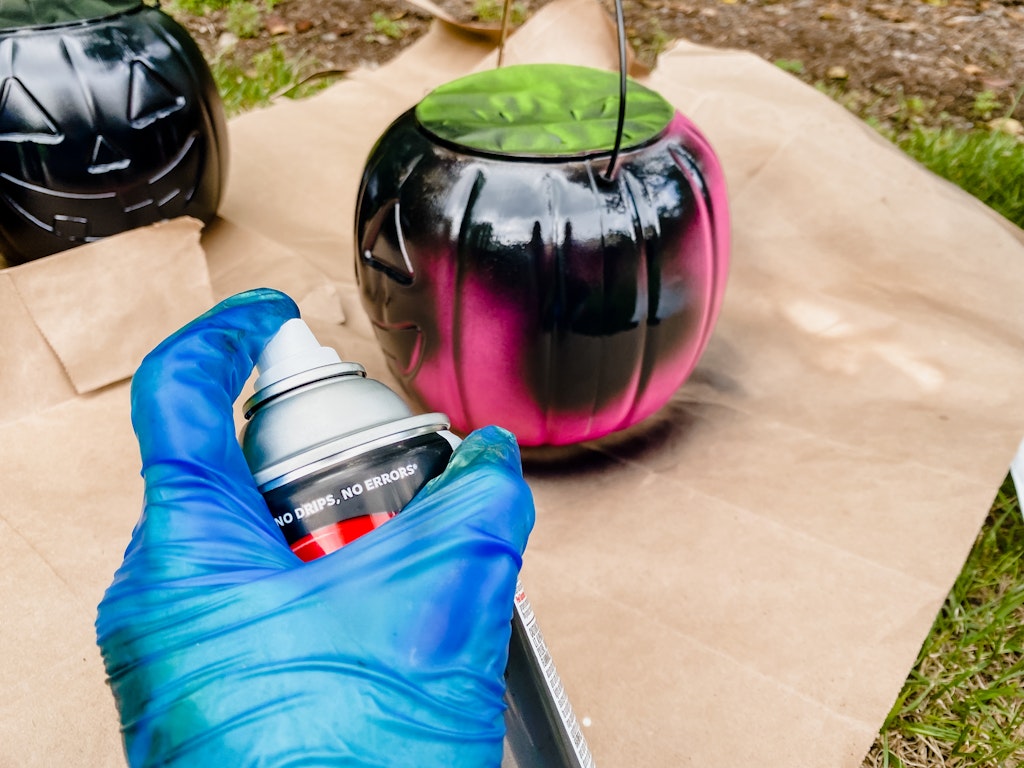
I used Krylon Max black matte spray paint for the outside of the pumpkins.
You can use Frog Tape or masking tape to mask off the opening when spray painting the outside.
You’ll need a craft knife like an X-Acto Knife or Westcott Pen Craft Knife to cut out the eyes and mouth. I tried using a box cutter but it was way more difficult and I ended up slitting the pumpkin from the eye to the mouth by accident. whoops.
A pair of disposable gloves to use while spray painting will save your hands and nails, speaking from experience.
You’ll need craft paper, paper bags or garbage bag to place under the plastic pumpkins while spray painting.
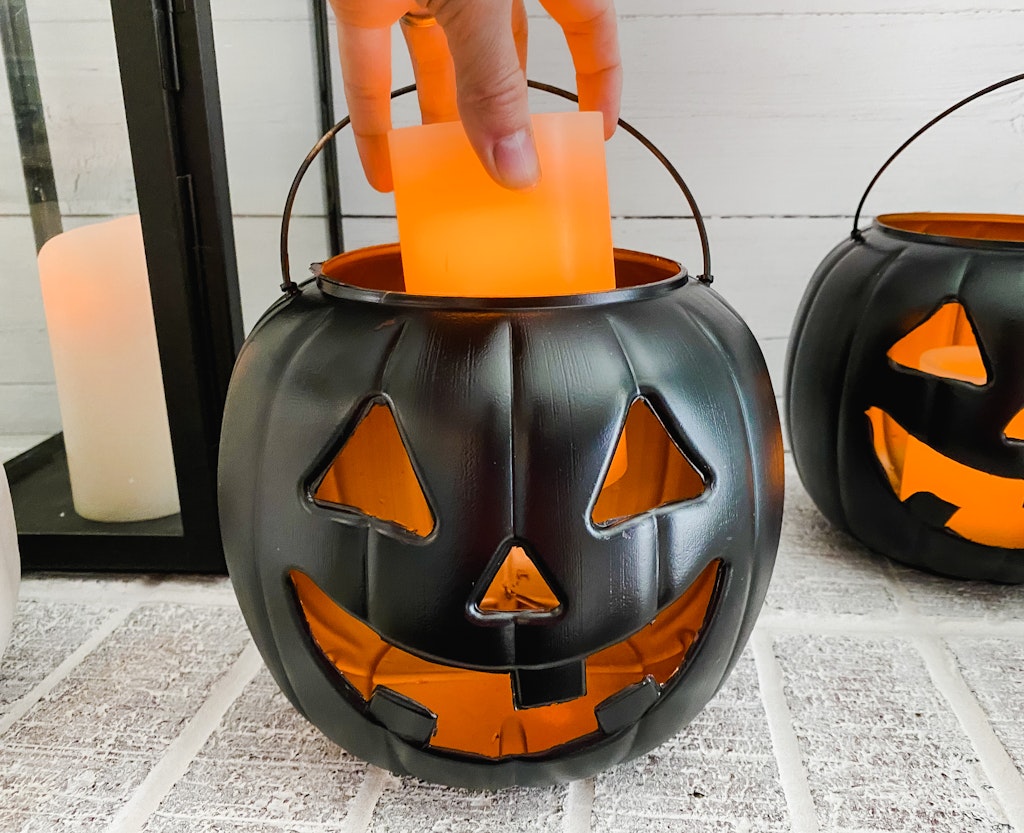
Make sure that you have battery powered flameless candles to illuminate your pumpkin lanterns. You do NOT want to use traditional candles in these.
. 
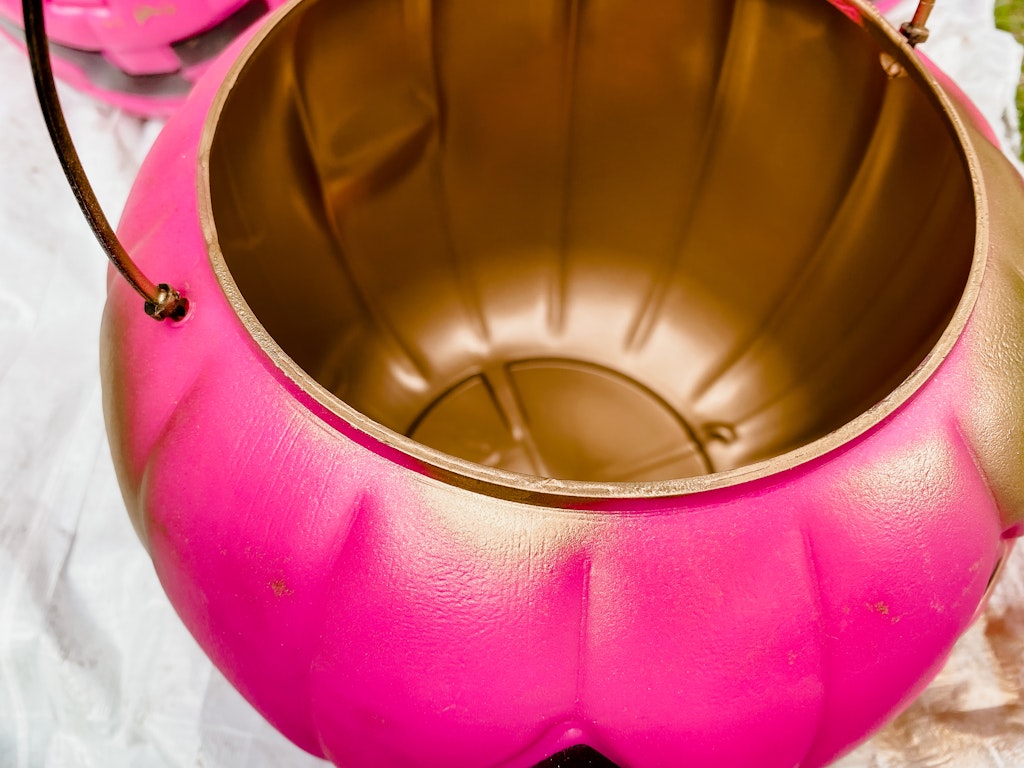
Spray Inside Of Pumpkins
Use your gold metallic spray paint to coat the inside of the pumpkin lanterns. Use thin layers, rotating the pumpkin to avoid drips.
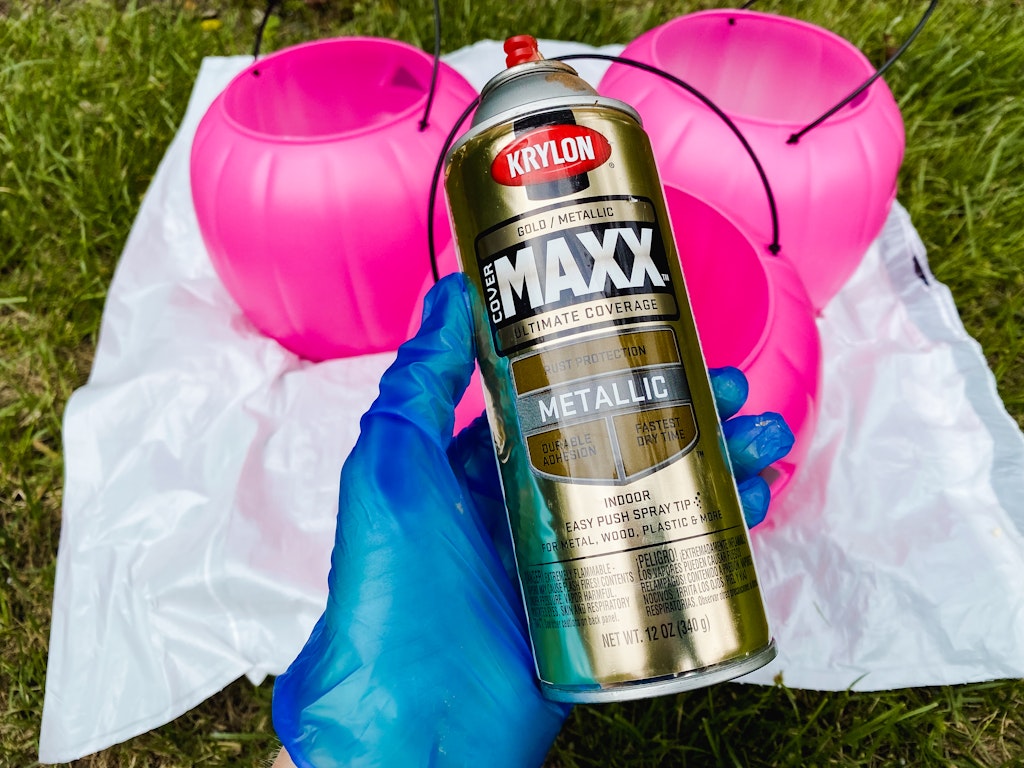
Look at that color!!! Let the pumpkins dry. If it’s humid outside move them inside to dry faster.
Painting The Outside Of the Pumpkins
You can do this a couple different ways. One option is to try to hold paper towels inside against the inside edge of the pumpkin.
You could actually go ahead and cut out the eyes and mouth at this point and carefully block those openings as well as the top while spray painting the outside.
I, however, did not trust myself to not be sloppy so I waited to cut out the face and covered the top with painters tape.
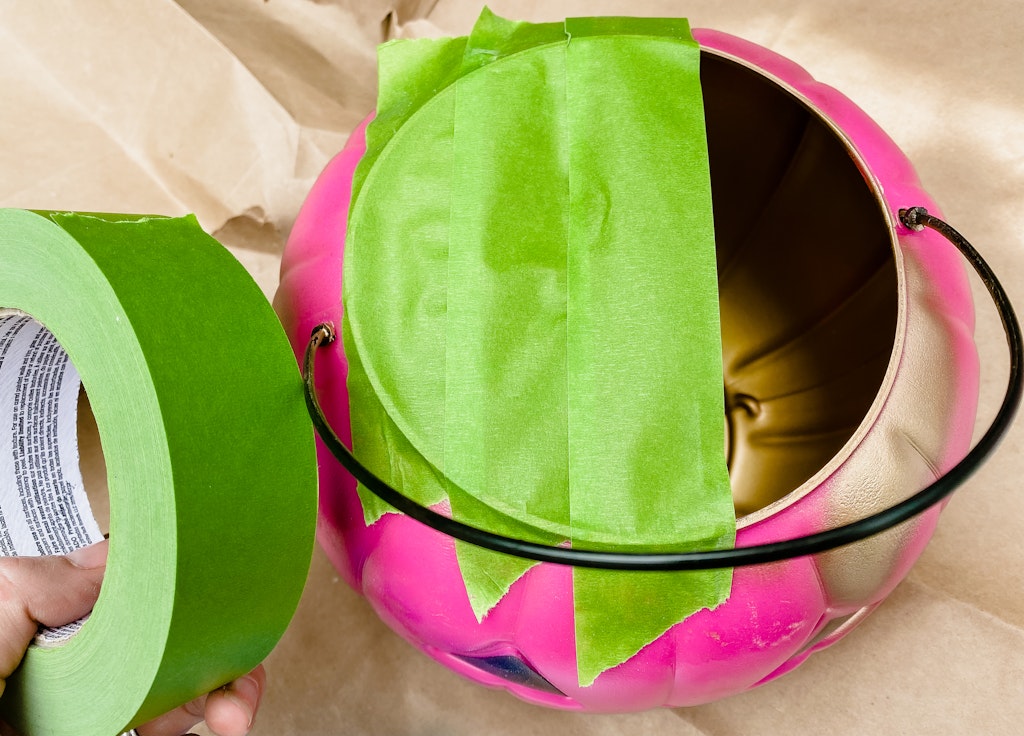
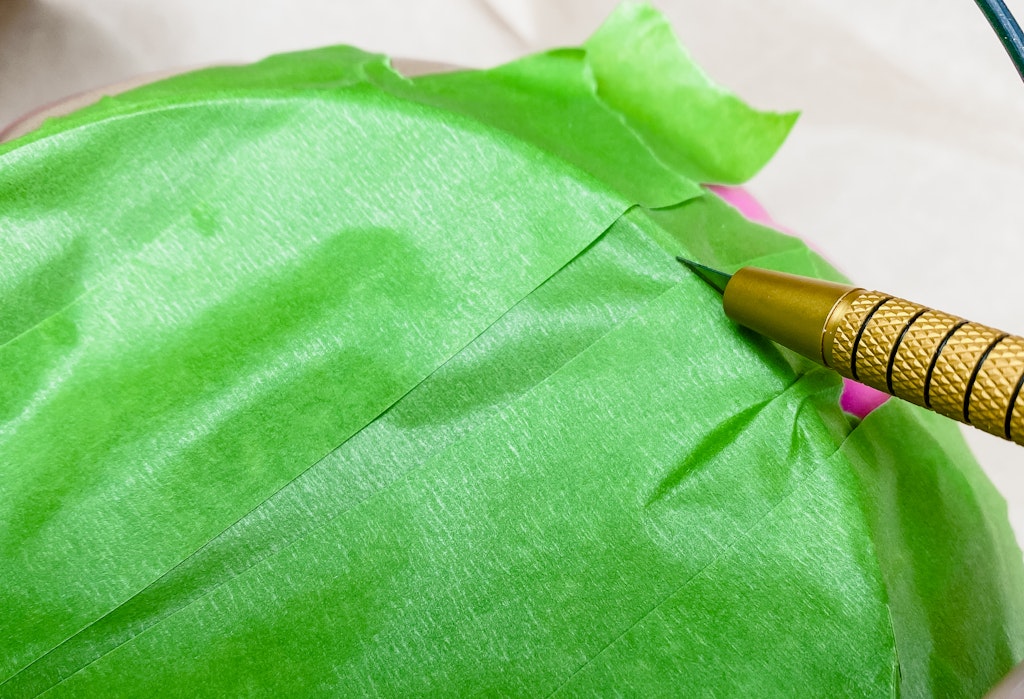
Trim the edge of the excess painters tape using your X-Acto knife or craft pen knife.
Pop on your gloves and use the black spray paint to coat the outside of the pumpkins.
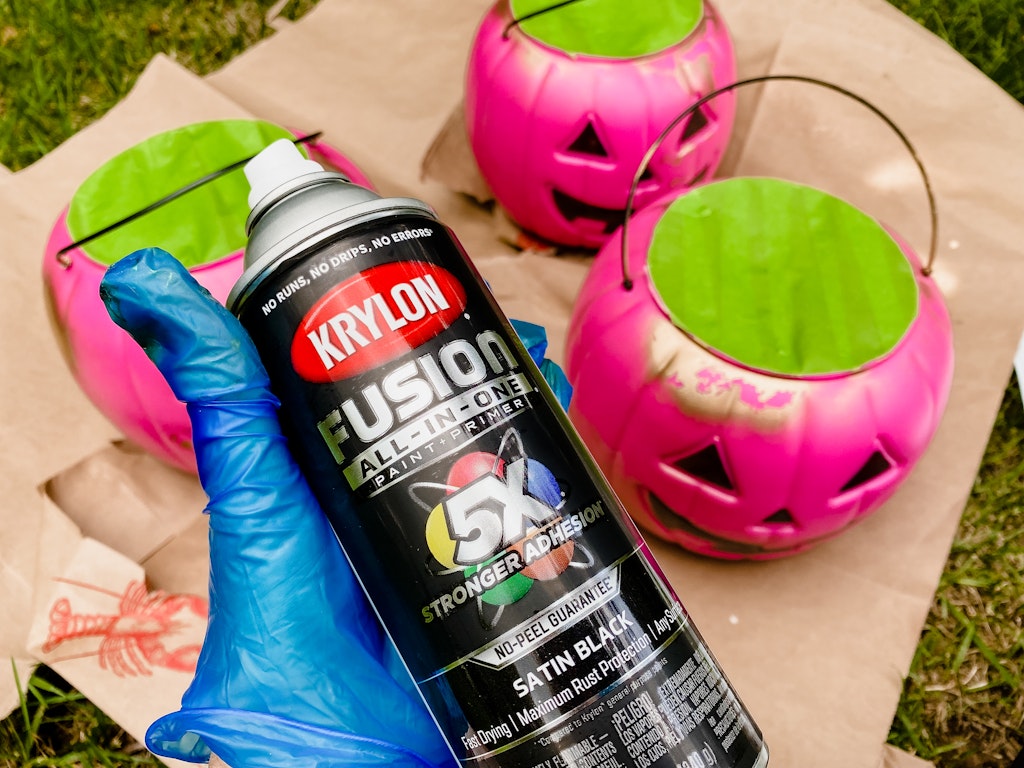
Cover the outside of the pumpkins with a couple thin layers of the black spray paint. Don’t coat the spray paint on too thick or it will drip.
Let the pumpkins dry to the touch.
Cut Out Jack-O-Lantern Eyes And Mouth
Once the pumpkins are dry use the X-Acto knife to cut out the eyes and mouth.
You’ll probably need to touch up the spray paint a little after cutting out the face.
We placed a few paper towels inside of the pumpkin behind the face openings to block the spray paint from coming through.
Spray thin layer over any areas that need touching up and let it dry.
Light ‘Em Up!
Add battery powered candles to your pumpkin lanterns to illuminate them. I love the way the metallic inside glows!!
1 thought on “Pumpkin Lantern”