Craft Pumpkin Halloween Display
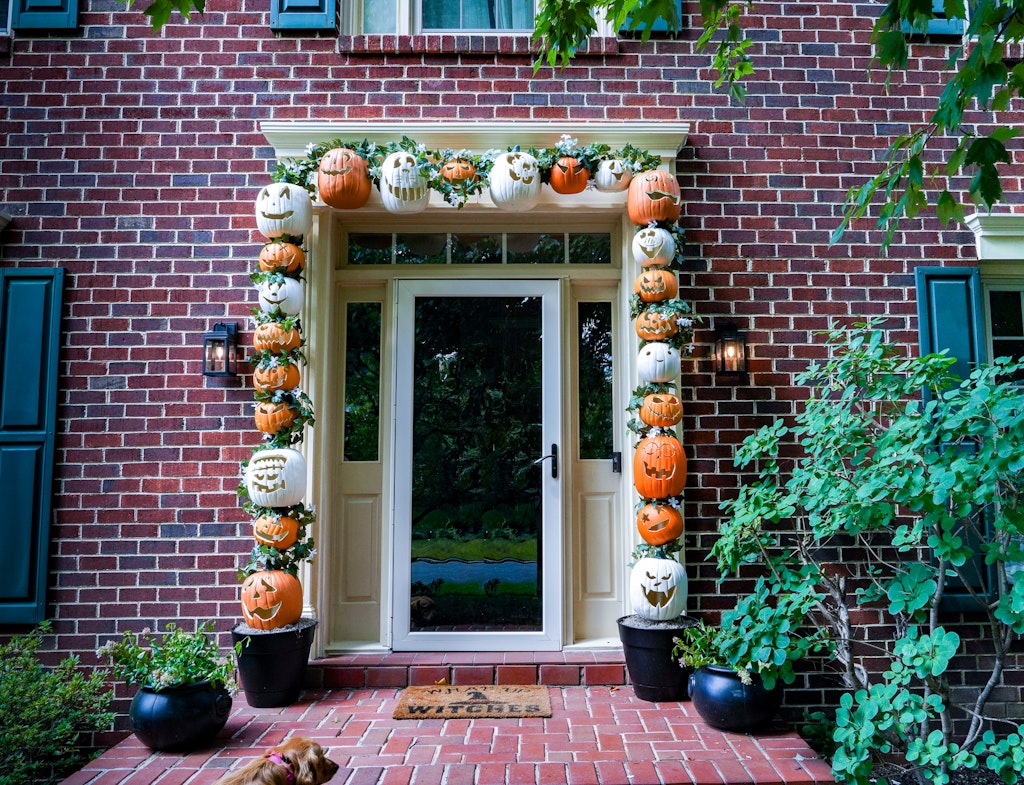
Holy Halloween craft pumpkin project Batman! This turned out so well ya’ll!!! It’s one of the few Halloween decorations that I’ve done that looks just as good during the day as it does at night.
For more Halloween DIYs check out some of our other fun projects.
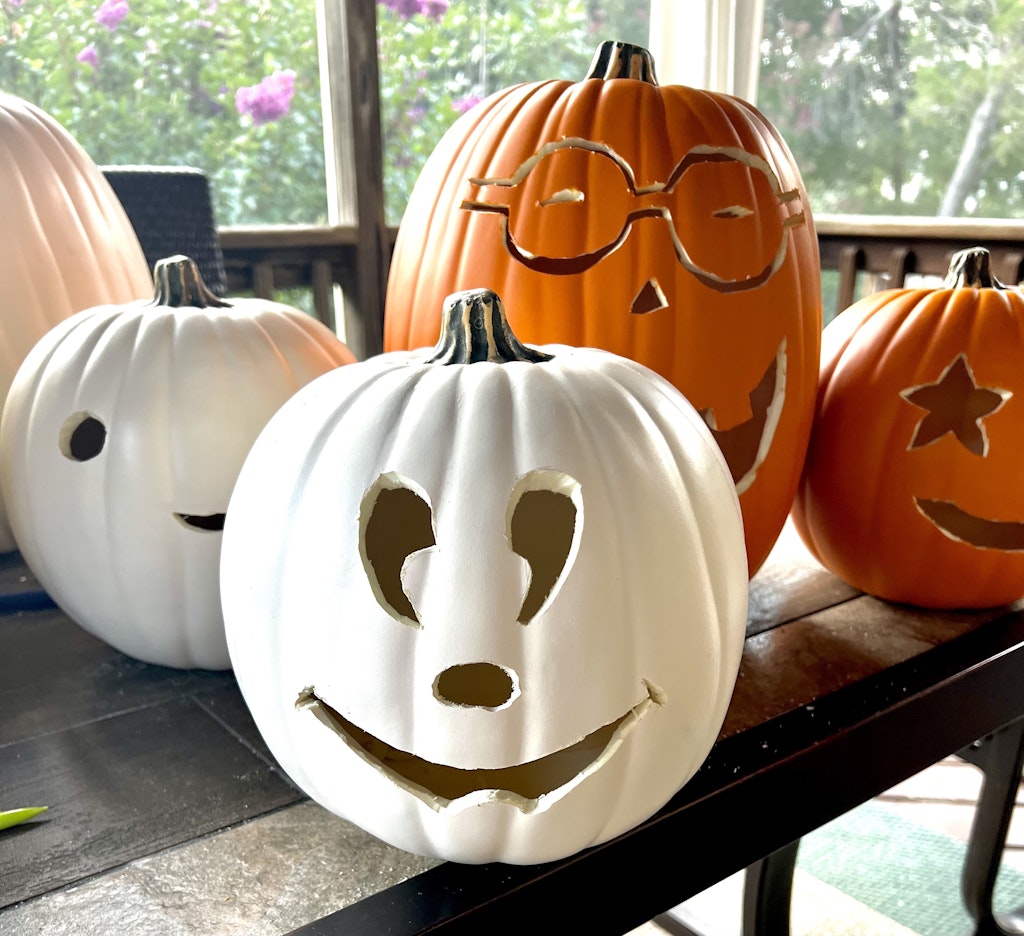
You’ll need a few different supplies to create this project. The main one is craft pumpkins. My biggest advice when shopping for them is to watch the sales and look for coupons. I collected mine from Michaels, Big Lots and Joanns. Make sure that they are of the carvable variety. I bought a few from Hobby Lobby, started carving one and realized that it was solid in the center, not what you want.
Get them in a variety of colors and sizes. I ended up using 24 pumpkins but the number will really depend on the size of your door and pumpkins.

How To Carve The Craft Pumpkins
I found a bunch of different free pumpkin carving templates and ideas online. I used the pictures I found as a guide and just freehanded the drawings on the pumpkins with a pencil. You could try to trace them on too.
To carve the craft pumpkins I used a hot knife foam cutter. Mine was less than $20. There are some pricier options that look nice, but this one worked pretty well. I tried using a Dremel, but the hot knife was a lot easier to work with.
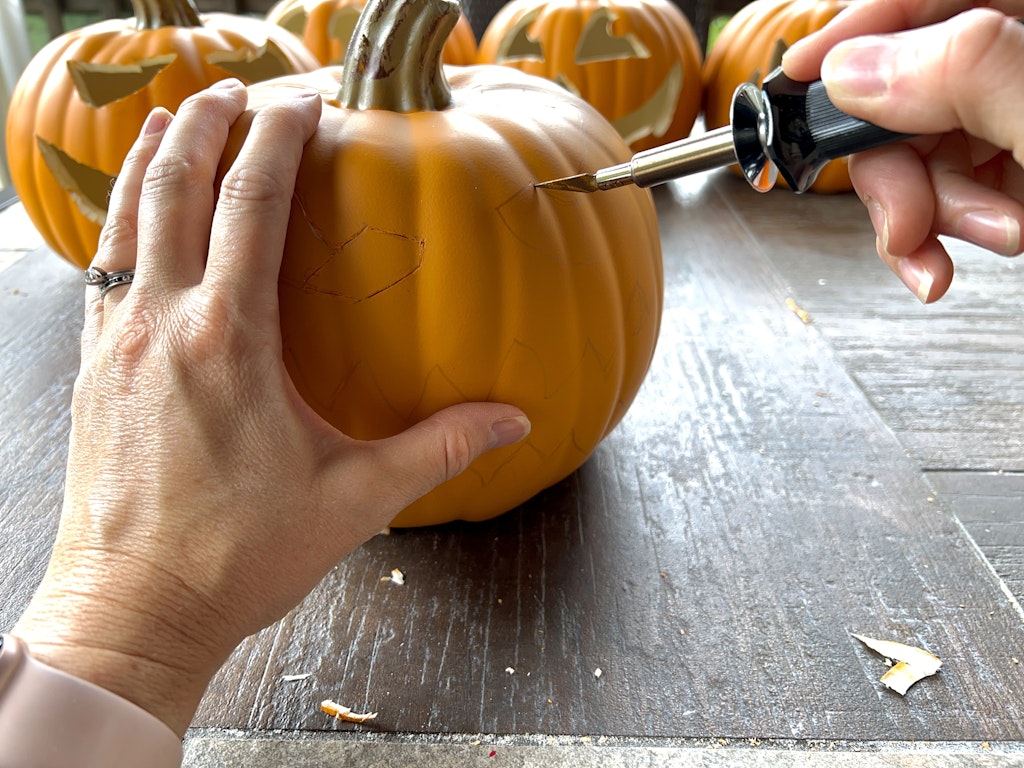
Carve your faces, but don’t add the holes for the pvc pipe yet.
Building The PVC Pipe Frame
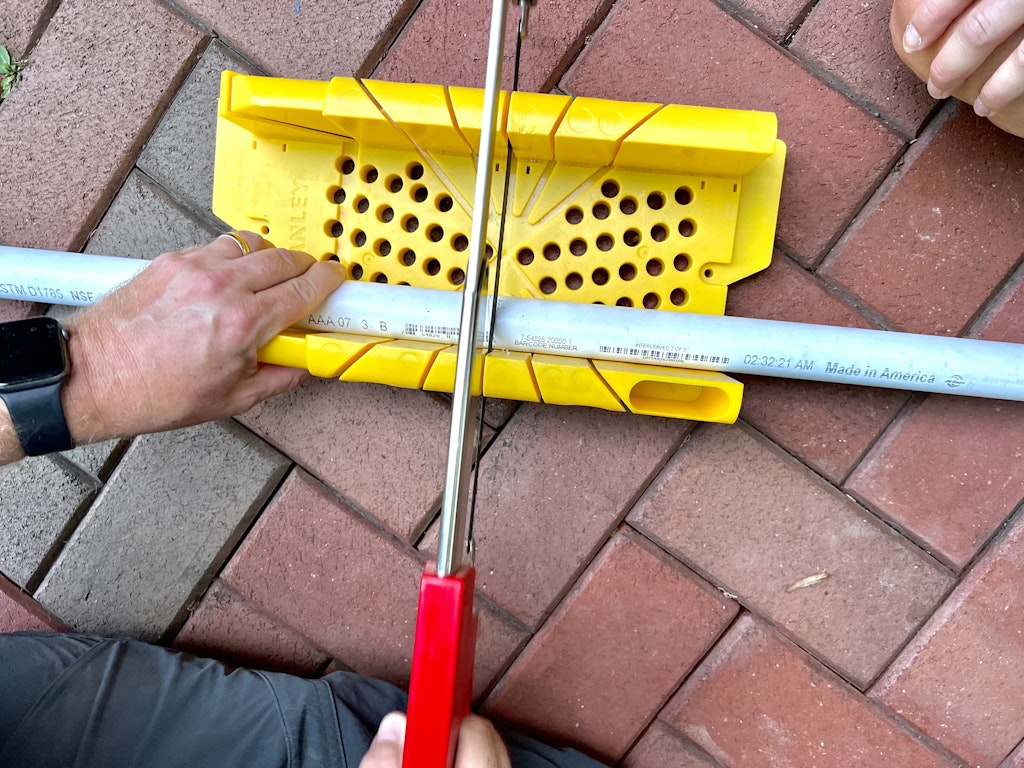
You’ll need to snag a few supplies from the hardware store. I used 1″ thick PVC pipe to build the frame. Measure how much you’ll need to go around your door. I used three 10 feet pieces that I then cut to size.
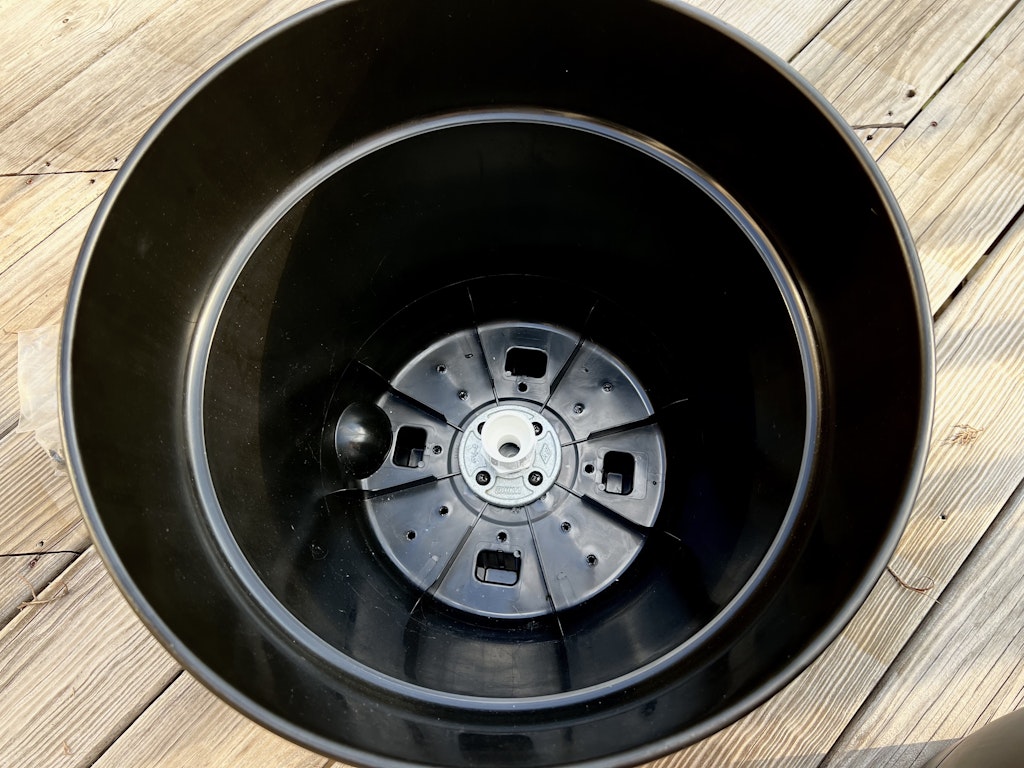
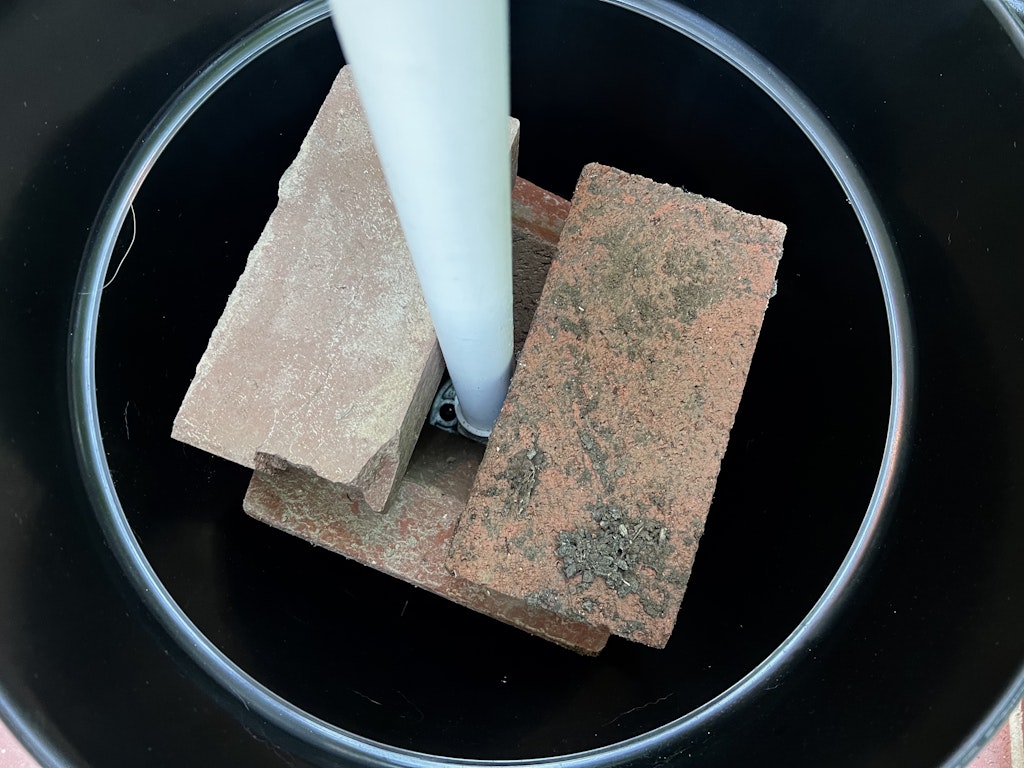
To bought a 1″ to 3/4 inch male connector piece, a 3/4″ floor flange and screws to attach the PVC pipe to my planter pots. I found two black plastic planter pots at the hardware store to place the base of the frame in.
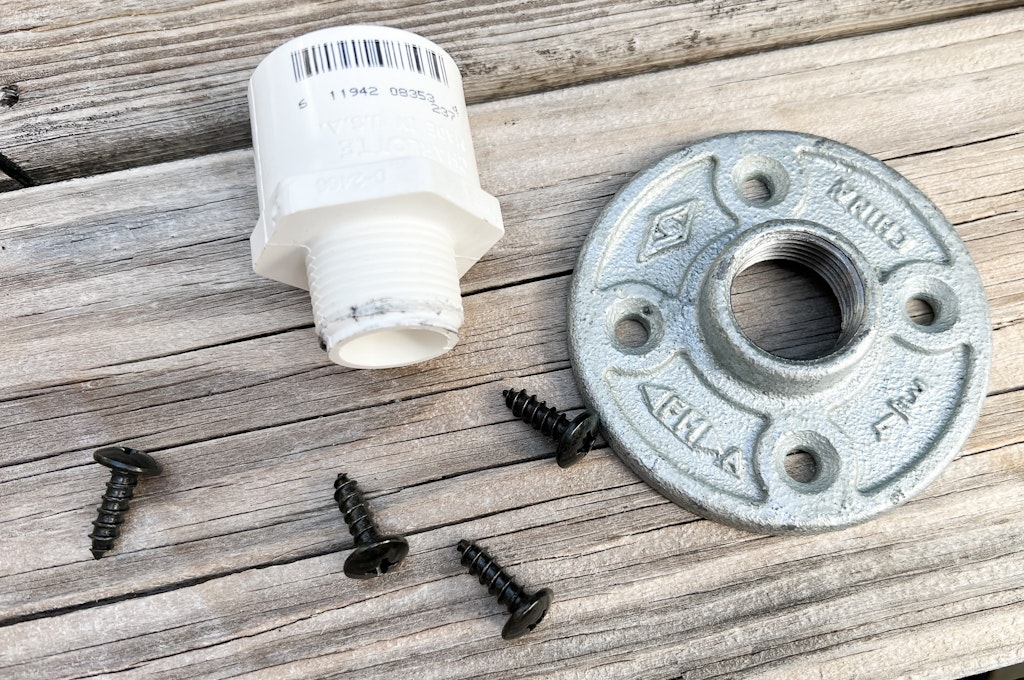
You’ll also need 2 1″ elbow connectors for the top of your frame.
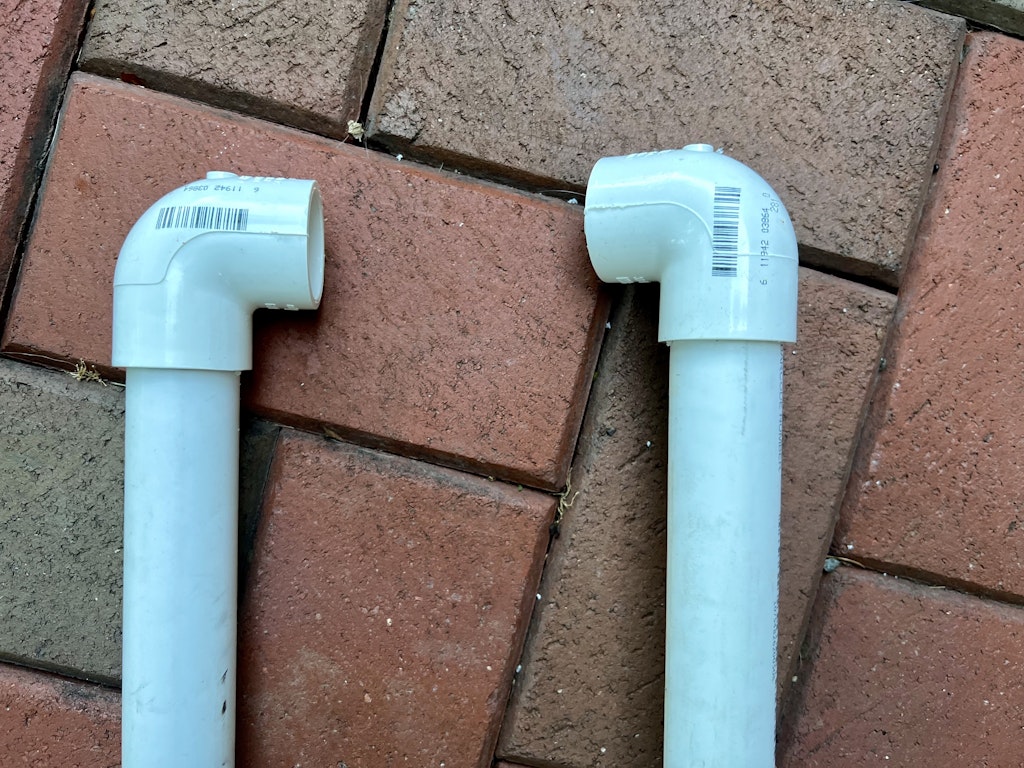
Test out all of these connector pieces at the hardware store to make sure they all fit together and are the correct size.
Use a screwdriver to attach the floor flange to the inside of your planter pot.
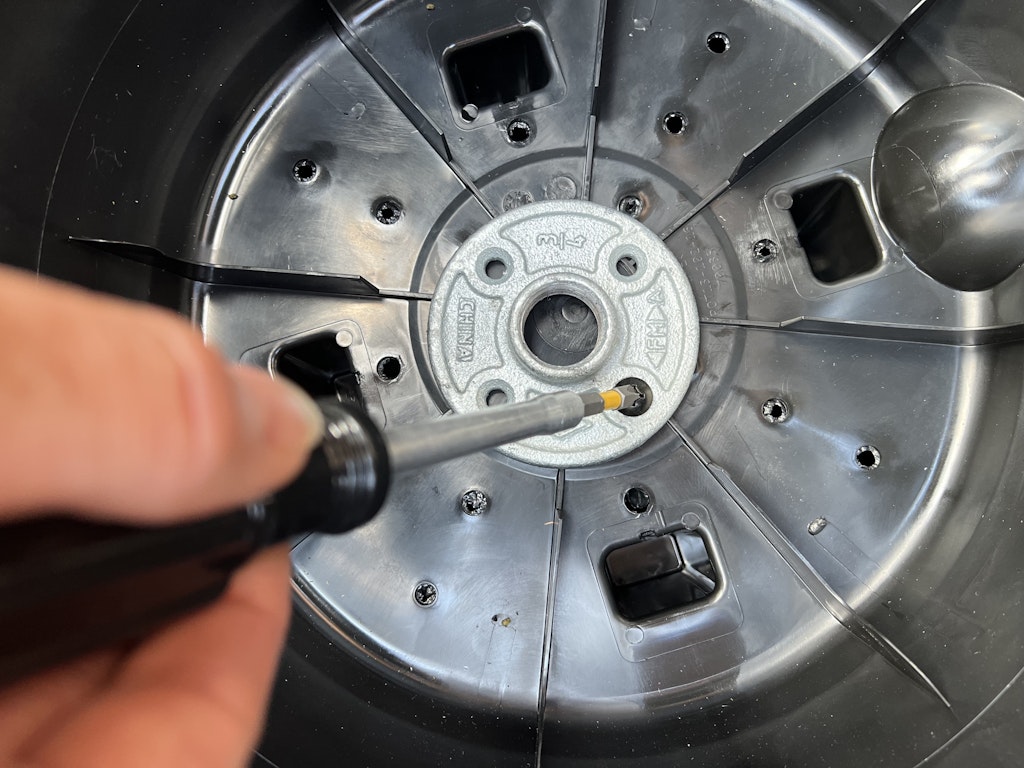
Screw in the PVC male connector piece where your PVC pipe will drop in.
Next I placed the flower pot where I was going to put the frame and measured how tall I wanted the frame to be.
I used a miter box and hacksaw to cut the PVC pipe to size.
I used some old bricks to weigh down the bottom of the stand. Gravel, sand or rocks would work too.
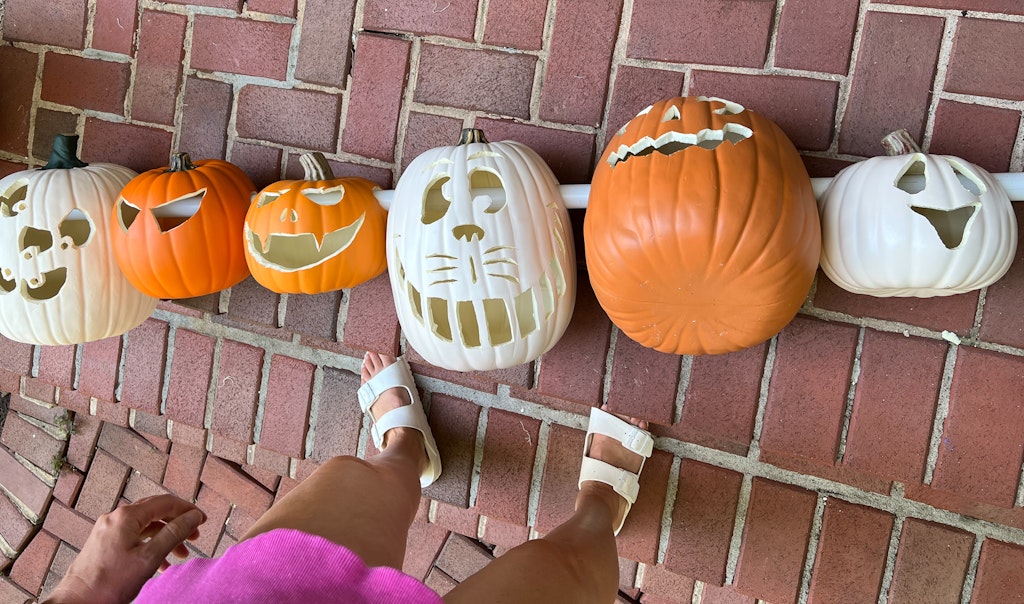
Add Your Pumpkins To The Frame
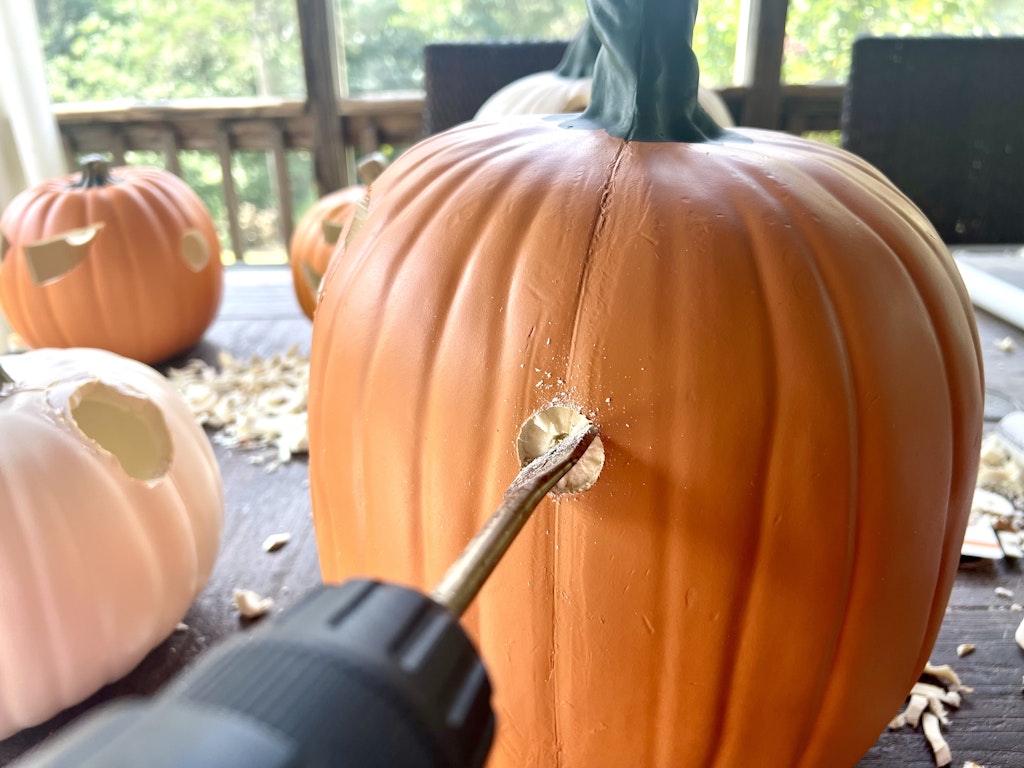
Decide what order you want your pumpkins and start adding them to your frame. I used a drill bit as close to 1″ as I could find to drill circles into the top and bottom of the pumpkins going on the side frame.
Then I used the hot knife to make the hole a little bit bigger if need be. I had a spare piece of cut PVC pipe that I tested each hole with to make sure it was going to easily slide onto the frame.
For the top row you’ll need to drill the holes on either side of the pumpkin.
UPDATE – ADDING LIGHT
OK ya’ll. I originally added battery powered candles with a remote to illuminate the pumpkins. After a couple rain storms, I had a little trouble and lost a few candles. I drilled extra drainage holes in the pumpkins and popped in a few extra candles. A few of the candles were still dimming and loosing their battery.
We moved to plan B and added white string lights to all of the pumpkins. I found these LED warm light holiday lights . I wanted ones with the white wires so they were more hidden in the inside of the pumpkins since they are also white.
More holes were drilled into the backs of the pumpkins and we fed about 6 lights in each pumpkin.

We wanted to have as little of the wire showing as possible so we drilled two extra holes on the back of each pumpkin. One hole near the top of the pumpkin (but below the hole where the pumpkin slid on the PVC pipe) and one near the bottom of the pumpkin (but above where the hole for the PVC pipe was. Then we weaved the lights through the pumpkins. Make sure the holes are large enough for the plug to fit through.
For our porch we connected 5 strands of lights.
This is definitely something that I would do as you’re adding the pumpkins. I added them while the entire set up was all in place and that is much more difficult.
Finishing Touches
I used about 5 sections of faux ivy to wrap around and hide the PVC pipe.
I filled the flower pots with dirt and added Spanish moss to the top.
We used string and some tiny nails to secure the top of the frame to the door frame since it was so tall.