

Limewash Your Brick Fireplace In These Easy Steps
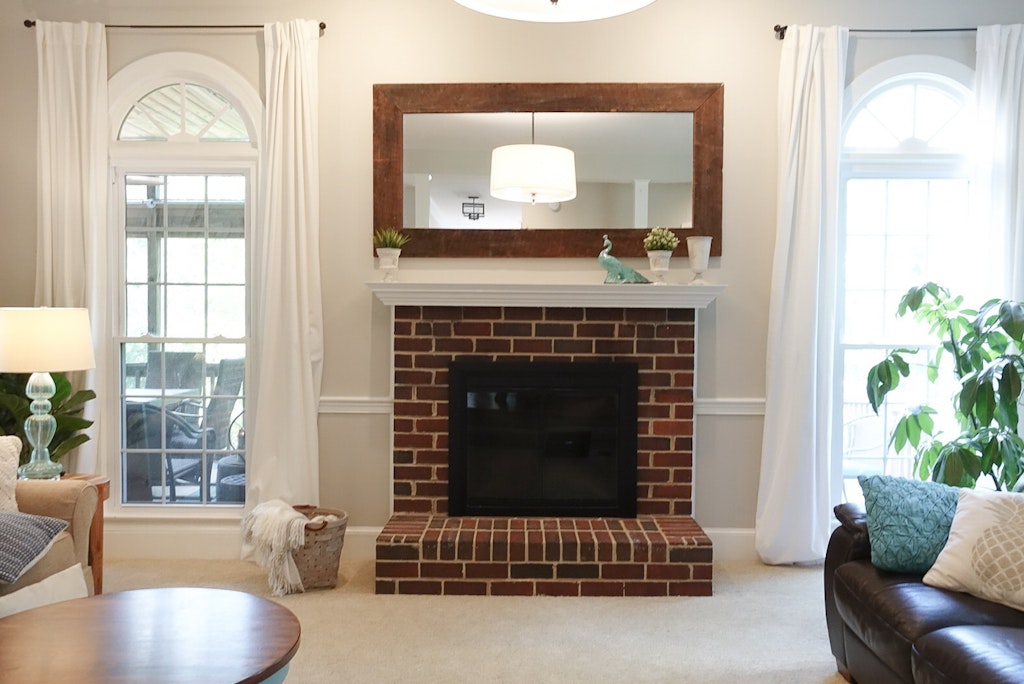
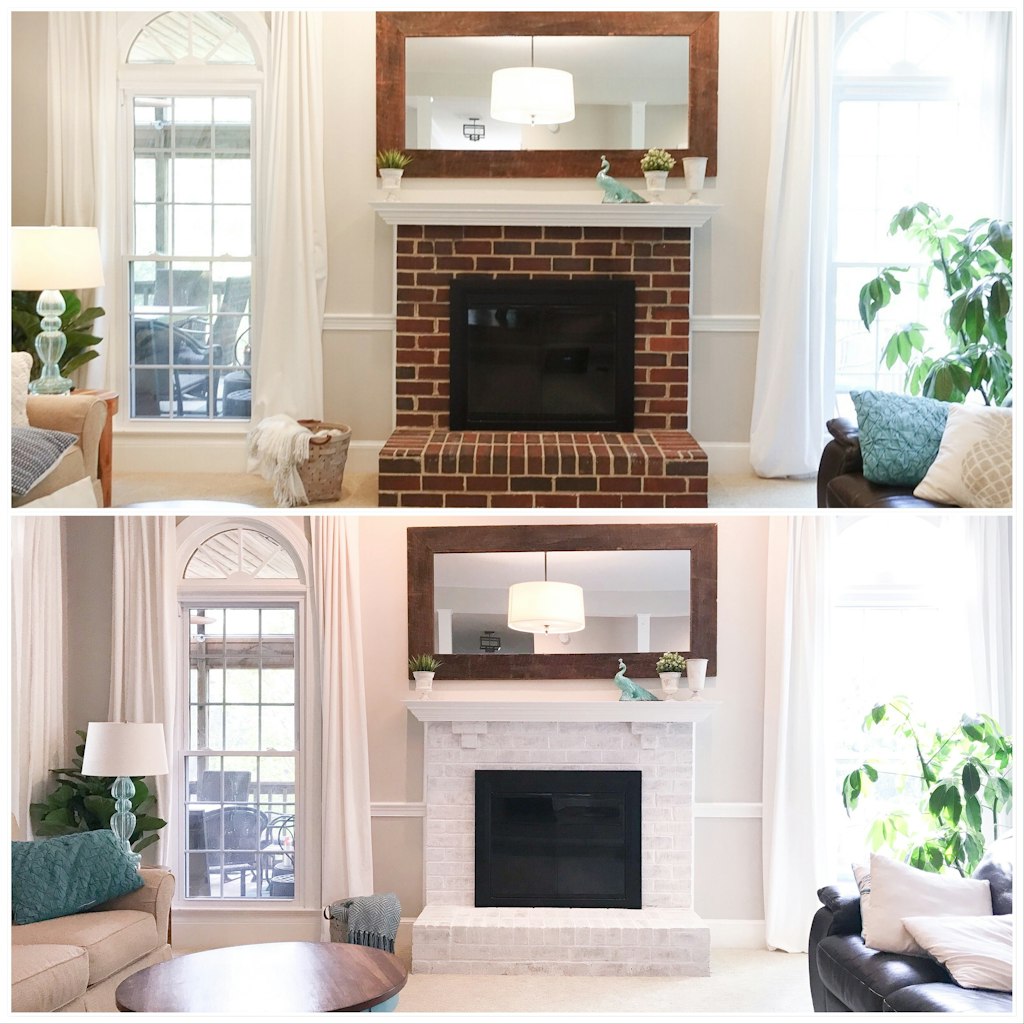
Our fireplace is one of the first things you see when you walk in the front door. We’ve been trying to brighten up the living area and the dark brick fireplace was screaming for a facelift. We’ll show you how to limewash your brick fireplace.
We were trying to decide between whitewashing and limewashing the brick. We finally decided on using a limewash. The thing that sold us on the limewashing technique is that you brush it on then keep removing it until it has reached your desired look.
I felt a lot more comfortable with this technique since supposedly we could still remove all of the limewash from the brick within the first five days before it has truly cured to the brick.
You’ll need a few supplies to get the job done.
Supplies To Limewash Your Brick Fireplace
- white vinegar, scrub brush or coarse sponge (if you have stains you need to remove before applying the limewash)
- empty spray bottle (need to keep the brick wet when applying the limewash)
- bucket to dilute the limewash
- old measuring cup or something to measure the limewash/water combination
- paint stick or something to stir the diluted limewash
- rosin paper or drop cloth to protect the floor around your fireplace
- painter’s tape
- limewash
- masonry brush or large paint brush
- old rags
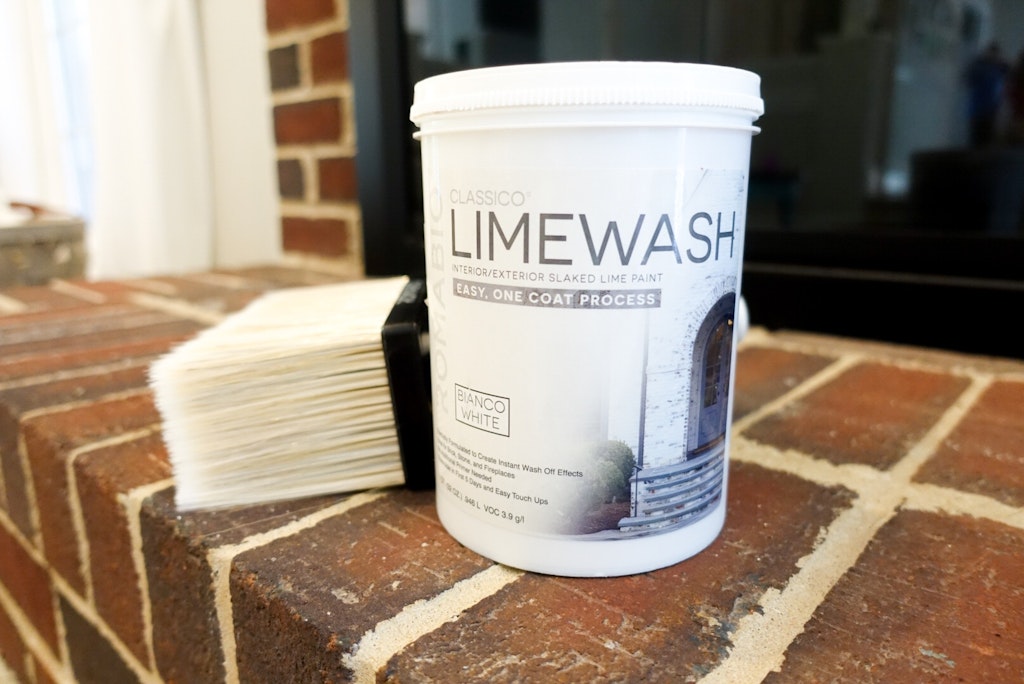
We ordered the Romabio Classico Limewash in Blanco White from Home Depot in the 1-quart size. Some stores carry the smaller containers in stock, but our local store did not.
We also purchased a masonry brush to apply the limewash onto the brick. A thick paintbrush would probably also work.
Prep The Fireplace For The Limewash
Using painter’s tape, tape off along the edges of your fireplace where it meets the floor and the walls. It will help keep the limewash from bleeding through if you’ve watered it down a bunch.
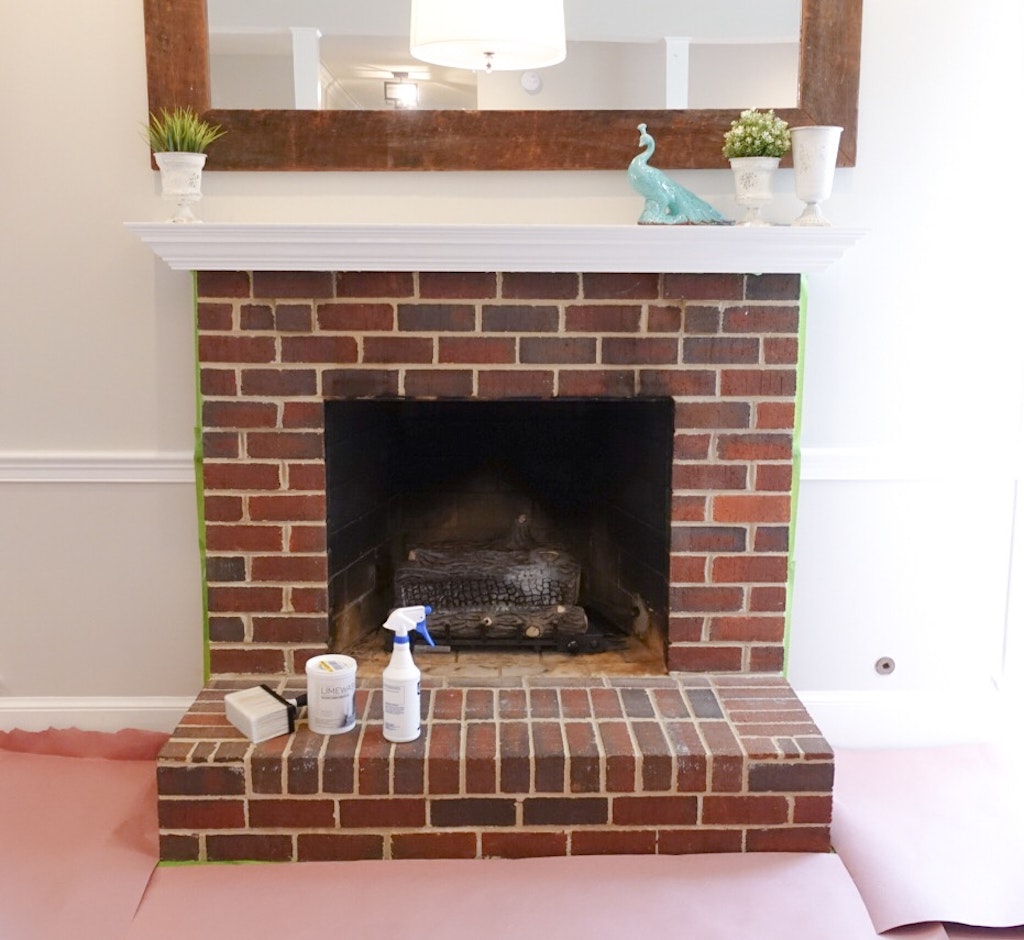
We lined the carpet in front of the fireplace with a drop cloth or rosin paper. We used the red rosin paper, but we’ve recently found that they carry brown rosin paper as well.
I don’t think the color makes a difference, but we had a lot left over and the craft brown color might be more useful for other craft projects down the road. Ya never know 🙂
Make sure you clean any soot off of the brick before starting. You can dilute white vinegar with equal parts water and scrub the bricks with a coarse sponge or cleaning brush for any stubborn stains.
Dilute The Limewash
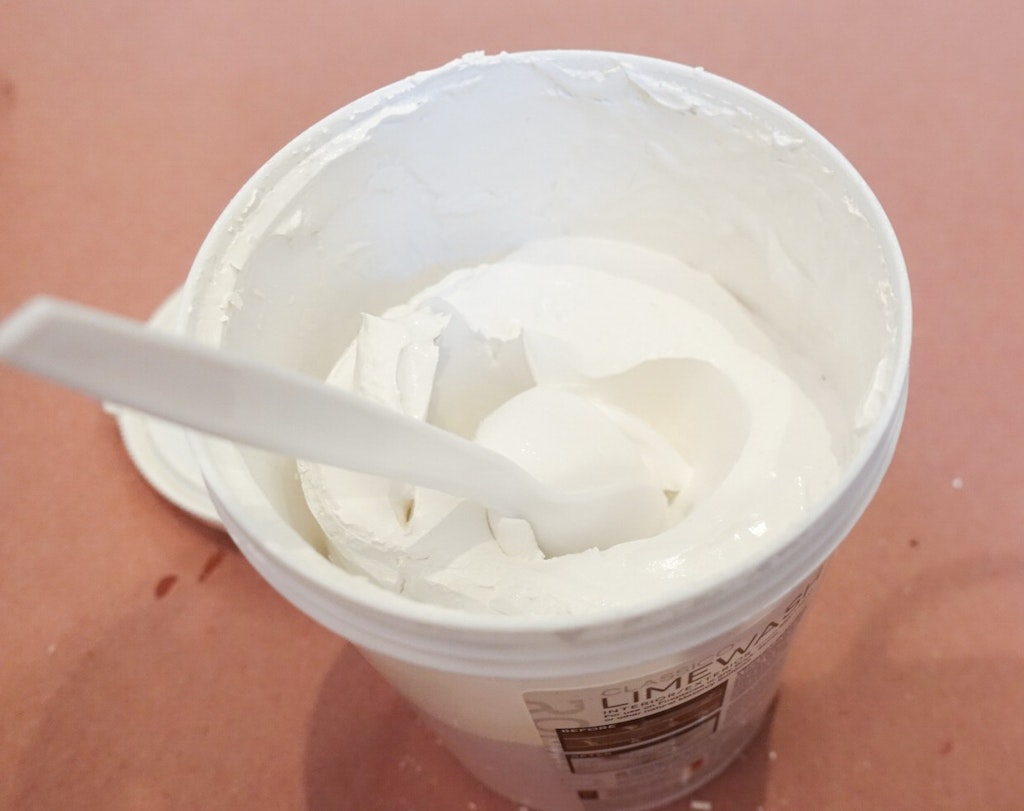
The limewash is extremely thick before you dilute it. You’ll need to scoop it out with a spoon.
We started off with 50% dilution. We scooped out about 2 cups of limewash into the bucket and mixed it with about 2 cups of water.
If you want a thinner limewash coat on your brick then add more water. For a thicker, more opaque look add less water.
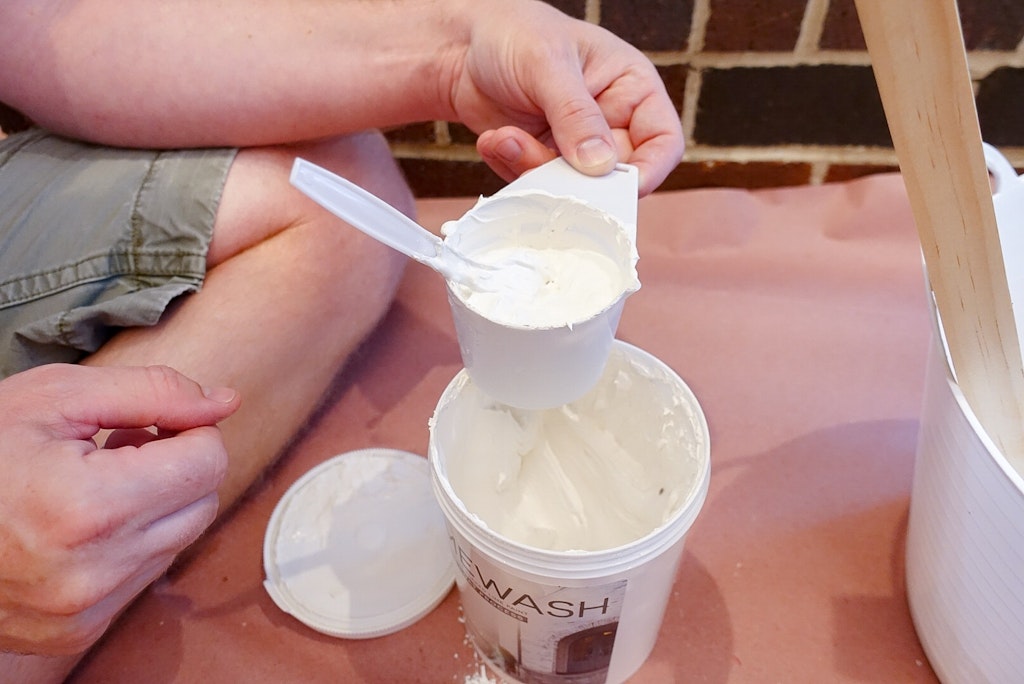
This is not an exact science, just make sure you remember what ratio you used, so if you need to make more it will match your first batch. We have a smaller fireplace so this was plenty for us. If you have a larger fireplace you might want to start off diluting more of the limewash.
So here’s where we went to work and failed in the photos during the process department. Sorry peeps!
How To Apply The Limewash To Your Brick Fireplace
Using your spray bottle with just water (no vinegar allowed in this step) spray the brick to wet it.
Pick up your masonry brush and start brushing the diluted limewash onto the brick. Make sure you keep a wet edge while working around the brick.
Once you’ve completely covered the brick with the limewash, you’re ready to start creating your custom look.
Dampen your rags and start patting the brick to remove some of the limewash. Work brick by brick around your fireplace. The limewash will appear brighter and slightly more opaque once it’s dried.
We went back several times to different bricks to remove more limewash in different sections. Keep in mind that the limewash doesn’t completely cure to the brick for about five days so if you’re like us and start your project after putting the kiddos to bed, you can wait until daylight to finish customizing your look.
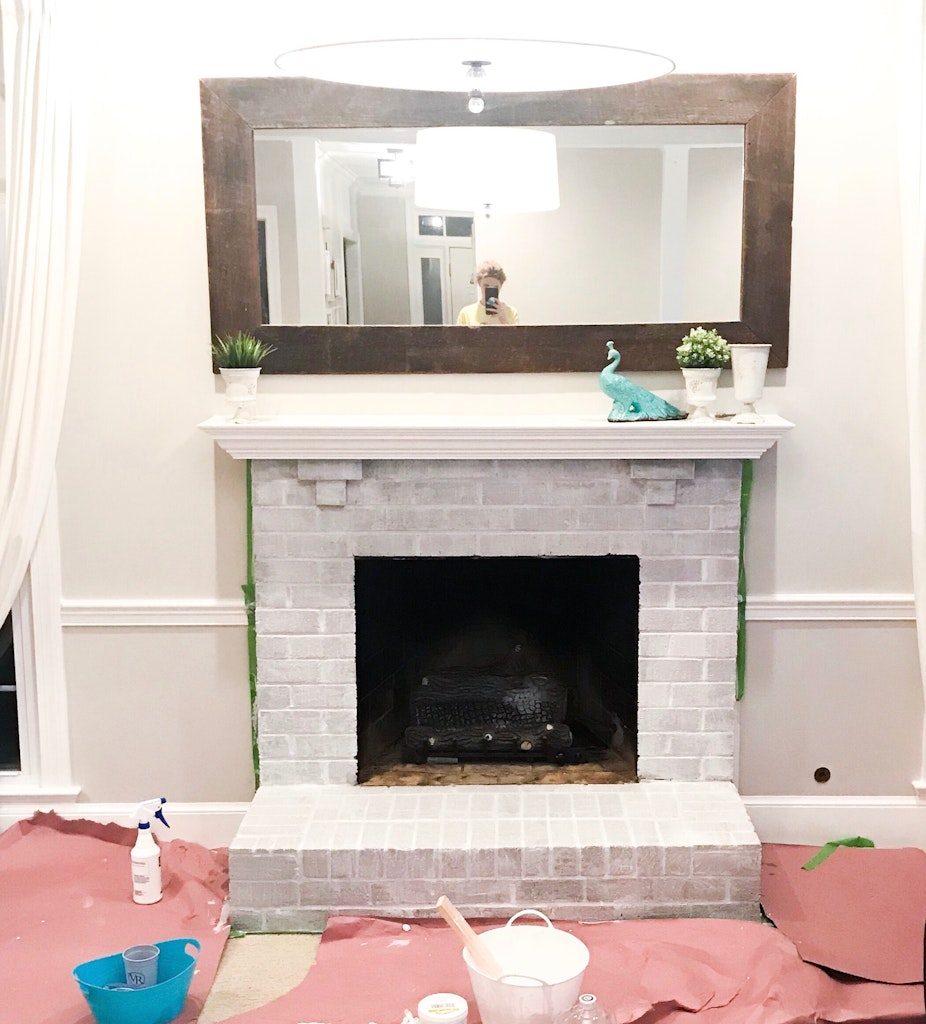
Here’s the “baby we finished!” shot taken that night around midnight. Haha. See me in the mirror…. hello Kelly 🙂
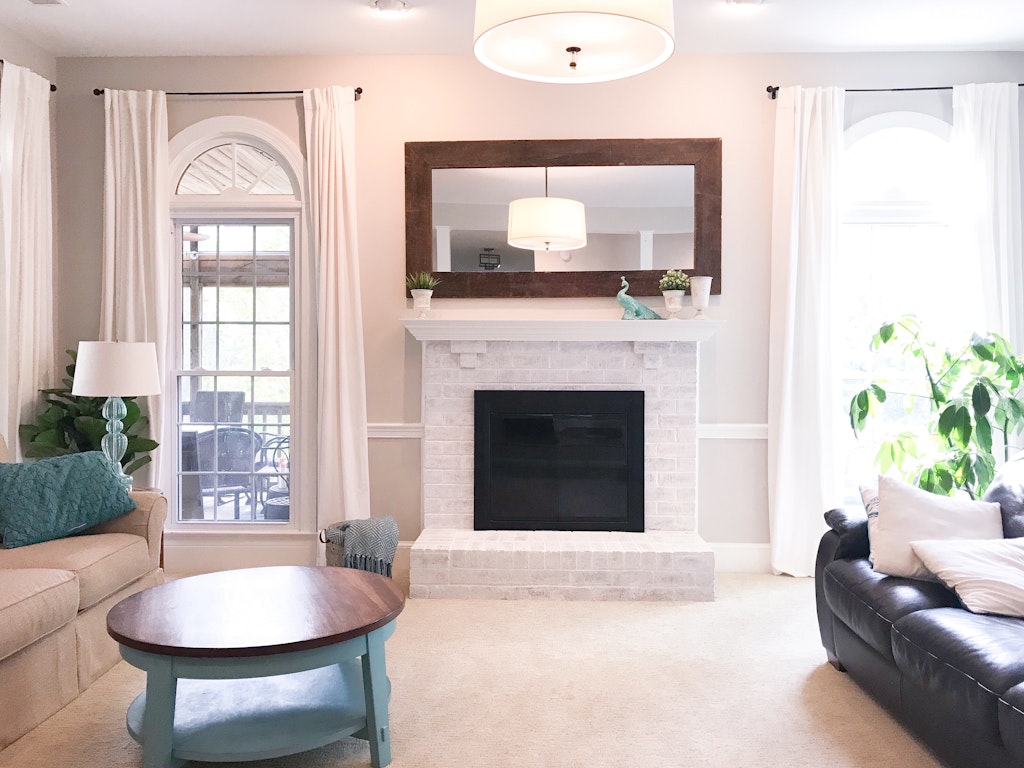
And here’s the day shot! I love the way it turned out. It has a chalky finish and seriously brightens up the entire room. I love when we can start and finish a project in a day or two. Ahhhhhmazing 🙂
Can I do this on River Rock?
Kim – The brand I used, Romabio, suggests that you test out the surface first to see if it will absorb the limewash. If you wet the stone does the water sit on top or does the stone absorb some of the water. If it does absorb some of the water then it will work and you apply it the same as you would on the brick. If the water just sits on the rock, then it won’t work unfortunately.
We use our fireplace often. Can we seal the lime wash to prevent smoke/soot stains?
Maureen that’s a very good question! We have a gas fireplace so we haven’t had to worry about that. I glanced through the FAQs on the website for the brand of limewash we used but couldn’t find anything. I would suggest contacting the company and running it by them. We used this brand https://romabio.com. I did see on there that you can touch up but if you’re doing a lighter coat then the areas where you touch up might end up looking more opaque.
What do you mean by “keep a wet edge”? Thank you.
you need to use a spray bottle with just water to get the brick wet before you apply the limewash. So I would get expanding on the area you’re working on rather than letting a section dry completely then come back to it. Does that make sense?