
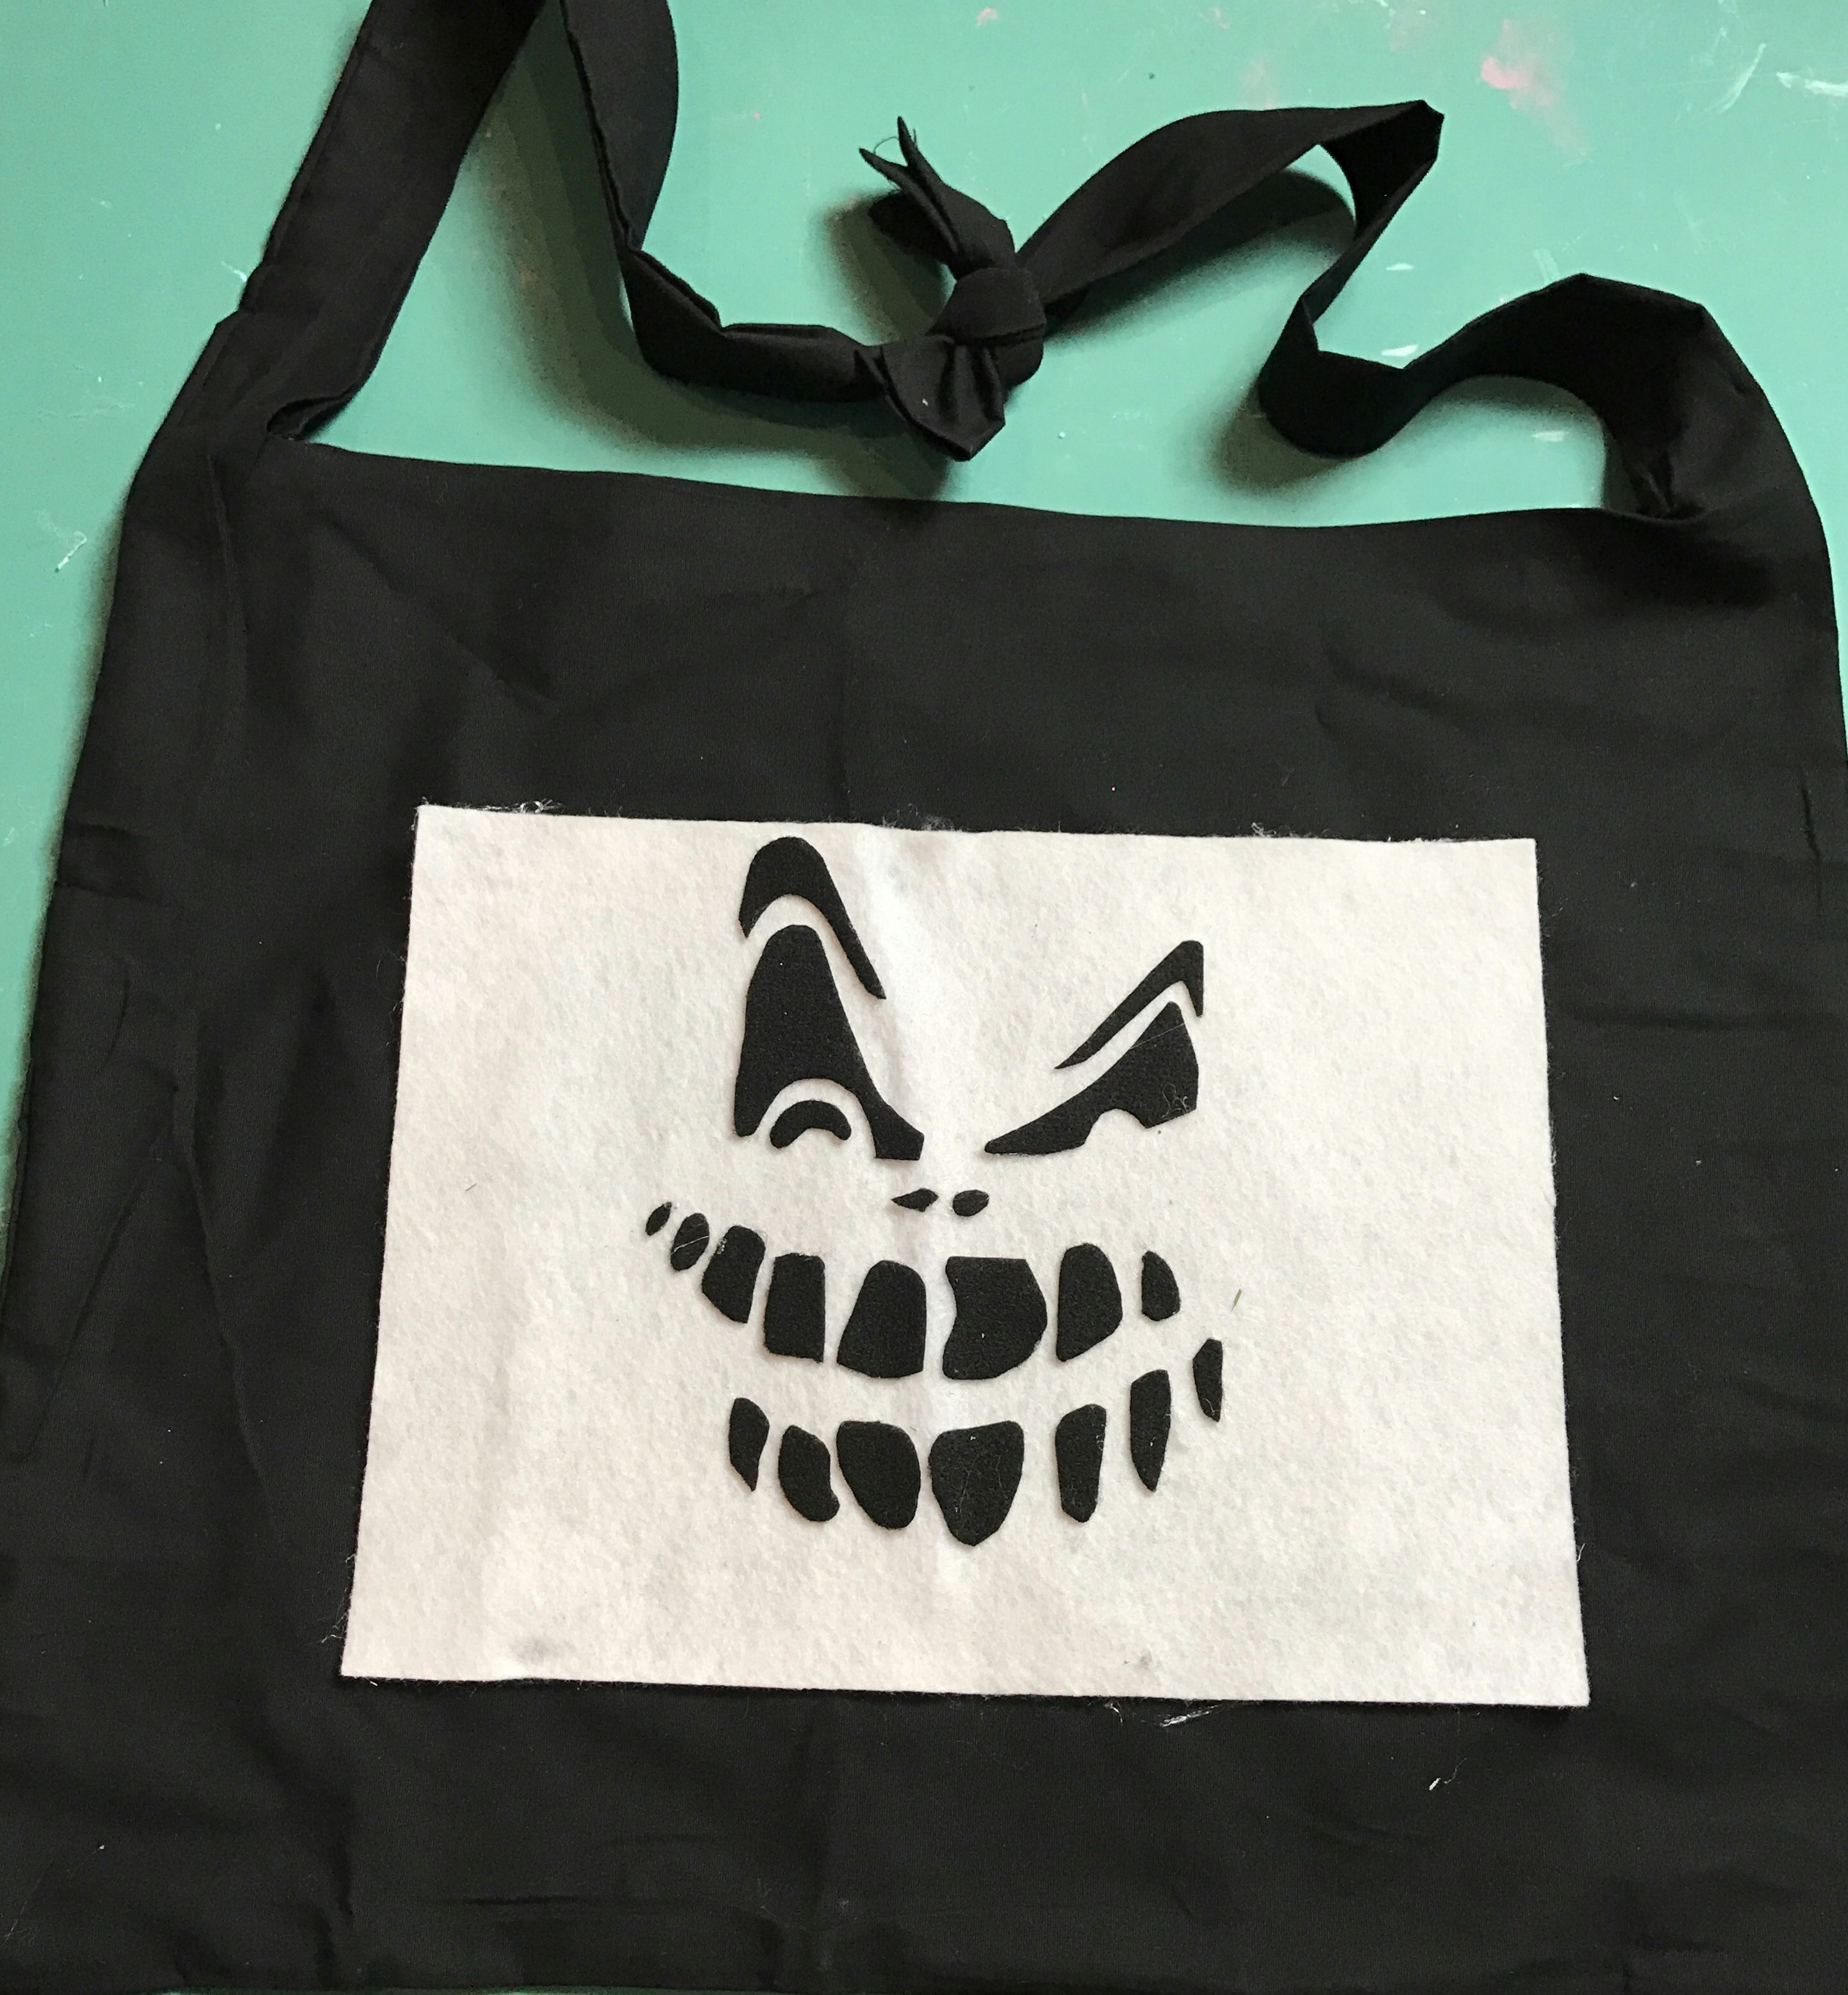
This is a super quick and easy project that makes the perfect Halloween treat bag for your kiddos who have outgrown the little plastic pumpkins. You can leave it plain or finish it with a decorated glowing felt panel. See our tutorial for the DIY Glow Panels here.
Pillowcase Treat Bag Supplies
– King Size Pillowcase – Walmart $9.47 for 2 or one from your linen closet that you’d like to sacrifice for the project 😉 (the ones with stiffer fabric work better than the sateen or microfiber ones)
– Scissors or pinking shears (using pinking shears will keep fraying to a minimum)
– Piece of chalk for marking
– Ruler
– Iron
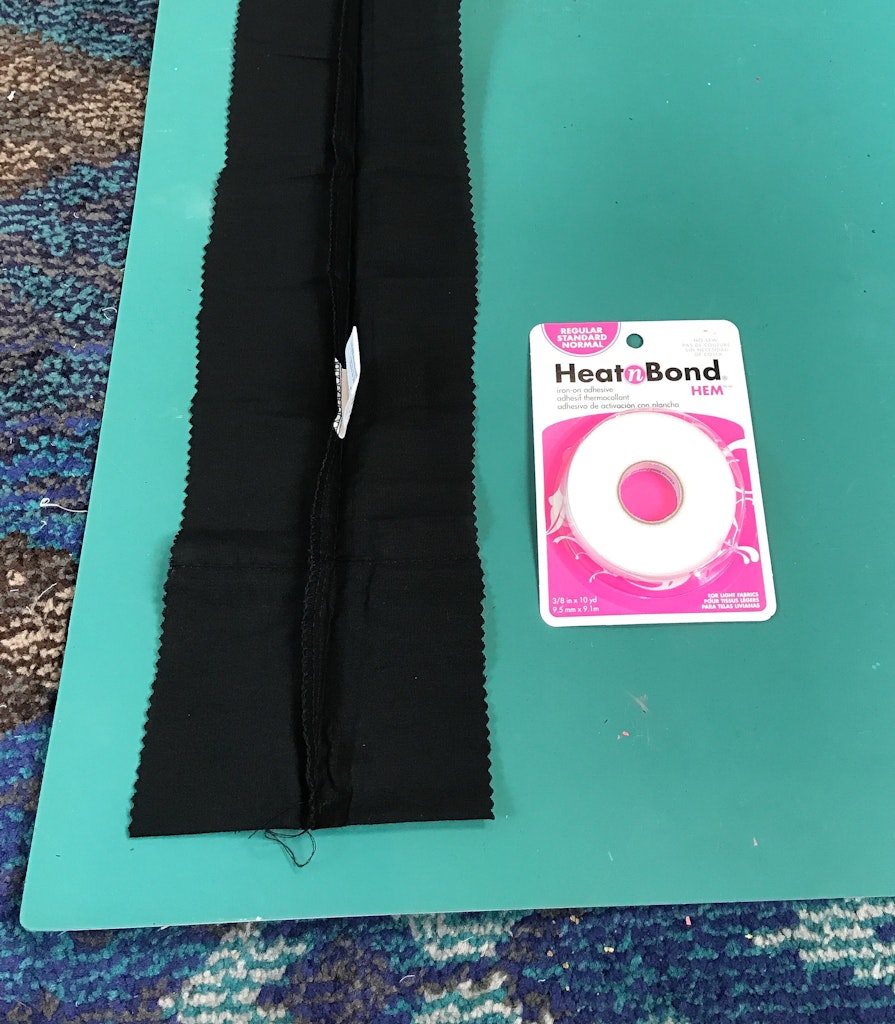
– HeatNBond 3/8″ No-Sew hemming tape – Walmart $1.97 also available at most craft stores (optional – if you want a more finished edge to the treat bag)
Here we go!
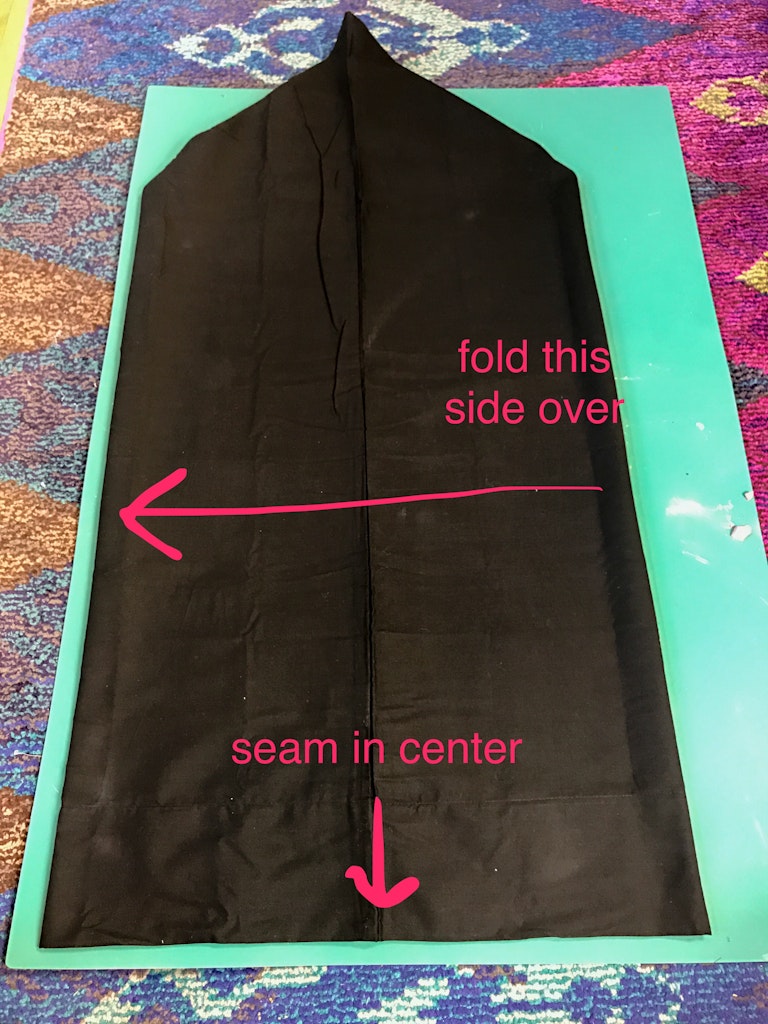
Open up the pillow case fold in half so that the side seam is now in the center of the pillowcase. This will create a point at the bottom. Smooth it out and flatten it.
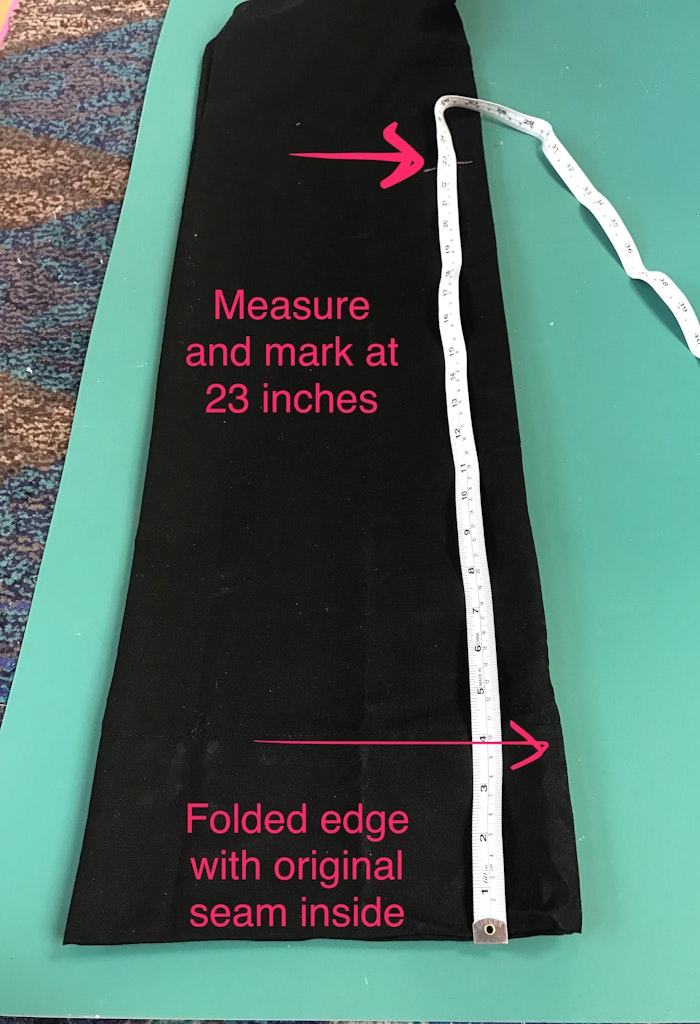
Measure out 23 inches from the top of the pillowcase. Mark in a few places.
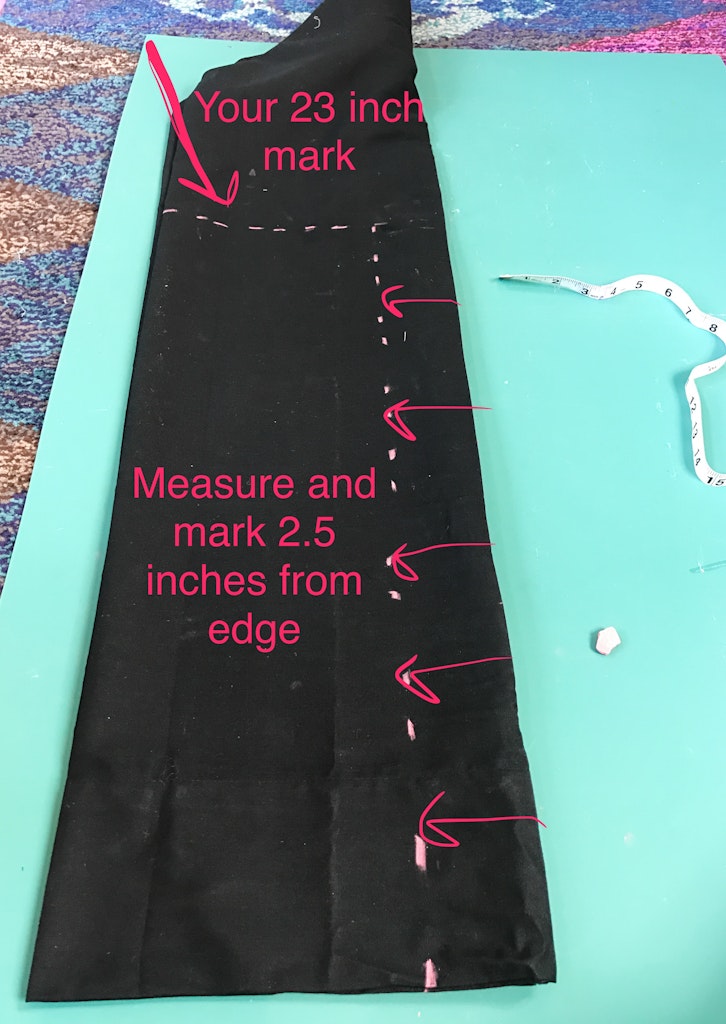
Measure 2.5 inches from the center fold all the way down to your 23 inch line.
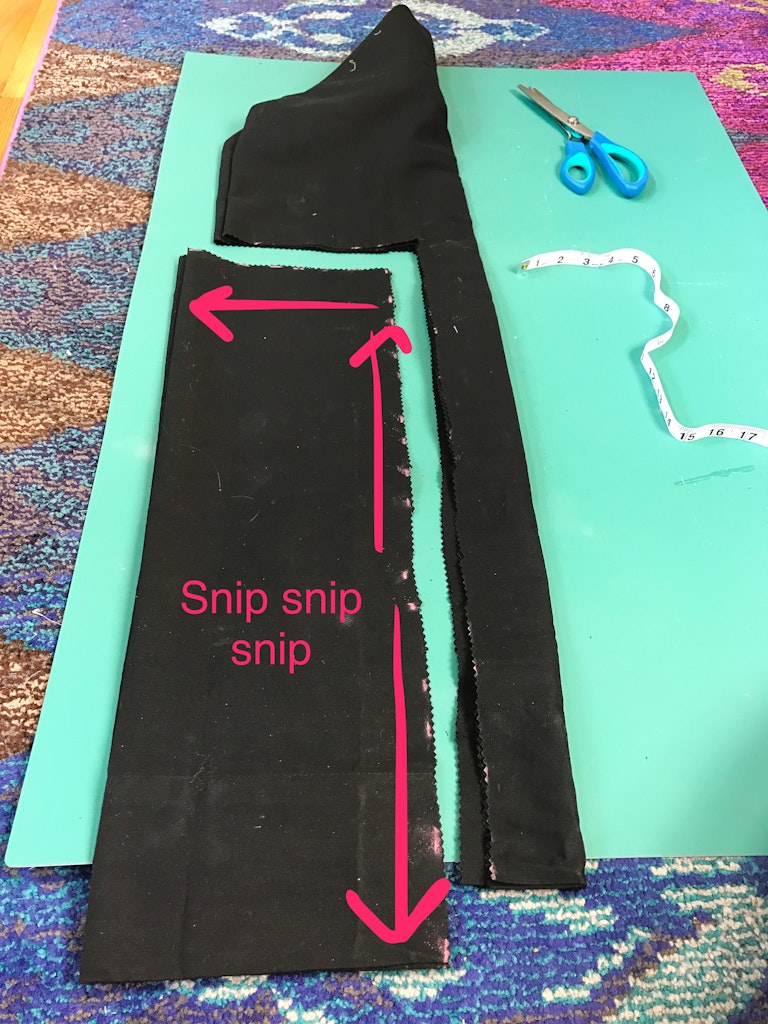
Cut along your marked line. Do not cut where the two lines overlap or you will disconnect the straps from your bag, making it a tad difficult to hold 🙂

If you are keeping the edges raw then you’re done, but remember that some fraying will occur even when using the pinking shears.
If you would like more of a finished edge, then grab your iron and HeatNBond hemming tape and get to work.
Turn your bag inside out and flatten out the straps.
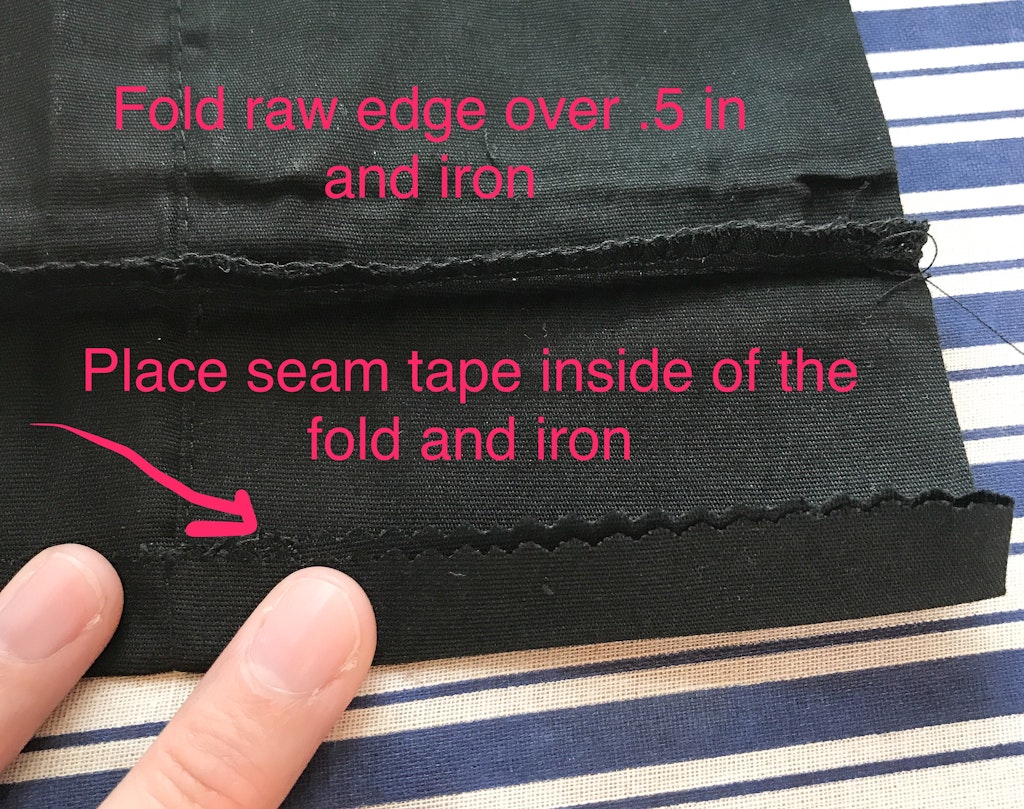
Fold the raw edge over 1/2 inch and iron the fold. Rip off a section of the hemming tape and place it inside of the folded hem. Press the fold down over the hemming tape and iron again to adhere the edge to the hemming tape.
Continue this around all of the raw edges of the entire bag and both sides of the straps.
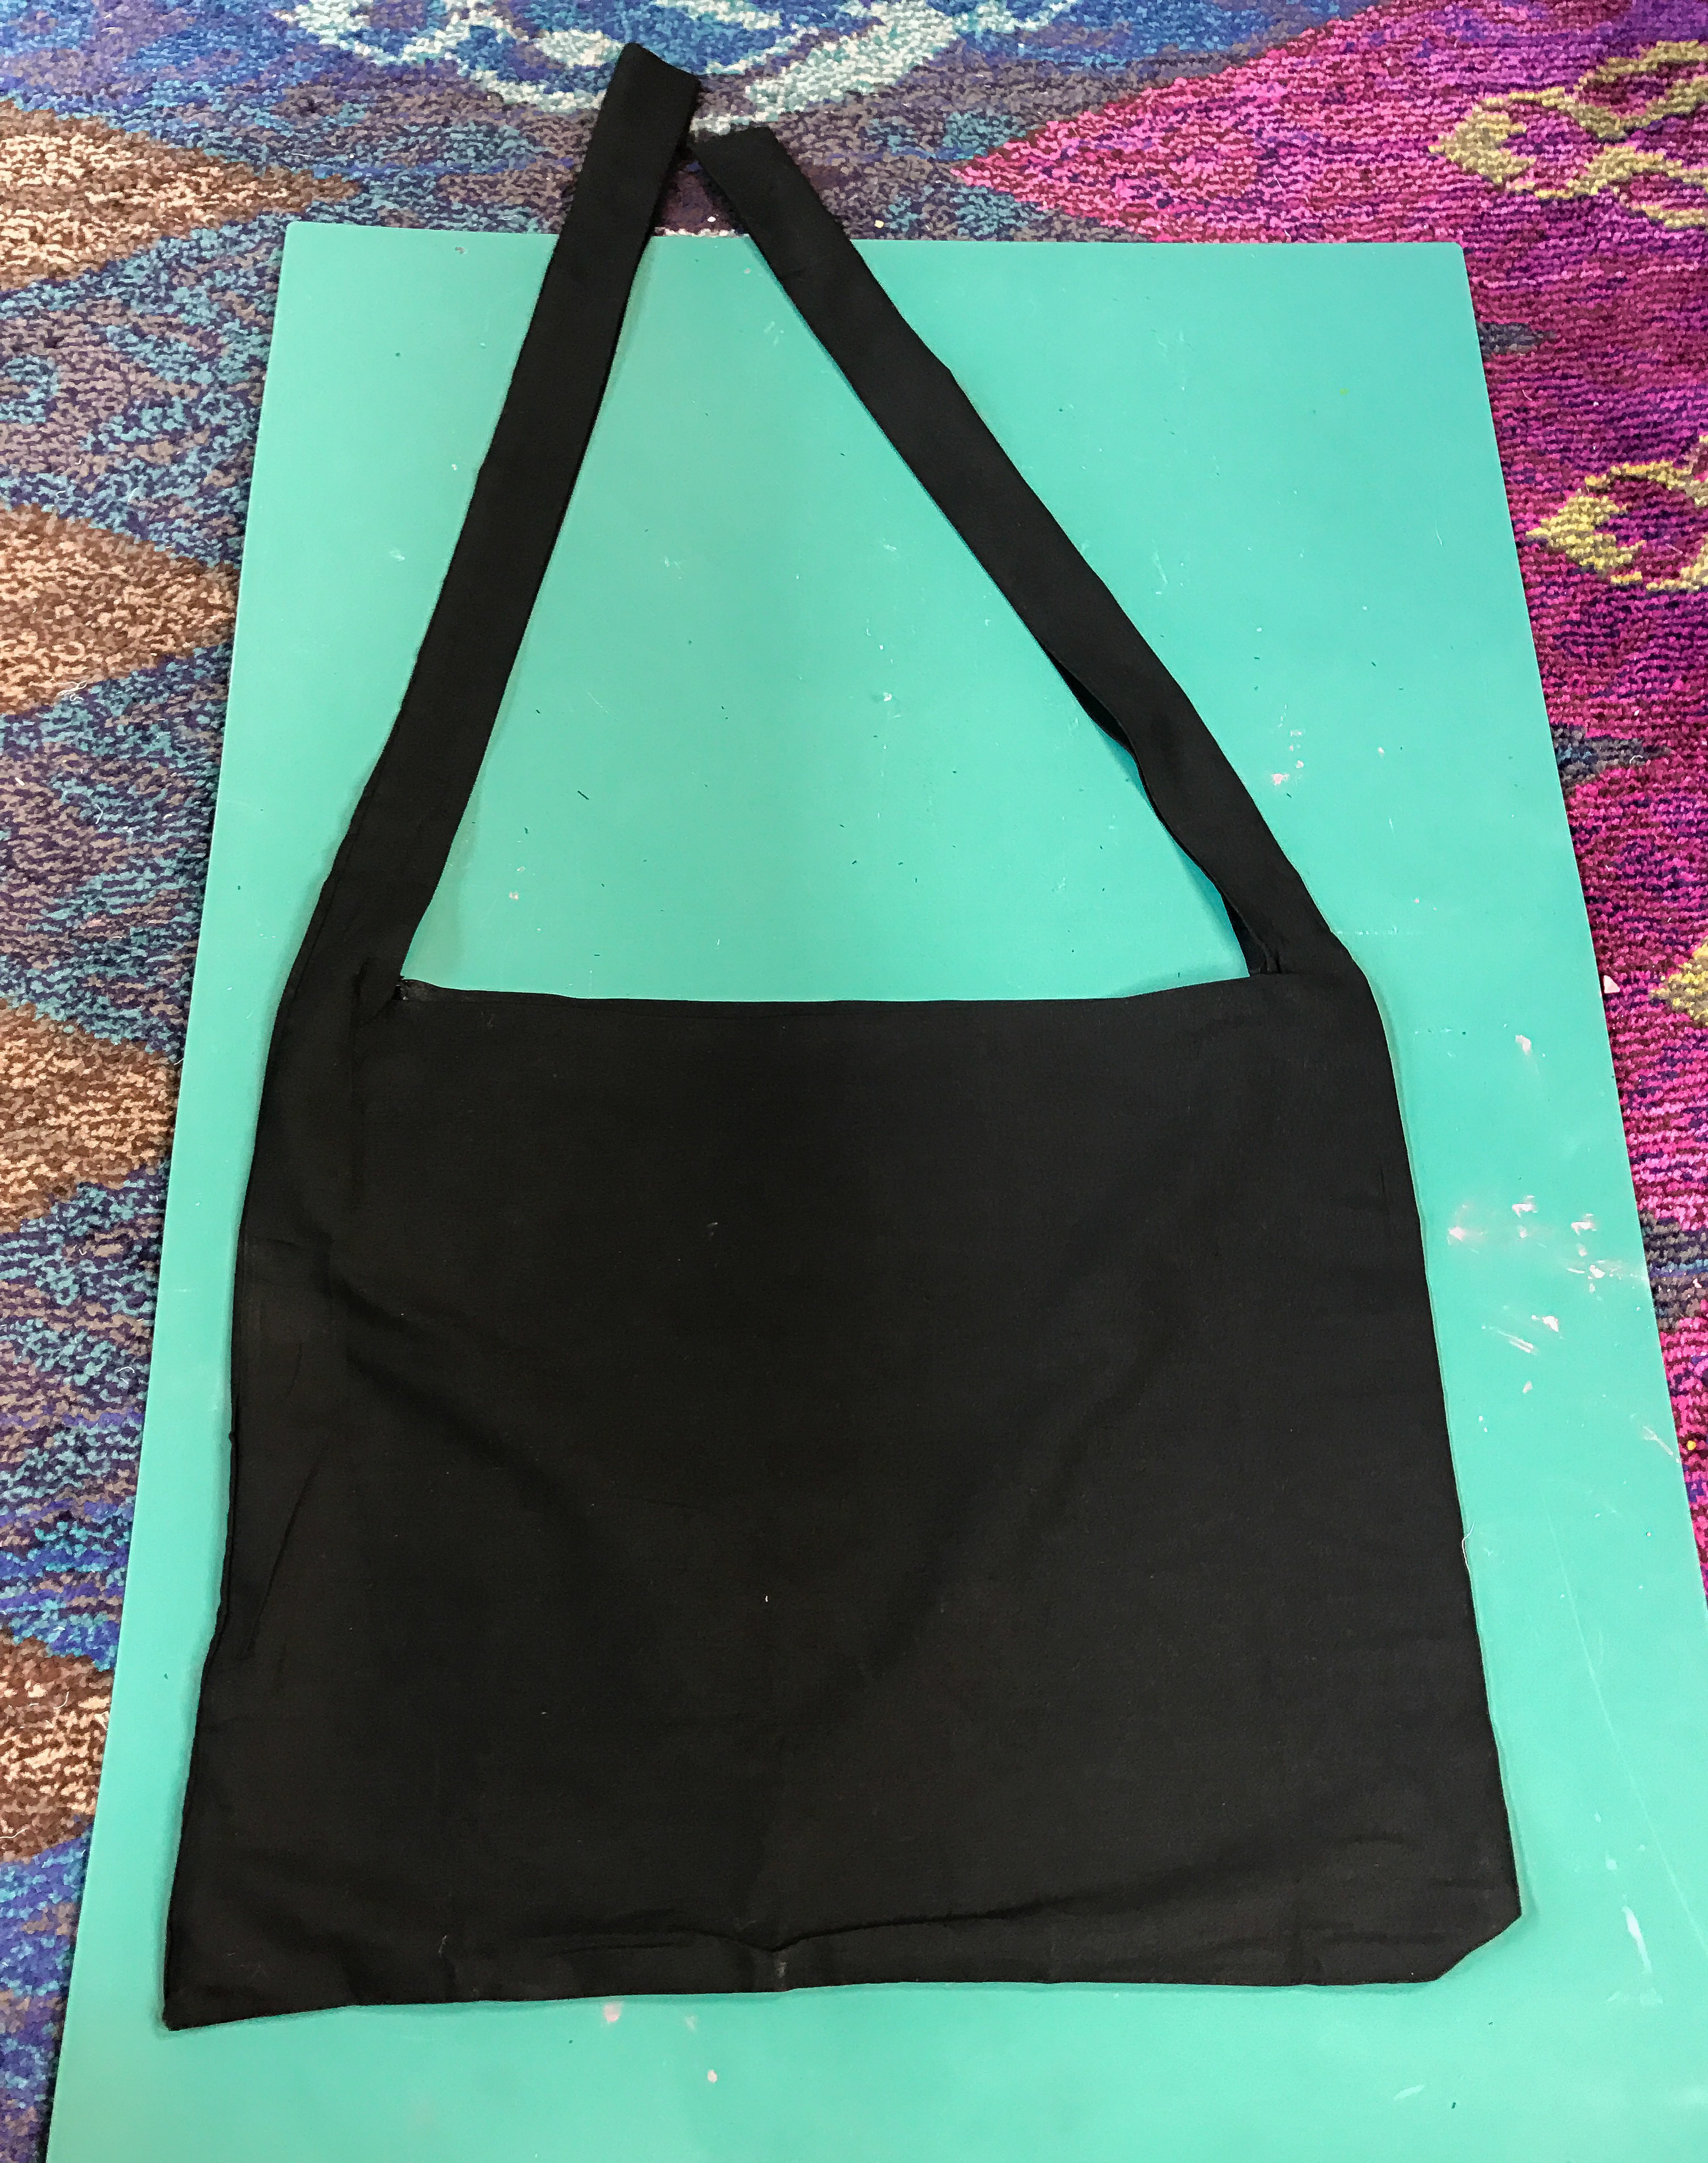
Fold your bag back inside out again so the finished edges are on the outside. Tie the two straps in a knot at the top to fit your kiddo. Mine wear them as a crossbody bag so they don’t swing around as much. Now marvel at your amazingness. 🙂
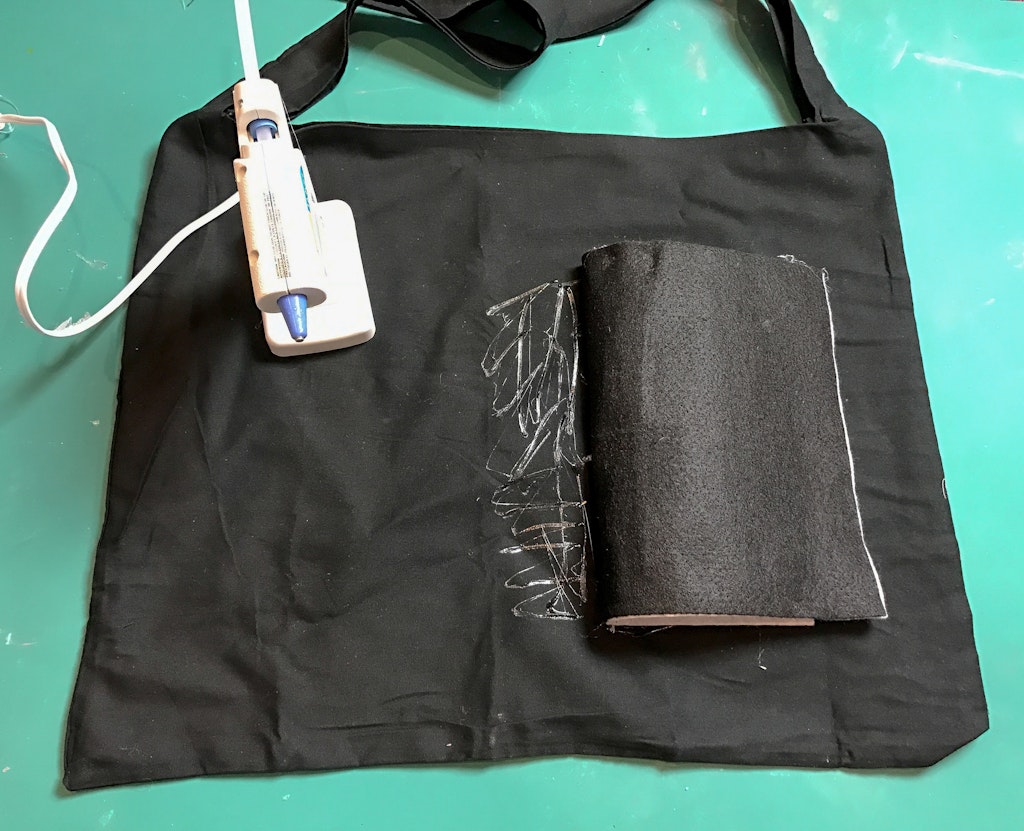
Now you can attach your DIY Halloween Treat Bag Glow Panel to the front using hot glue.

Happy Trick-or-Treating!!!