Simple Embroidery Project – Embroidering A Hat By Hand
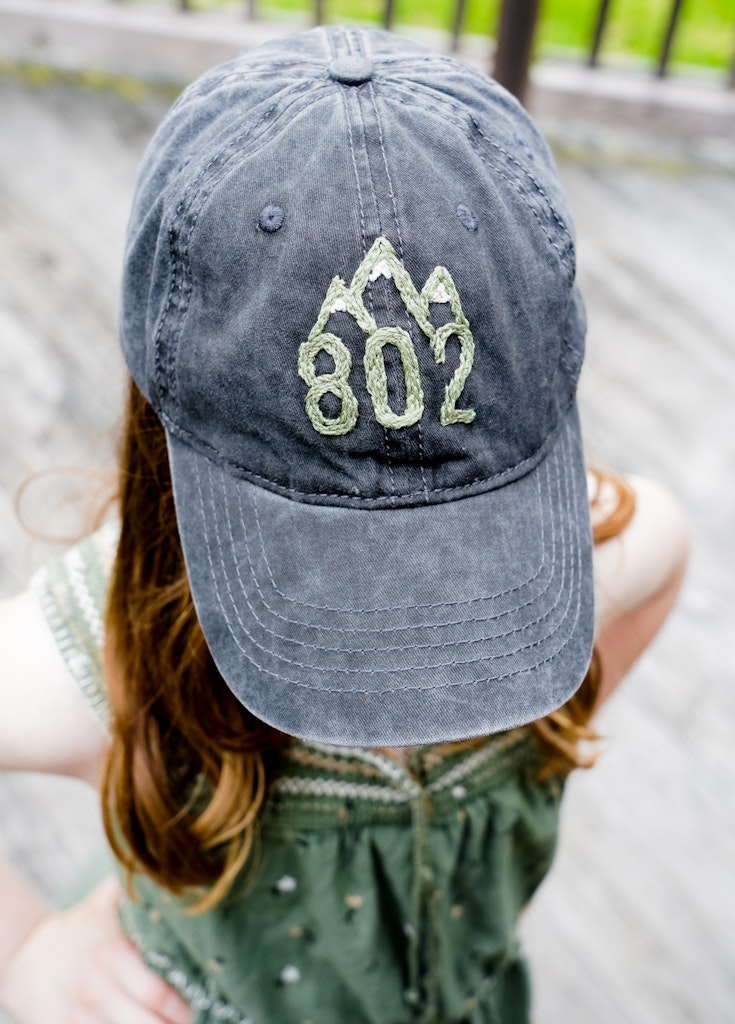
I found this hat at Wallyworld for under $5 and wanted to personalize it a bit. Let me preface this by saying that this is my first embroidery project and I have a lot to learn, but it was so much fun and I can’t wait to add little details to other clothing too. I’ll walk you through how to embroider a hat or any clothing item by hand using a stencil!
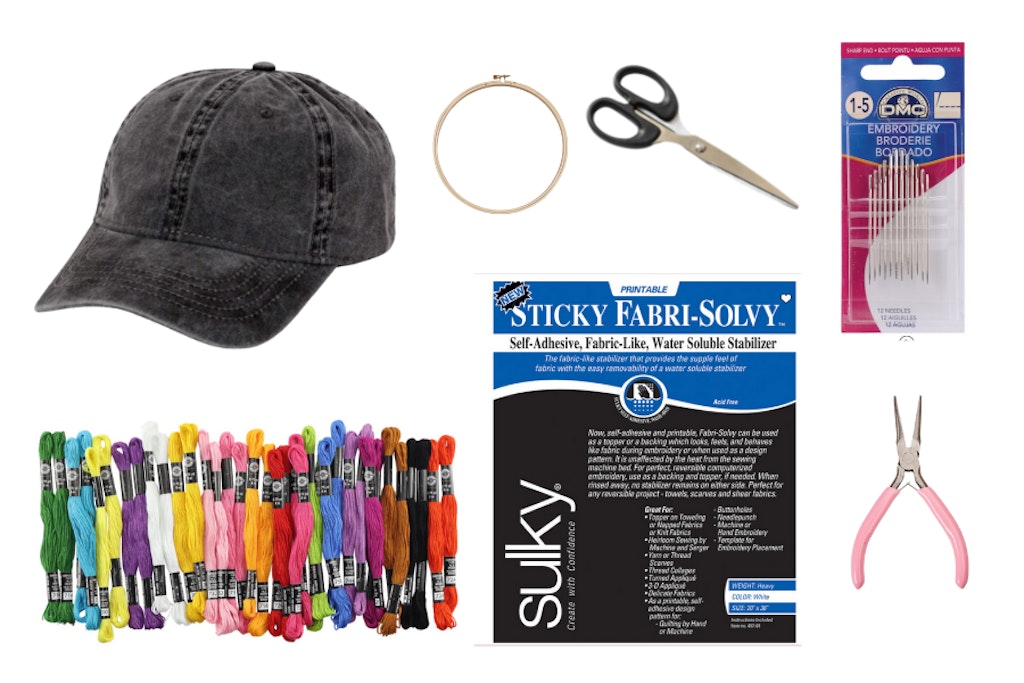
Supplies To Embroider Hat By Hand
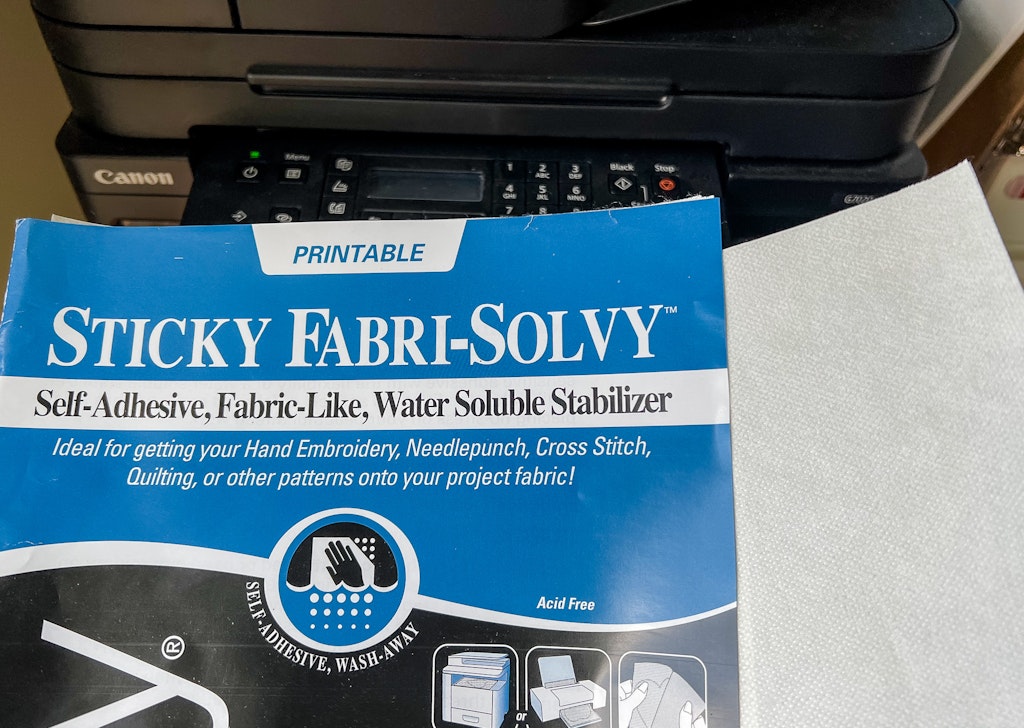
- Sulky Sticky Fabri-Solvy printable embroidery stencil that dissolves in water.
- Scissors
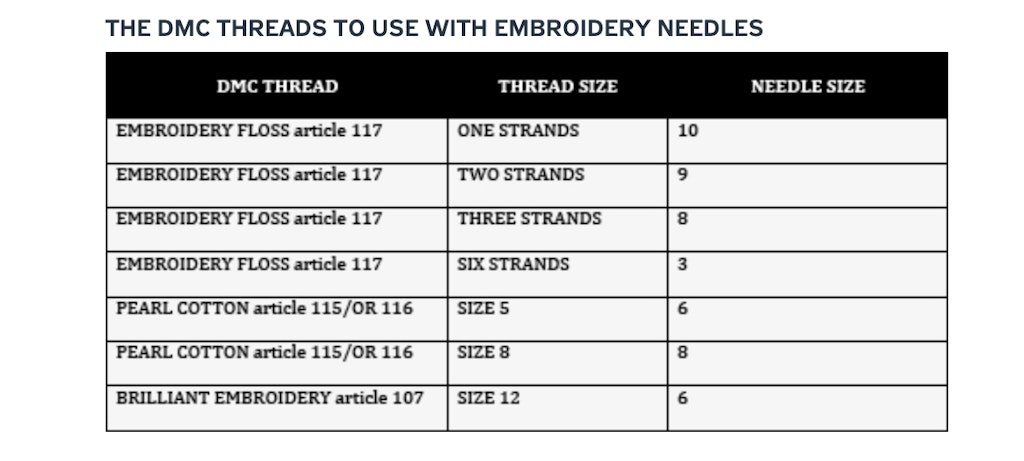
- Embroidery needle – size depends on how many strands of thread you’re using. I used all 6 strands and used a size 5 needle.
- Embroidery Floss
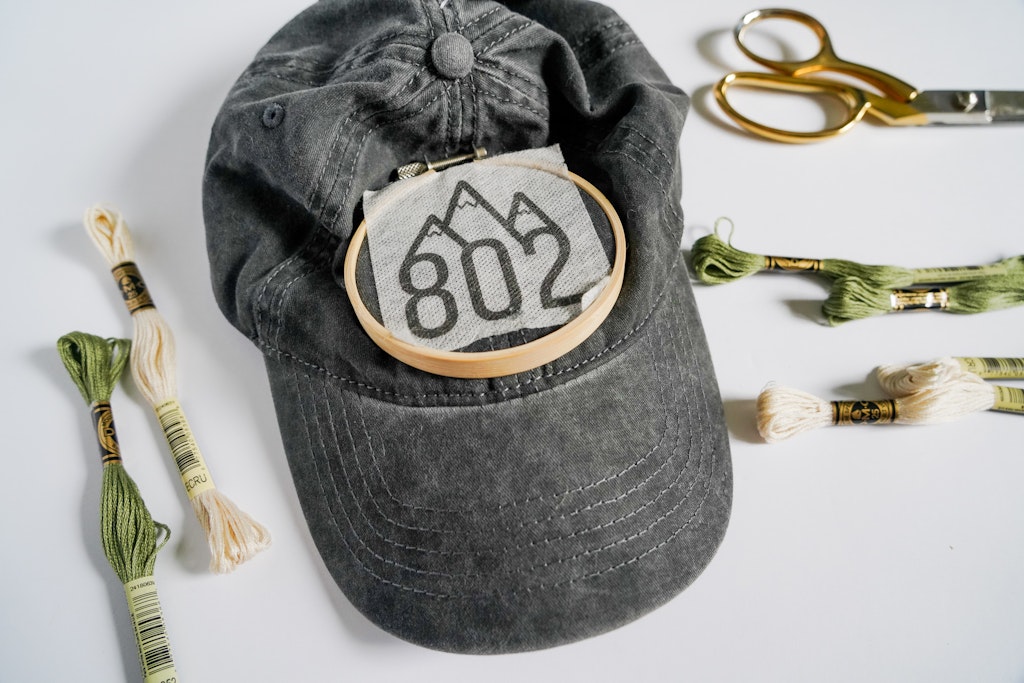
- 3 inch embroidery hoop
- needle nose pliers used for jewelry making
- hat or whatever clothing or item you’d like to embroider. You can use this same process for bags, jeans, shirts, etc.
Since I’m a beginner, I found this useful chart on the DMC website to give us some guidance on choosing needle sizes for different projects. I purchased a pack with varying sized needles to try different ones.
Add Your Embroidery Hoop To Your Hat
Add your 3″ embroidery hoop to your hat or item that you plan on embroidering. Put the inside hoop on the inside of your hat and the outer ring on the front of your hat.
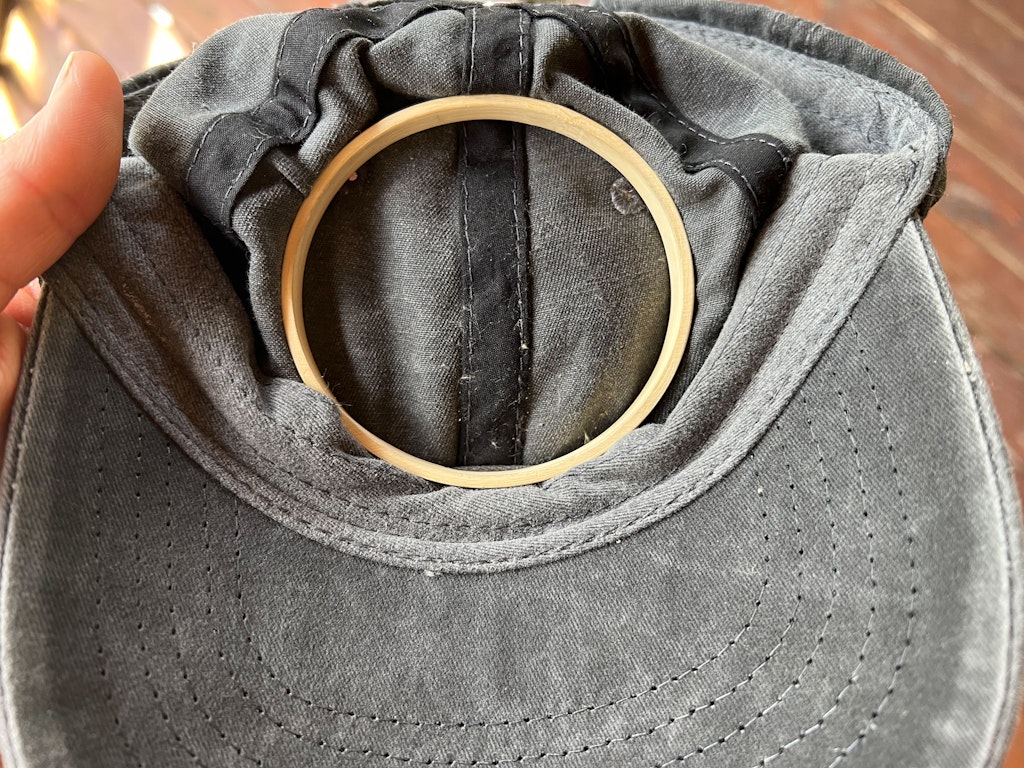
Pull the fabric tight inside of the hoop and fasten the hoop closed.
How To Create An Embroidery Stencil
This printable sticky stencil fabric is amazing. There are different ones on the market, but I used the Sulky Sticky Fabri-Solvy. I designed my image and printed it out directly onto the stencil using my home inkjet printer.
You could also find clipart or images online to print out and create stencils if you don’t want to create your own design.
Cut out your design and peel off the backing to stick inside of your embroidery hoop.
Embroider On Your Stencil
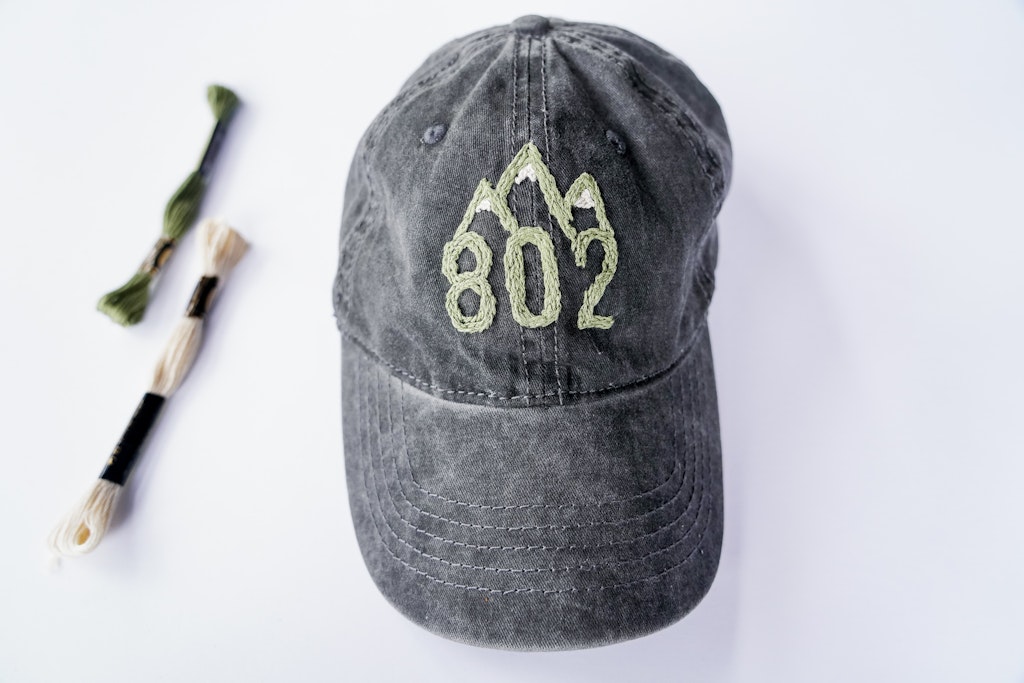
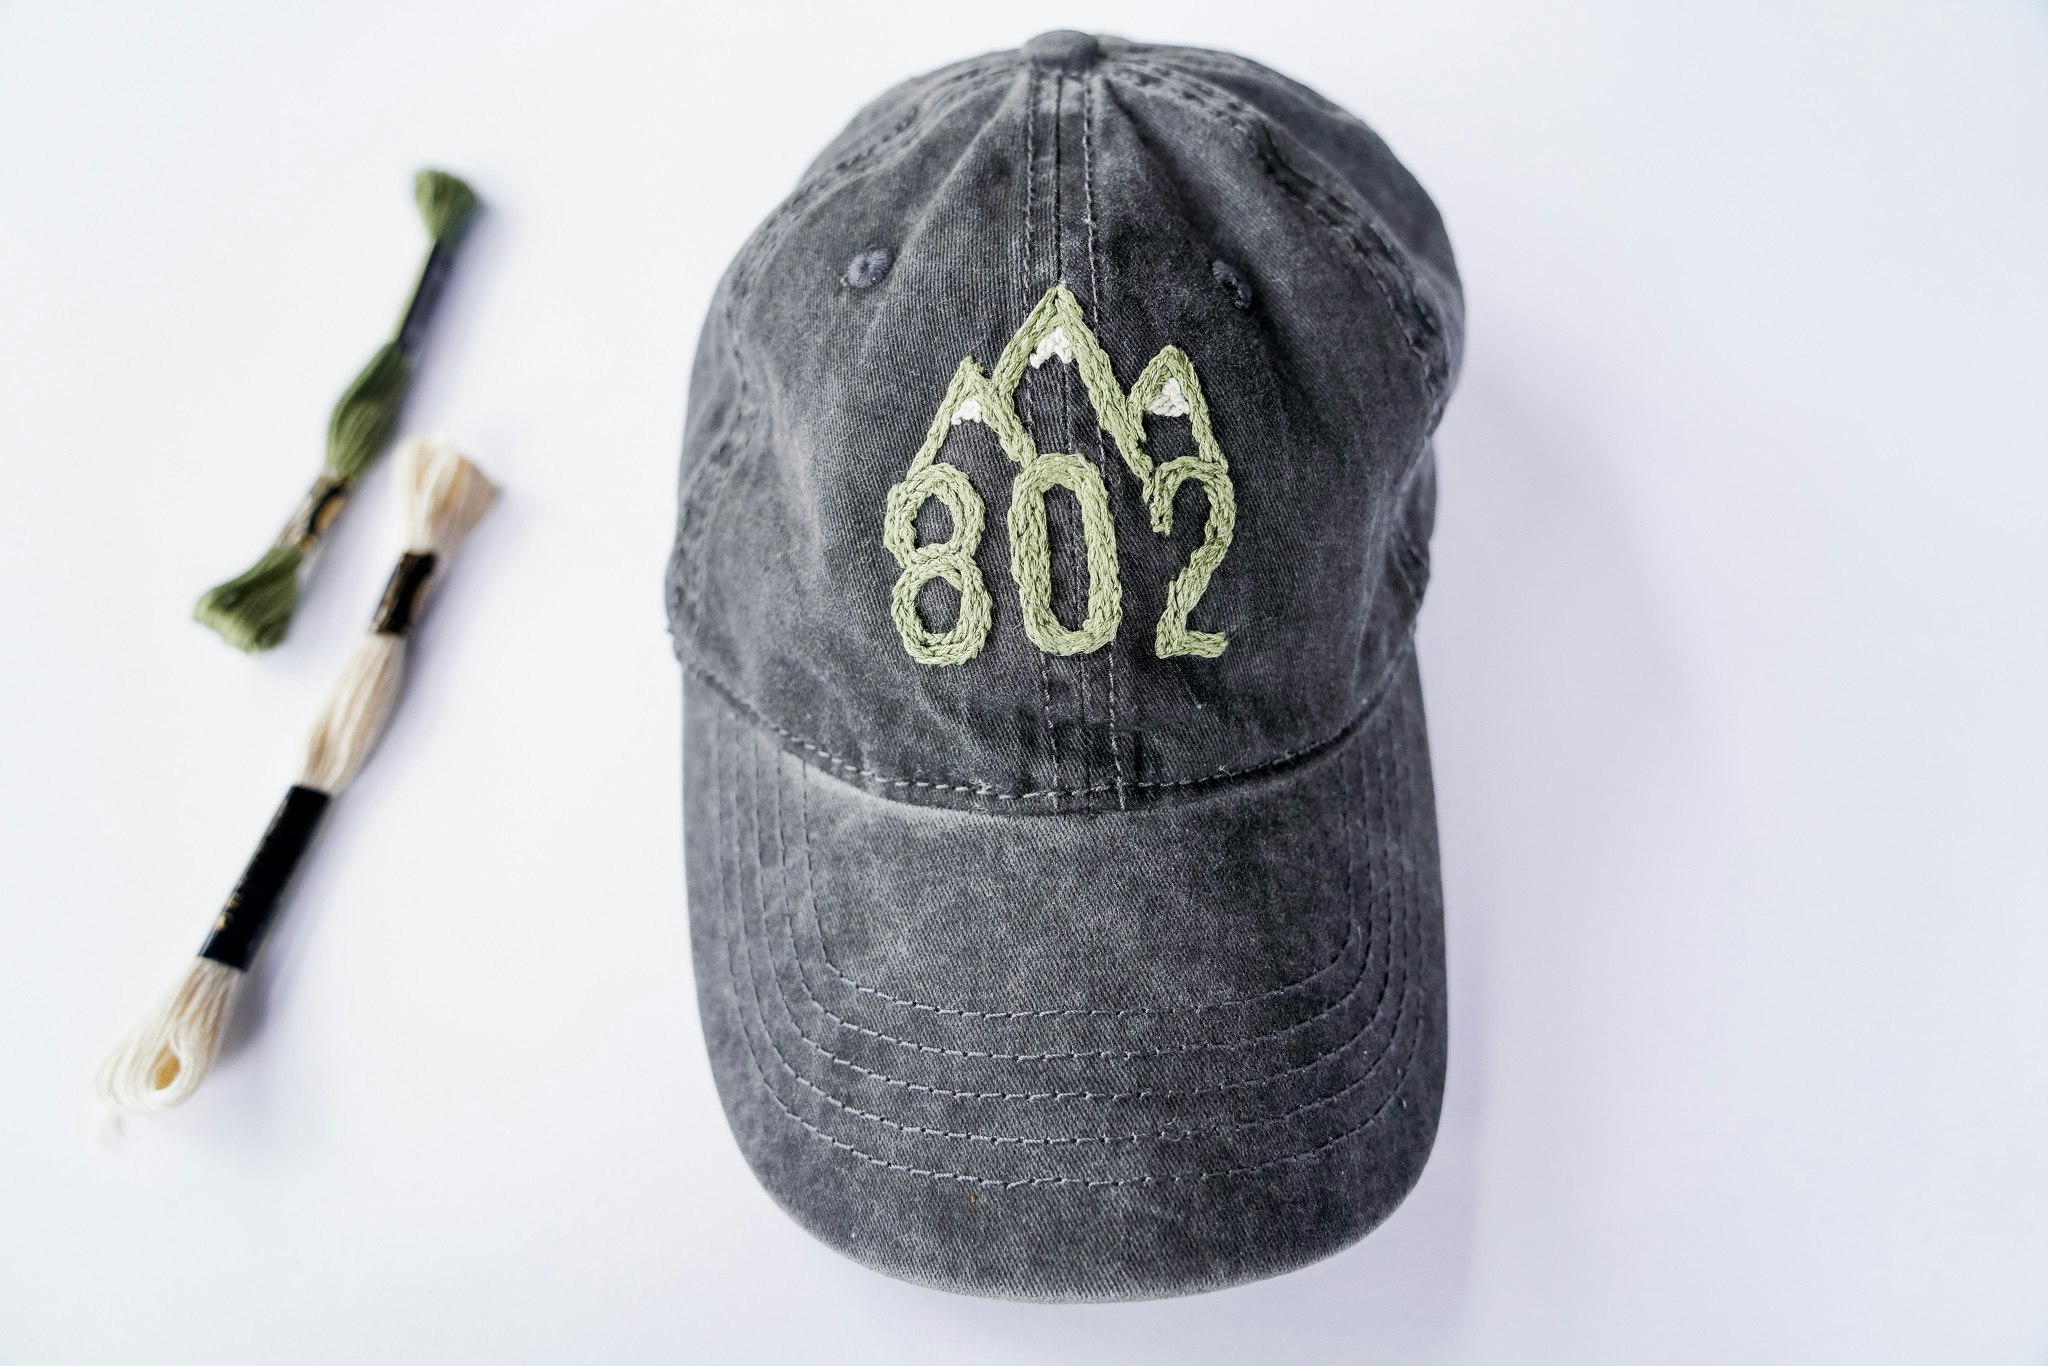
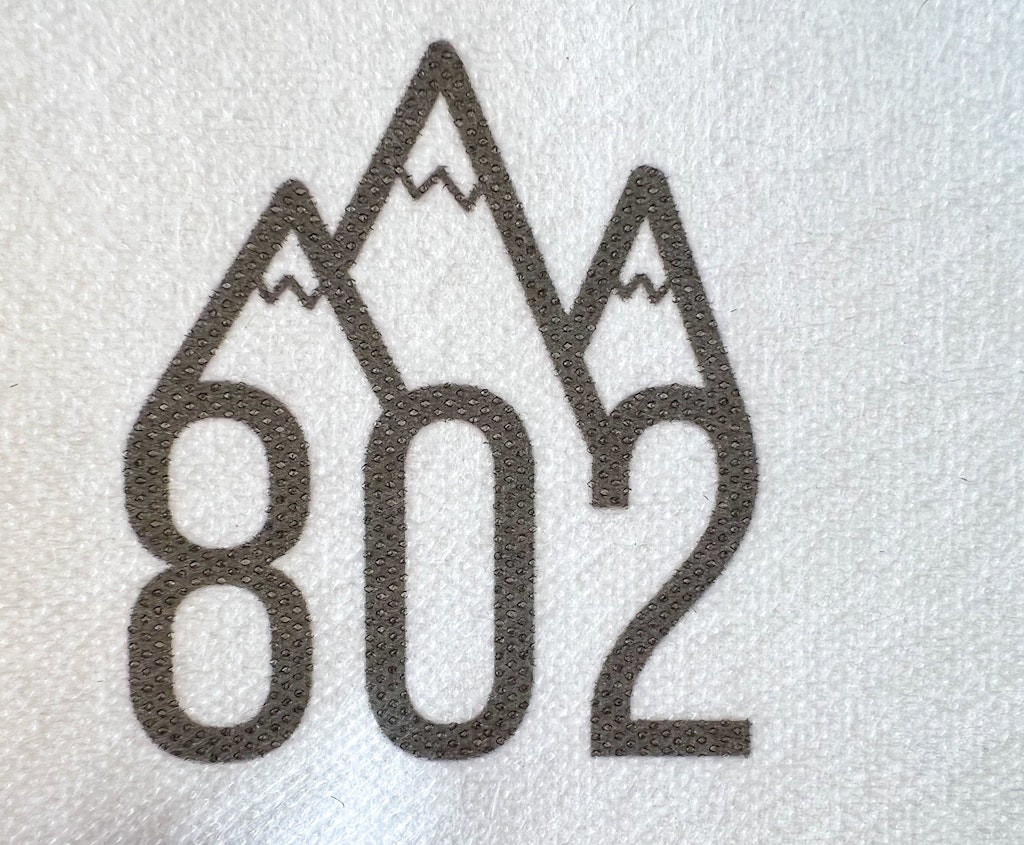
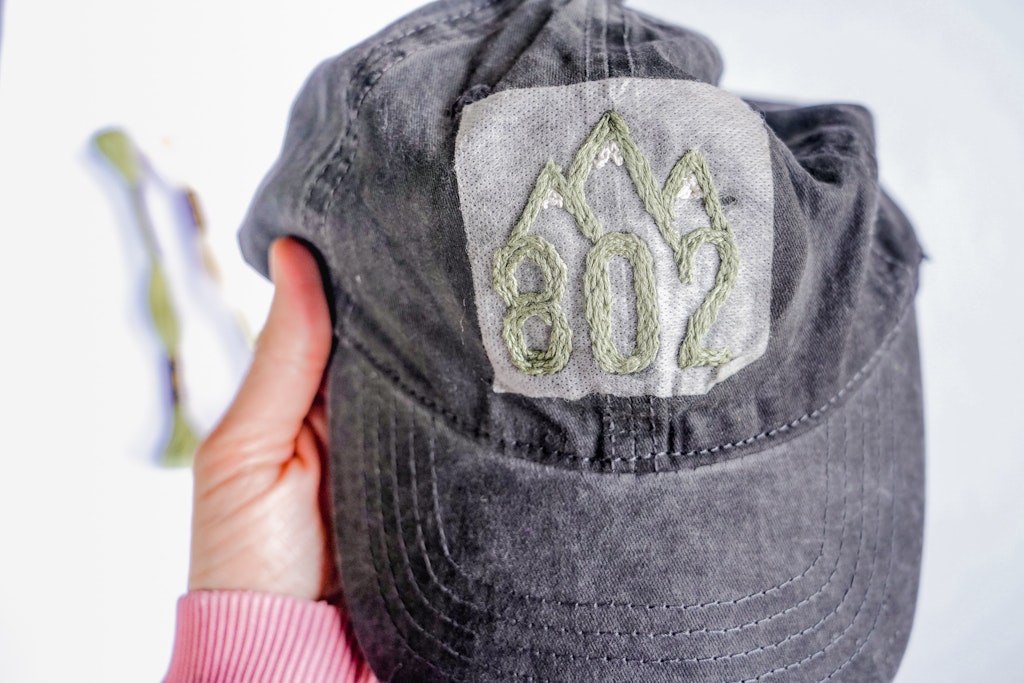
There are a bunch of different basic embroidery stitches you can use depending on your design and desired finished look. I used all 6 strands of floss at once and the end result was a little thicker than I had envisioned. If I tried it again, i would probably try 4 strands.
I had a bit of trouble threading my needle with all six strands so I taped the ends together, snipped it to a point then thread it through the needle head.
I used the split stitch to fill in my design. Here’s a little demo of how to do the split stitch.

I filled in my stencil going around and around with the split stitch. This design only used one little bunch of each color of embroidery floss. And that’s using 6 strands at a time.
I have some practicing to do with my embroidery, but I was pretty pleased how my first embroidery project turned out.
Removing The Embroidery Stencil
Once you finish embroidering your project, it’s time to remove the stencil. Run the item under warm water and carefully rub away the stencil.
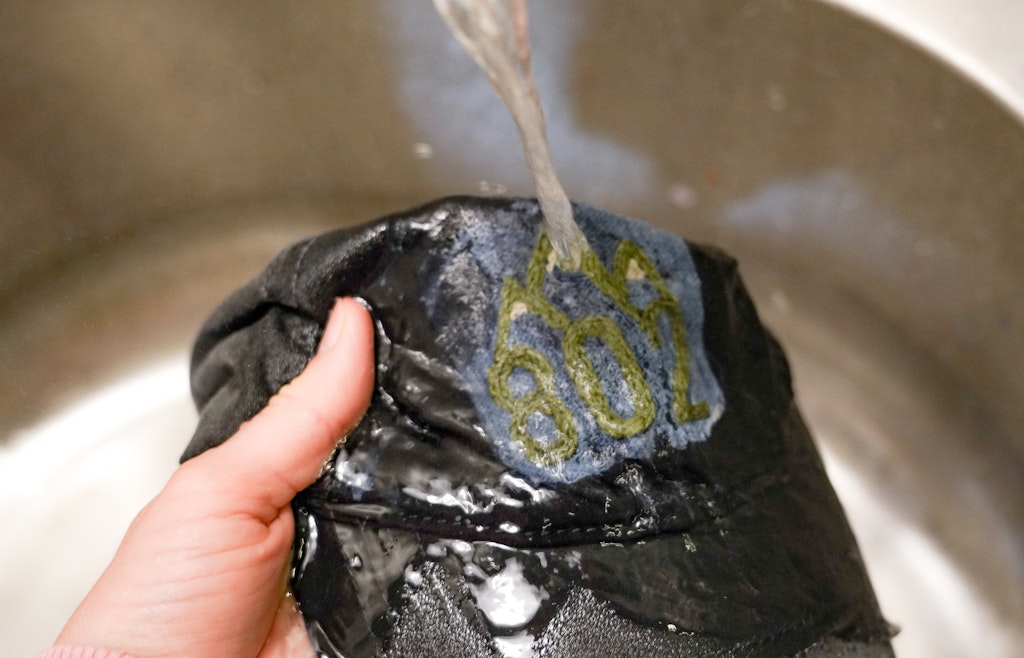
Let your project dry and it’s ready to wear!