
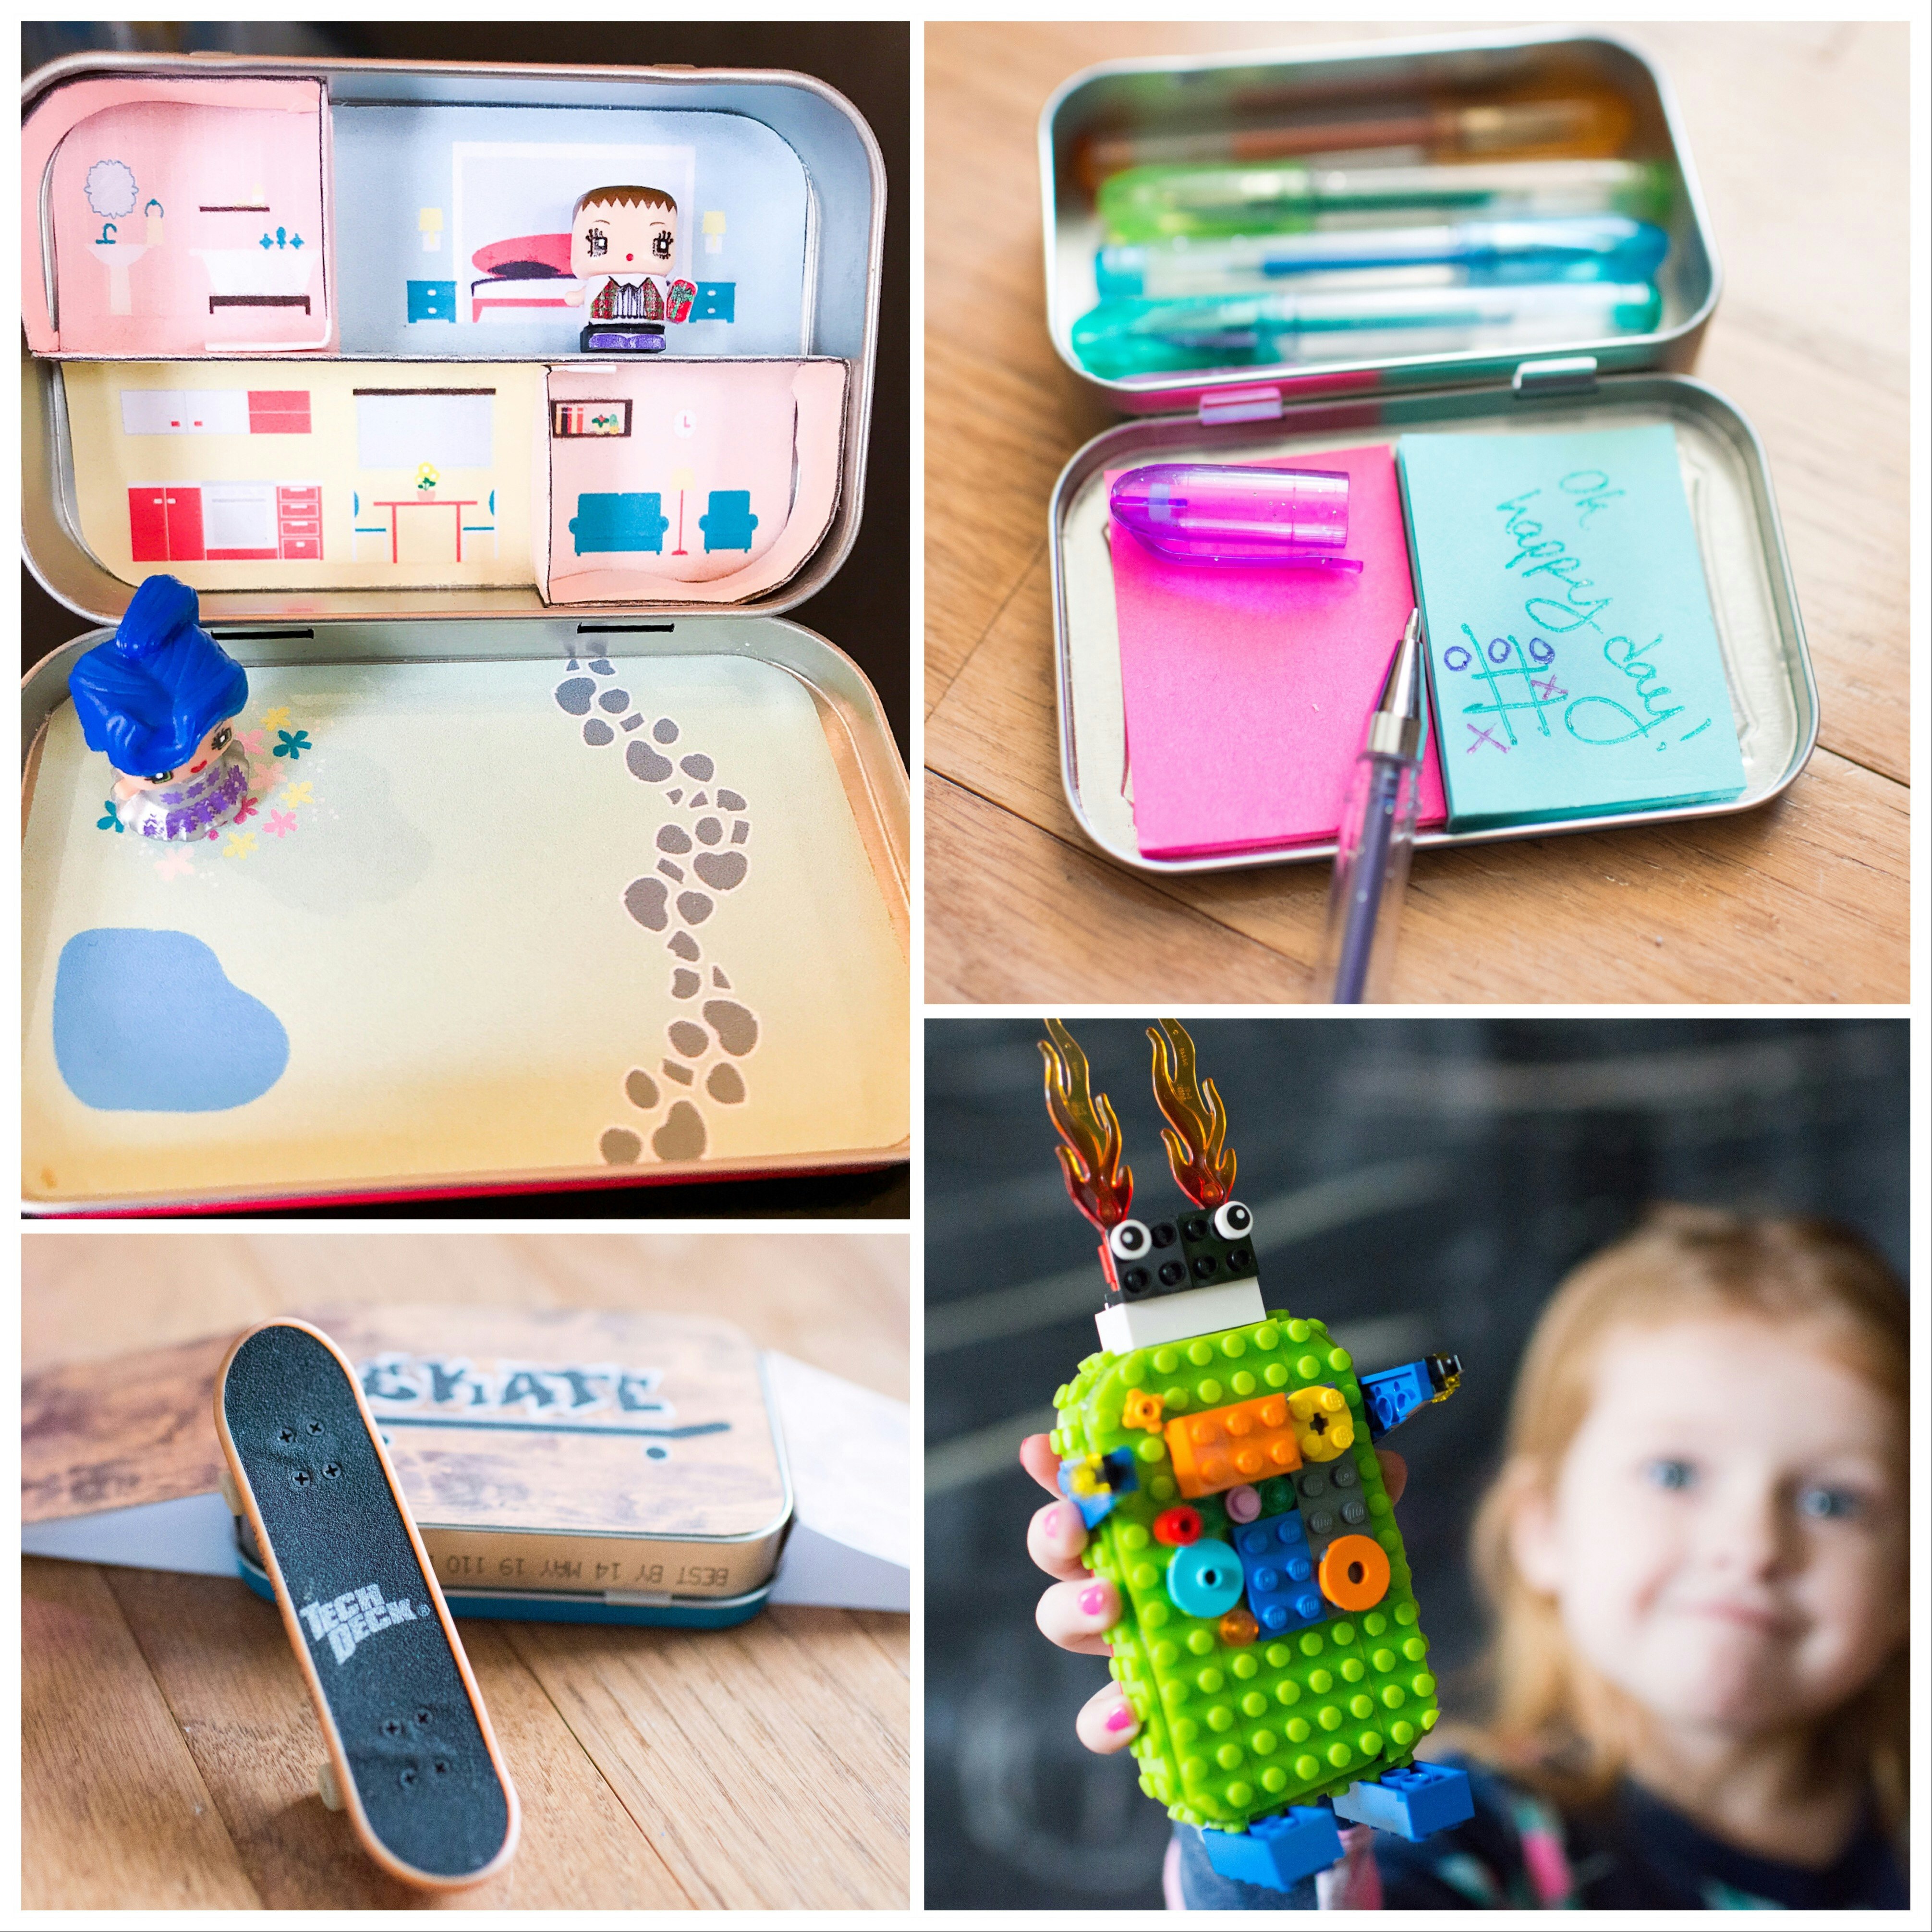

In the spirit of recycling and reusing we save those cute little Altoid tins to use for things such as mini first aid kits, and purse friendly toy containers. They have stood the test of time, but looking at them recently we thought, hmmmm….we can do even better than a simple container, let’s make them fancy! Below are instructions on how you too can make adorable little travel playsets in 5 minutes or less AND give the earth a hug by reusing objects 🙂
1. Altoid Tin Dollhouse & Minecraft World
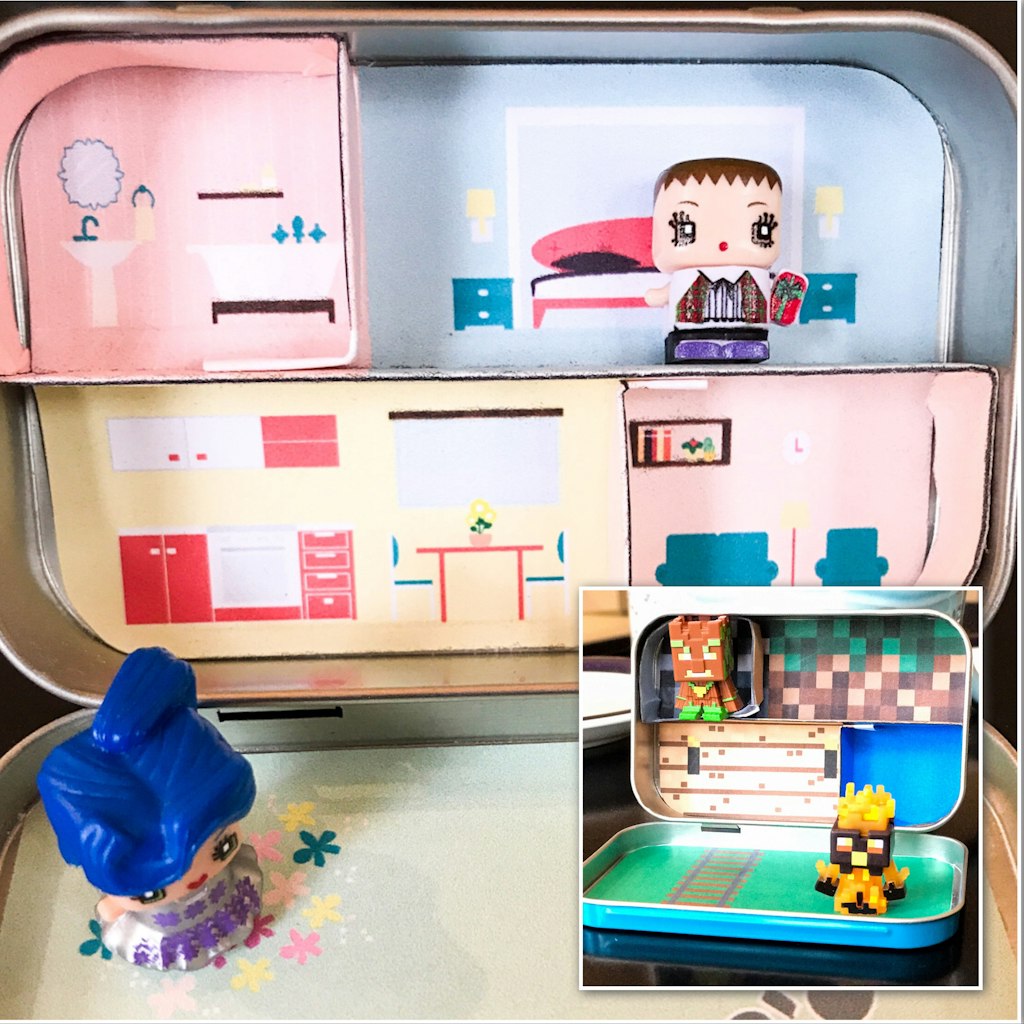
Start by downloading and printing one of the two free images below.
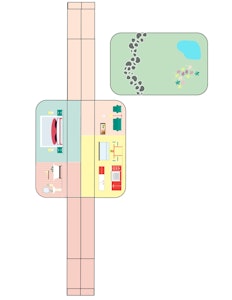
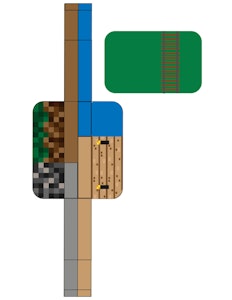
Once it is printed, cut around the edge of the templates. PLEASE NOTE- due to printer margins, part of the template (the one that looks like it has wings) will not print to the edge. Please cut along the wingALL the way to the edge of the paper to include the white space as well.
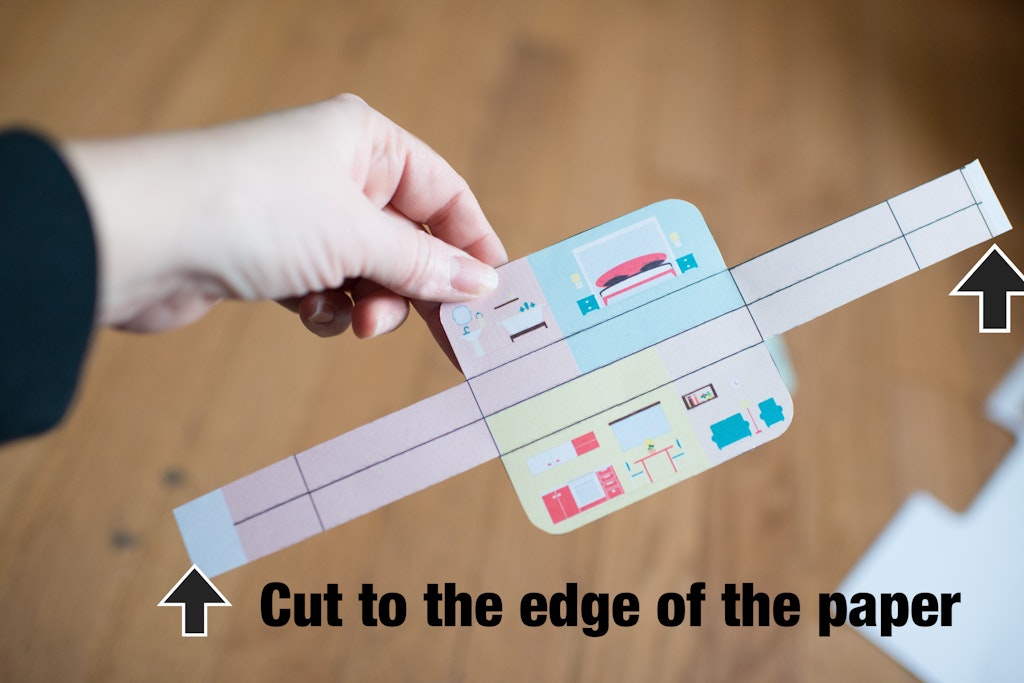
The resulting template will be 11.5 inches long as shown above.
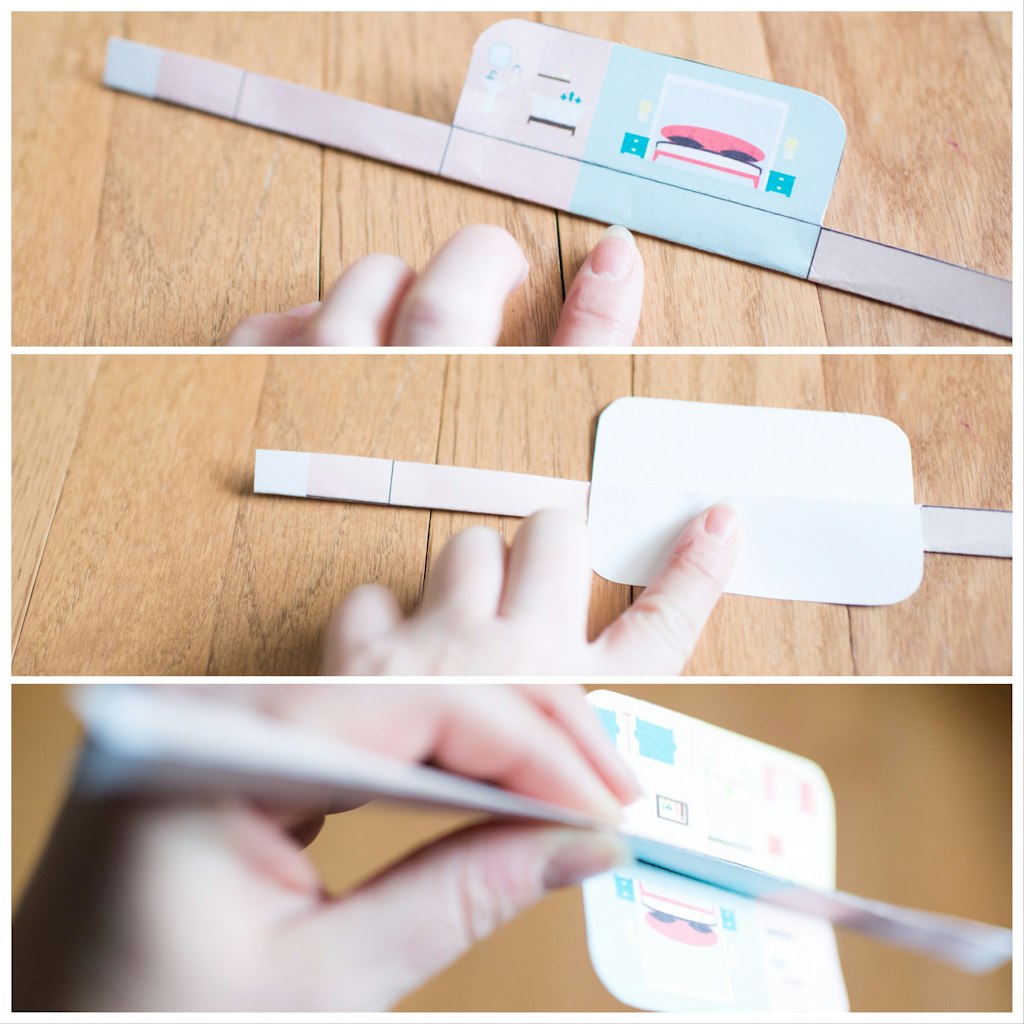
Fold your template in half. Next fold the top portion down (the part that includes the bedroom). Flip it over and fold the bottom portion (that includes the kitchen) down as well. You should now have a paper that resembles the second image above.
Fold the wings on the solid black lines as shown in the image above.
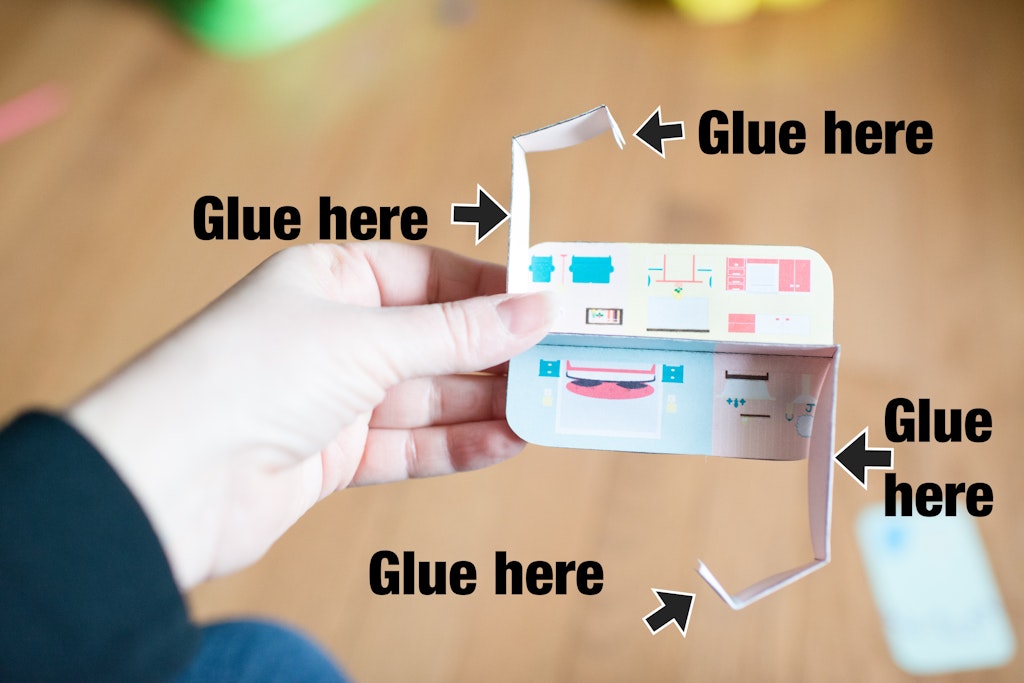
Using glue, cover the back of the flat portion and adhere to the deep portion of the tin. Use glue again to adhere the curved portion of the paper and the small white flap to the top of the divider.
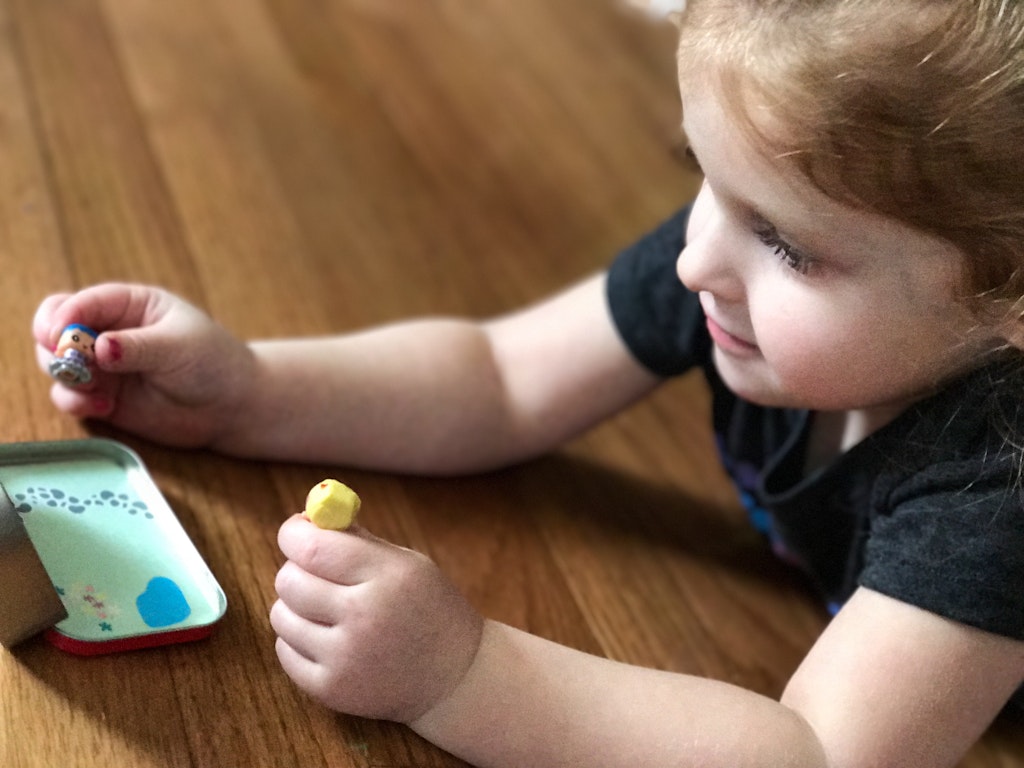
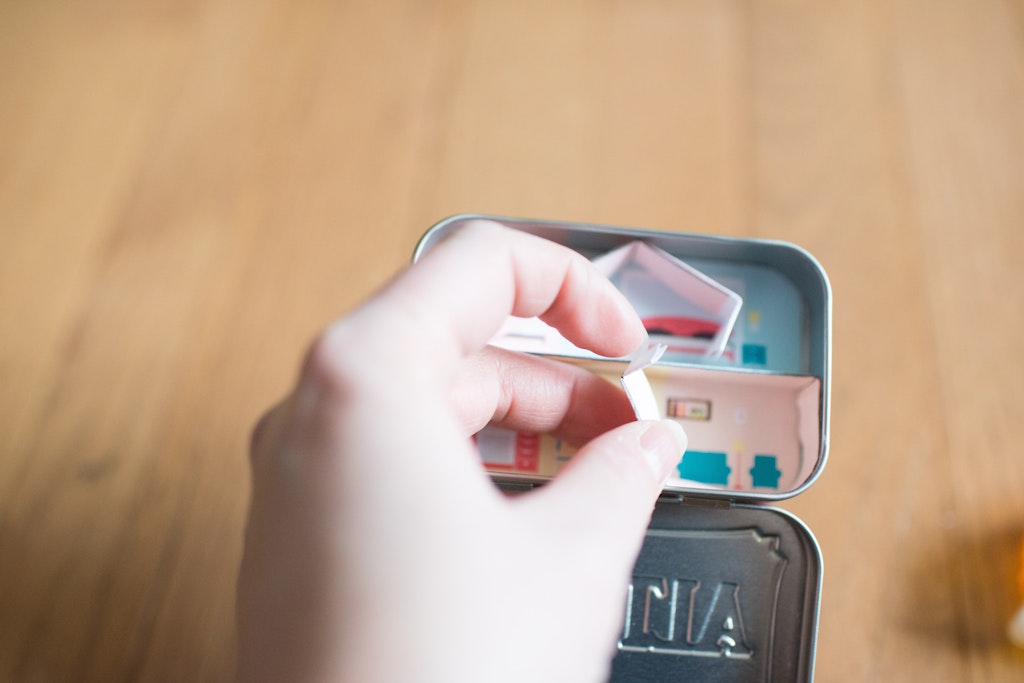
And you’re done! We added a few Mini Mixieqs (think vintage Polly pockets pixelated). Their outfits and hair can be changed for additional entertainment!
For the Minecraft world, we used a couple of Minecraft Minifigures or some from the Minecraft blind boxes.
2. Altoid Tin Lego Design-A-Robot Kit
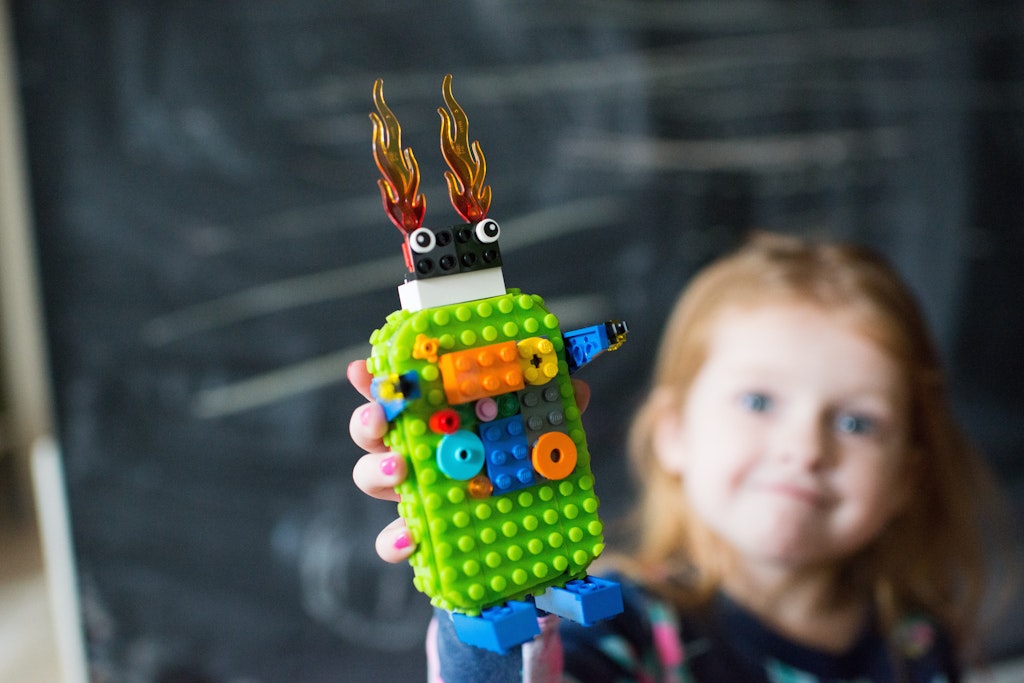
It’s like Mr. Potato head…but with legos… and more options…and no potato; ok it’s not like Mr potato head at all, but you get the idea :).
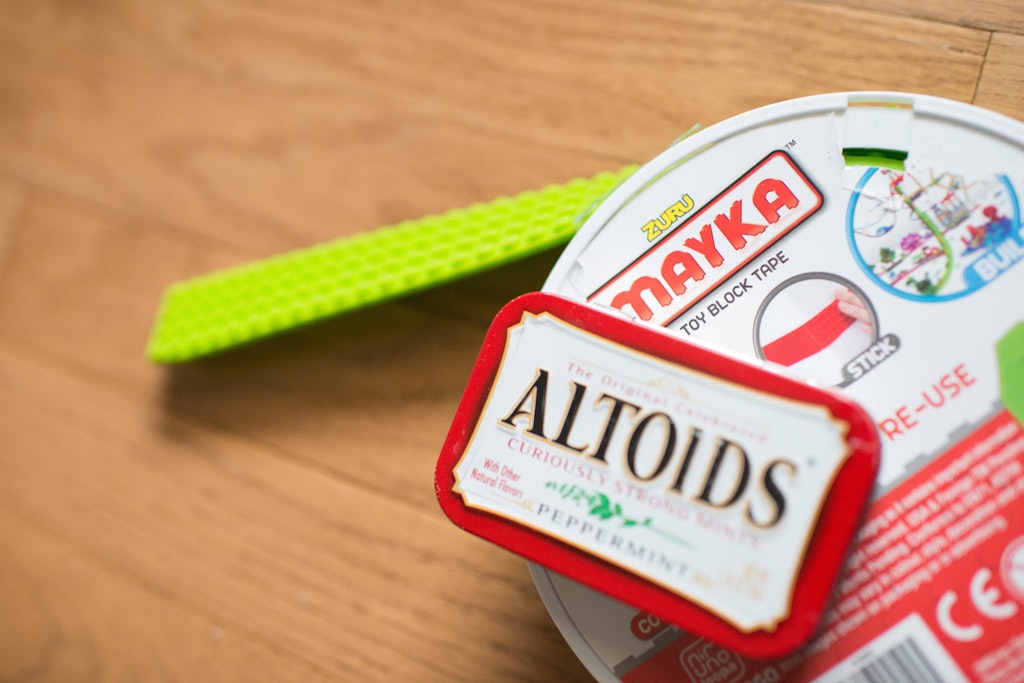
Start with some of the super neat Lego flexible tapes. We picked ours up from target but you can find similar ones here.
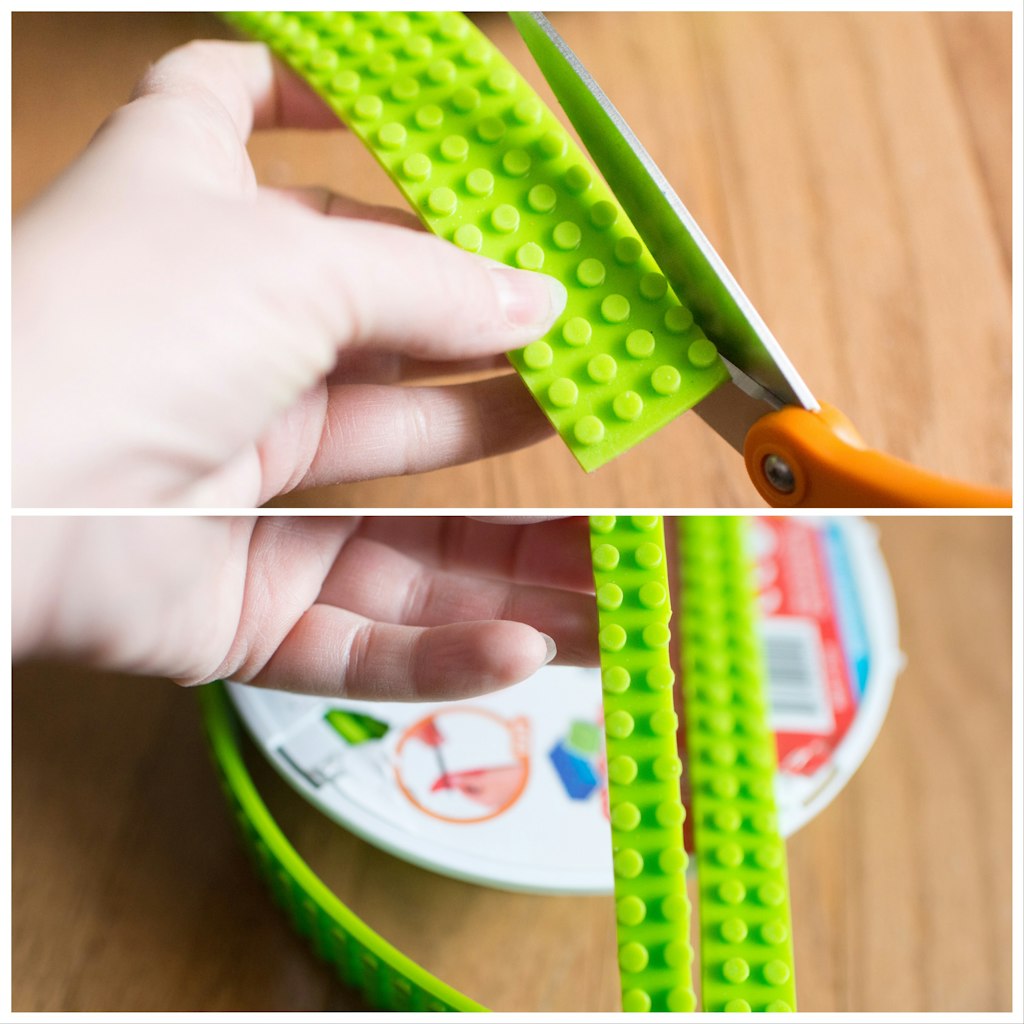
Trim the edges so that it is as close as possible to the bumps without actually cutting them. This is important so that the lid of the container still opens.
Start halfway down one side of the container. We recommend adding a little dot of hot glue at the start and finish of this wrap. All other pieces stayed perfectly in place after some wear and tear, except this weak point. A little hot glue to the rescue!
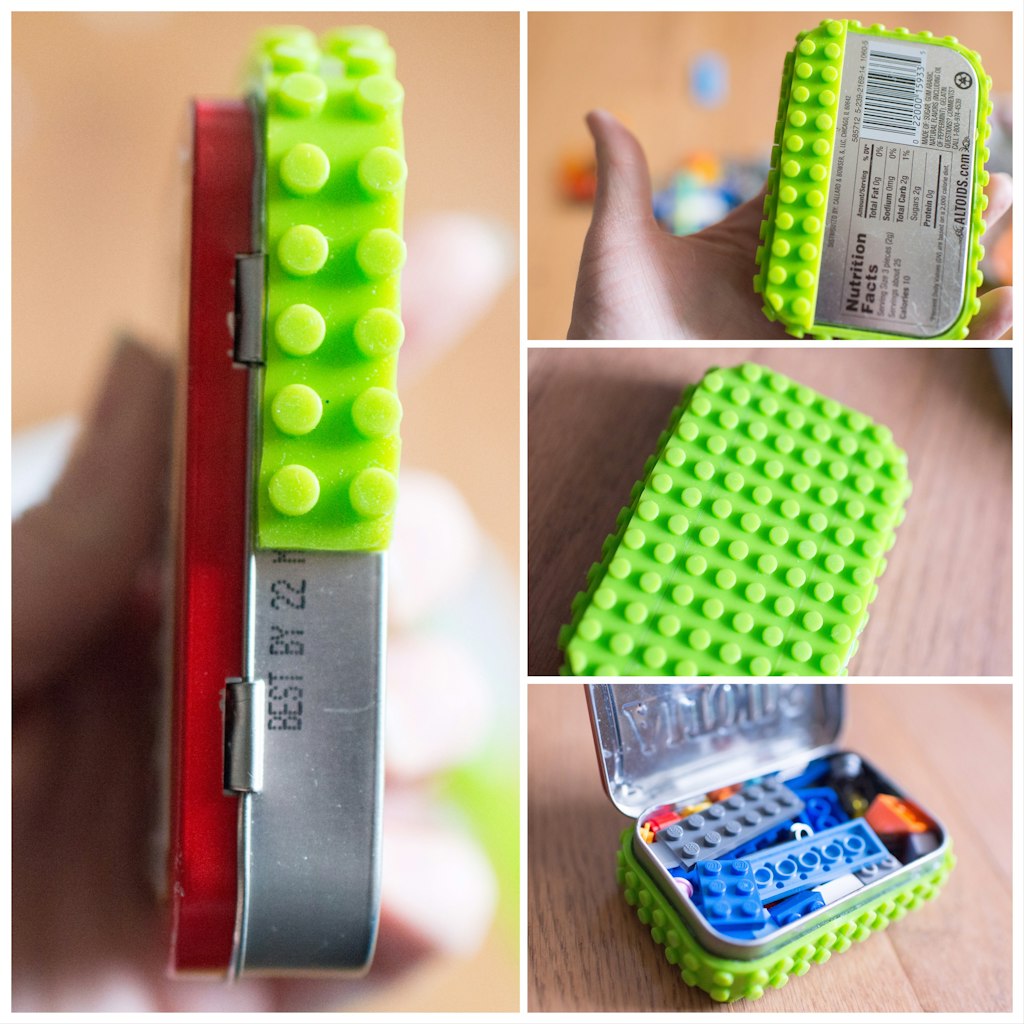
Starting from one edge, work your way across the bottom portion of the tin until it is also covered with Lego tape. Add any of those extra Lego pieces you have floating around the house and voila, a Lego not-so-potato head-travel-tin.
3. Altoid Tin Skate Park

My son has been obsessed with skateboards lately. I’m obsessed with the miniature version since the percent chance of injury decreases dramatically?. All you need is a couple of pieces of cardstock, glue, and of course a mini skateboard. This little skateboard was a gift, but similar ones can be found here or a variety pack here.
t this project by printing out our template below. We printed the image out on card stock to add a little stability to the ramps.
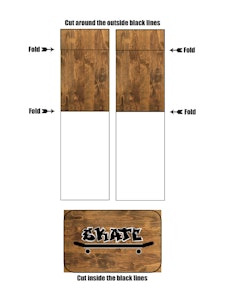
Cut around the outside edge of each of the three template pieces.
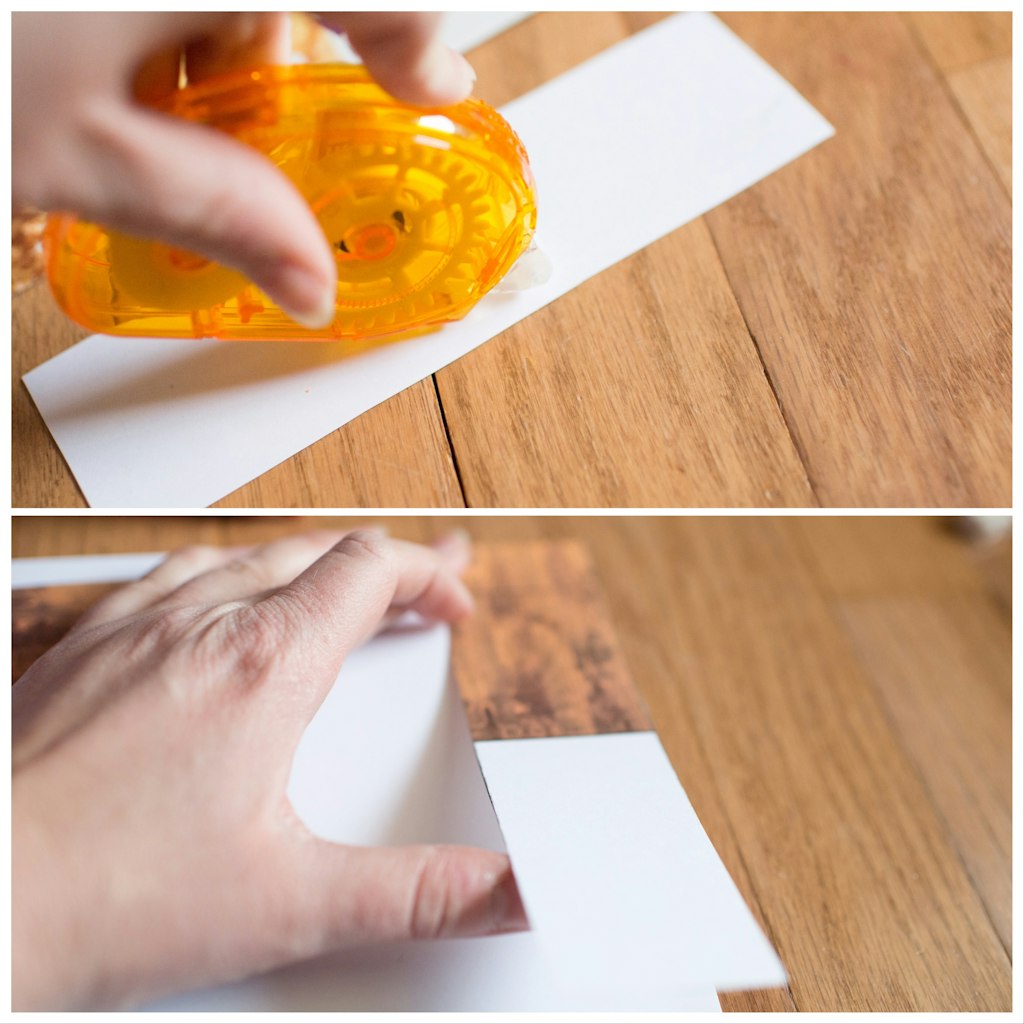
Add glue to the two ramp pieces (the two pieces that don’t have the word “SKATE” on them). We used Glue tape so that it would be as smooth as possible. Once the glue is applied, adhere them to the second piece of cardstock, again, making the ramps more sturdy. Cut the ramps out one last time.
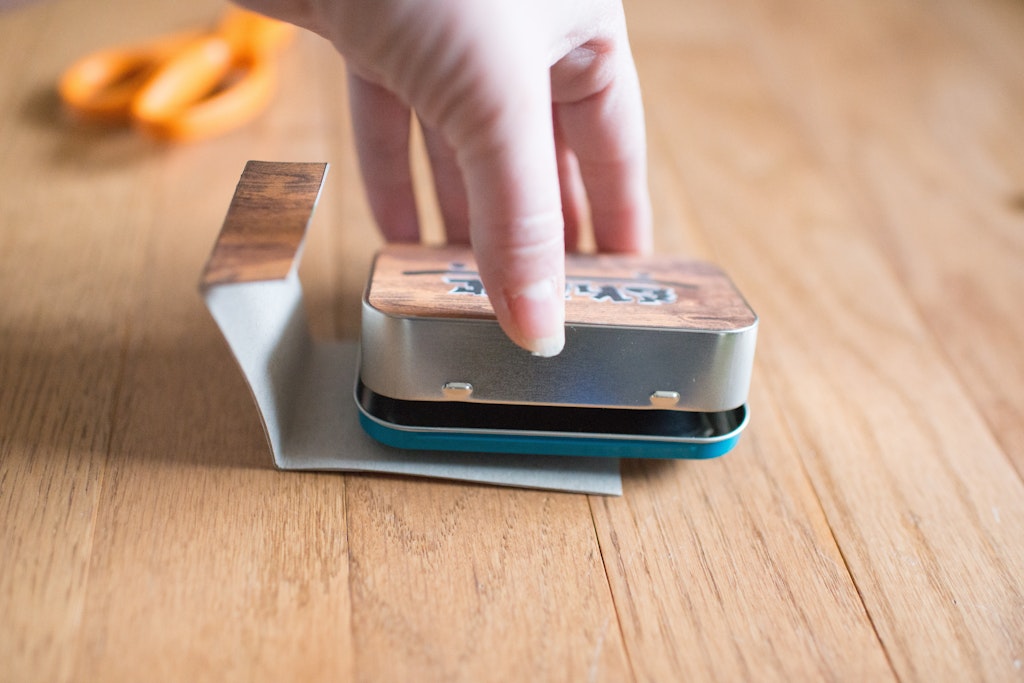
Glue the skate image to the bottom of the Altoid tin. Fold the ramps along the black line.
Now you are ready to assemble! Tuck the shortest edge of the ramp into the lid of the tin and the longest edge of the ramp rests underneath the tin (to hold it steady).
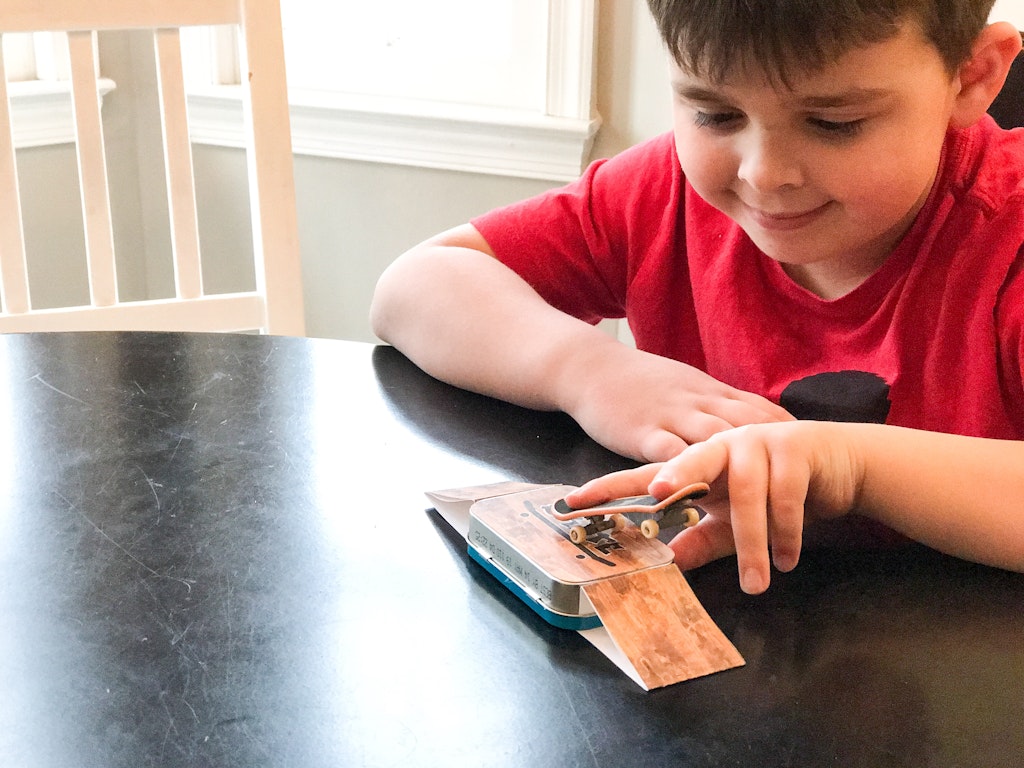
When your little skater is done playing, tuck everything back inside the tin and you are good to go!
4. Altoid Doodle Tin
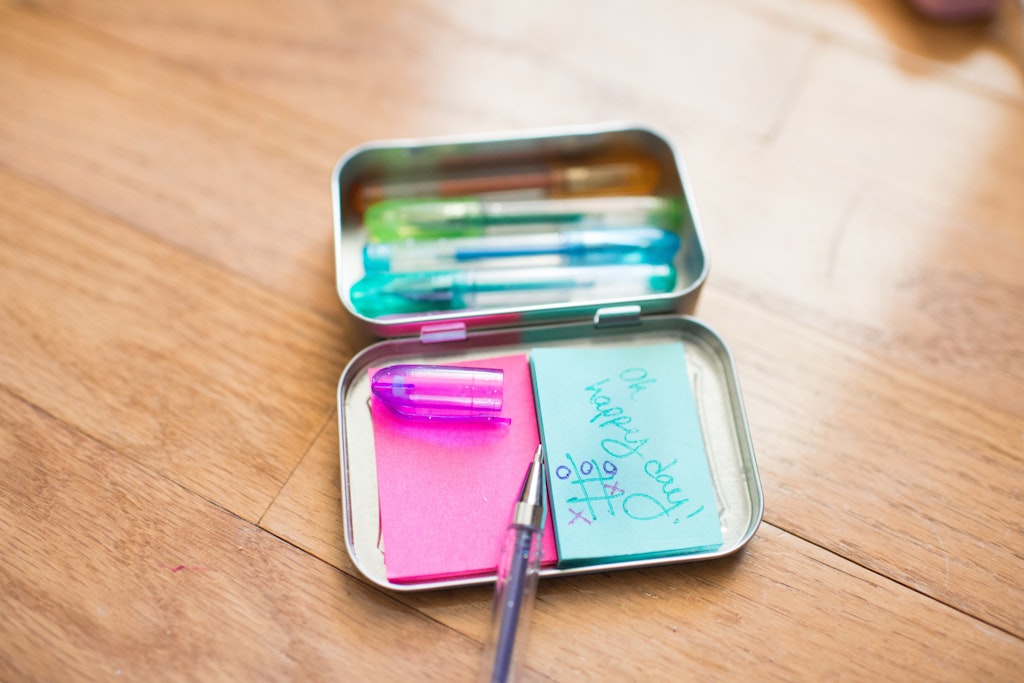
My oldest kiddo is always asking if I bought anything for her to “play with” to which the normal answer is, well, you don’t really PLAY with toys anymore 😉 So she helped figure out a tin that she (and other older kiddos) would find entertaining!
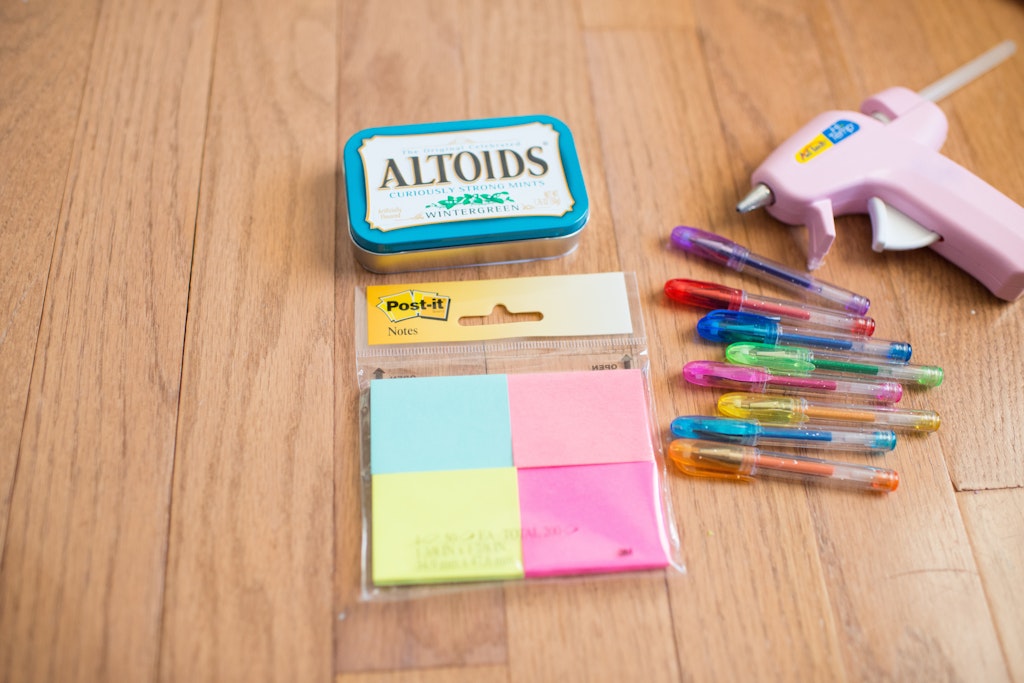
Start with the 4 pack of post-it notes. We purchased ours at Walmart but you can find similar ones here.
We used these miniature gel pens – and love them by the way! You can also use extra crayons that you have around the house. I have to admit, the pens did entice her to keep doodling much longer then crayons have in the past.
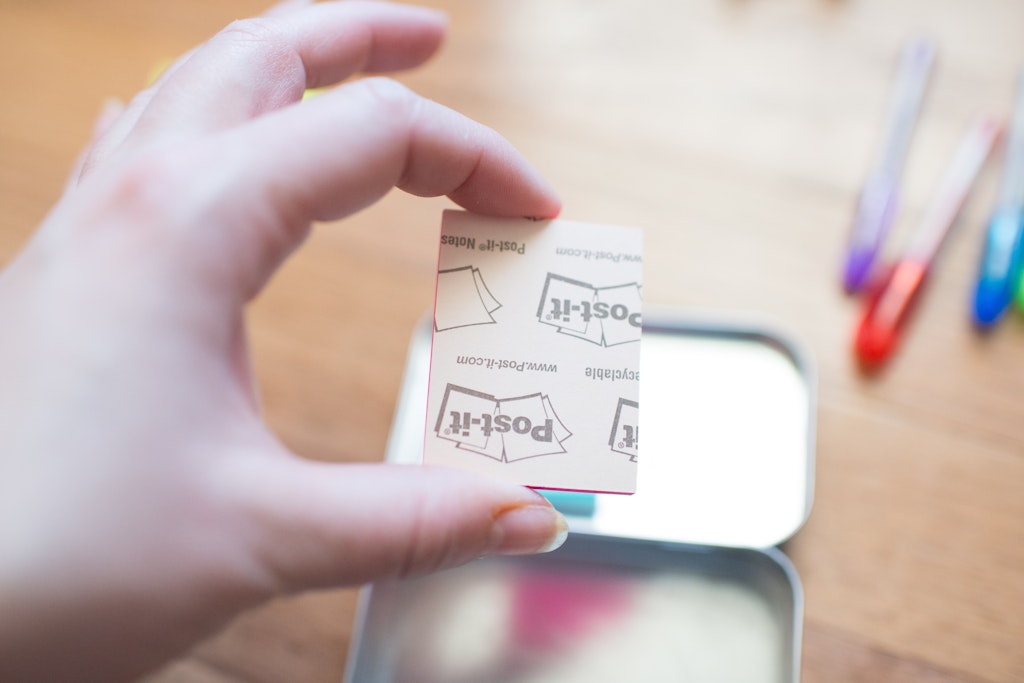
Use hot glue to adhere the post-it pad to the lid of the tin. Make sure when you are placing it, you leave a space between the top and the lip of the lid so you can still close the container after the post-it note is in.
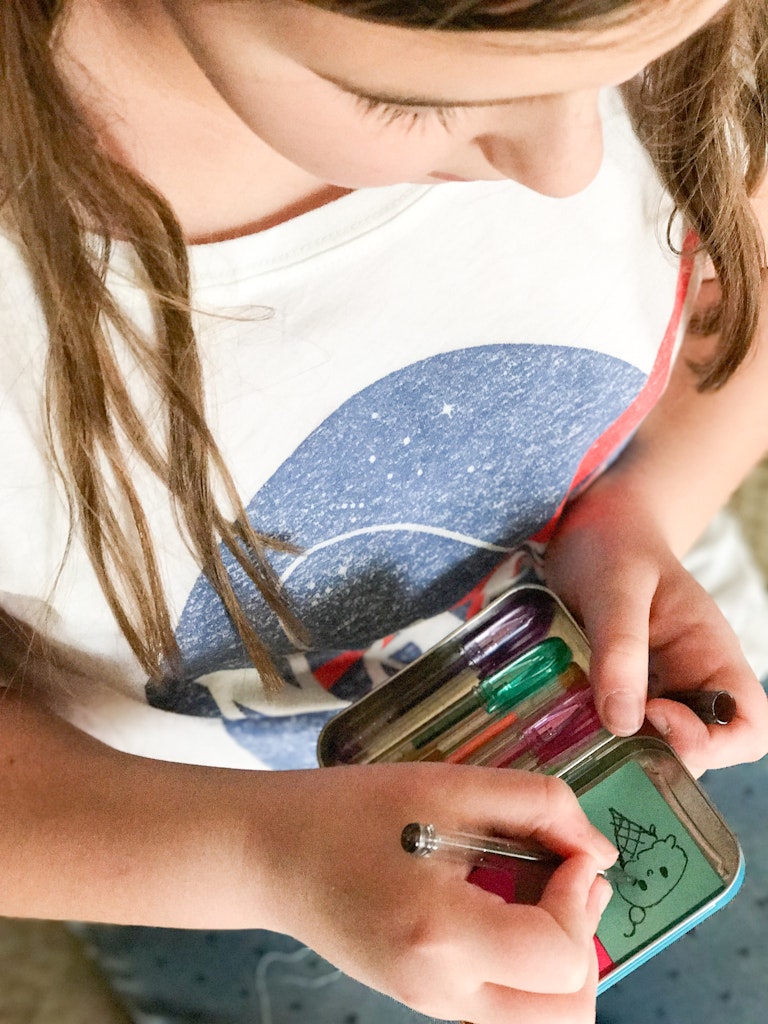
The easiest tin of all and the one with the most possibilities! Good for doodles, tic-tac-toe, hangman, all of the classics!
1 thought on “DIY Altoid Tin Travel Play Sets to Make in 5 Minutes or Less”