How To Make A Neon Sign Using EL Wire
I’m not kidding ya’ll. This was one of the most simple projects I’ve done. I made a couple of these neon signs in just a few hours.
Now keep in mind these are not true neon signs. That is above my DIY pay grade haha. But this is a simple, affordable version using battery powered el wire that looks just like a neon sign when it’s lit.
El Wire Neon Sign Supplies
- canvas board – I used a 16″ x 20″ size but depending on your design you can use any size. I chose to keep the canvas white so you could still see the sign during the daylight easily.
- el wire – 9 ft el wire (for the cheers sign) 15 ft el wire (for the graduation sign) I used blue but you can use whatever color. The length really depends on your design. More characters or larger font will require a longer string of el wire.
- batteries (my el wire used 2 AA batteries but other brands might differ)
- super glue
- drill with small drill bit
- painters tape
- pencil
- scissors
- access to printer to print out template

Designing Your Neon Sign
When you’re designing your sign keep in mind how thick the wire is. Larger, blocky fonts won’t appear the same unless you outline them in the el wire.
Think about where you will need to drill holes in your sign to bring the el wire from or to the back of the board. If it’s a complicated font you can plan it out with a piece of yarn or string.
And break in the font with a difficult curve or space will need to have a hole drilled for the wire to run behind the board to disappear then another hole drilled where you would like it to reappear on the front.
For my 16″ x 20″ board i designed it as 4″ x 5″. I then created a custom print size of 16″ x 20″ and increased the scale to 400% when saving it as a PDF.
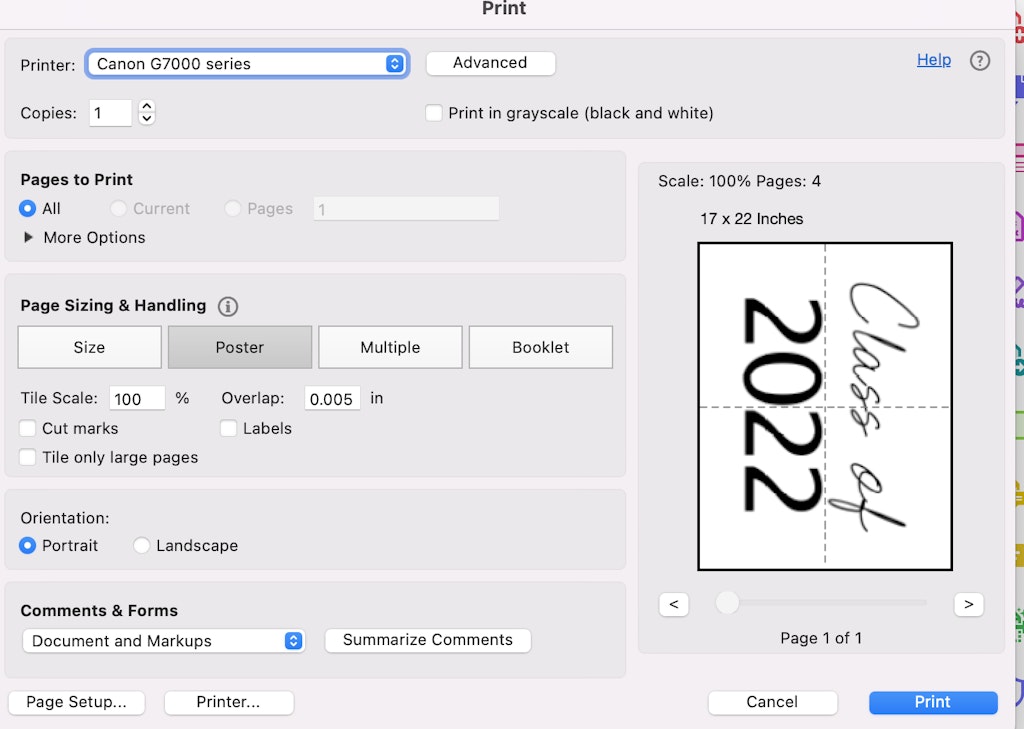
Once you’ve saved your PDF you can open it in Adobe Acrobat to print it out as a poster. If you don’t have Acrobat, you can download a free version online.
Open the file you created in Acrobat and in Page Sizing & Handling choose “Poster”. This will print out your sign spread out over multiple pages.
Once you piece them together it will be the correct 16 x 20 size. You might have a little larger overall size since your printer paper is a set size. Just trim the edges or center it on your board.
Neon Sign Templates
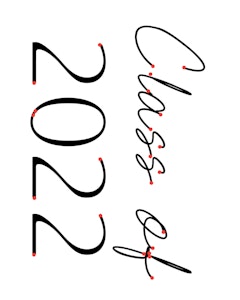
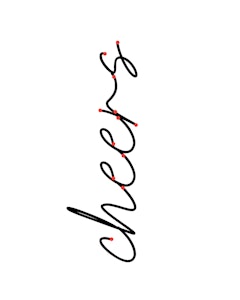
Below are two templates I created. If you want to use either one,
In the sign below I’ve marked all the drill holes I’ll need to make with a red dot. I actually ended up needed to add a few more as i went too.

Transfer Your Template To Your Canvas
Tape your template together and place it on top of your canvas. Use a pencil or stylus to press and trace the design onto the canvas. It will leave a faint indentation of your design on your template. You can go back and trace it with a pencil if you’d like. I just traced the outline of the drill holes.
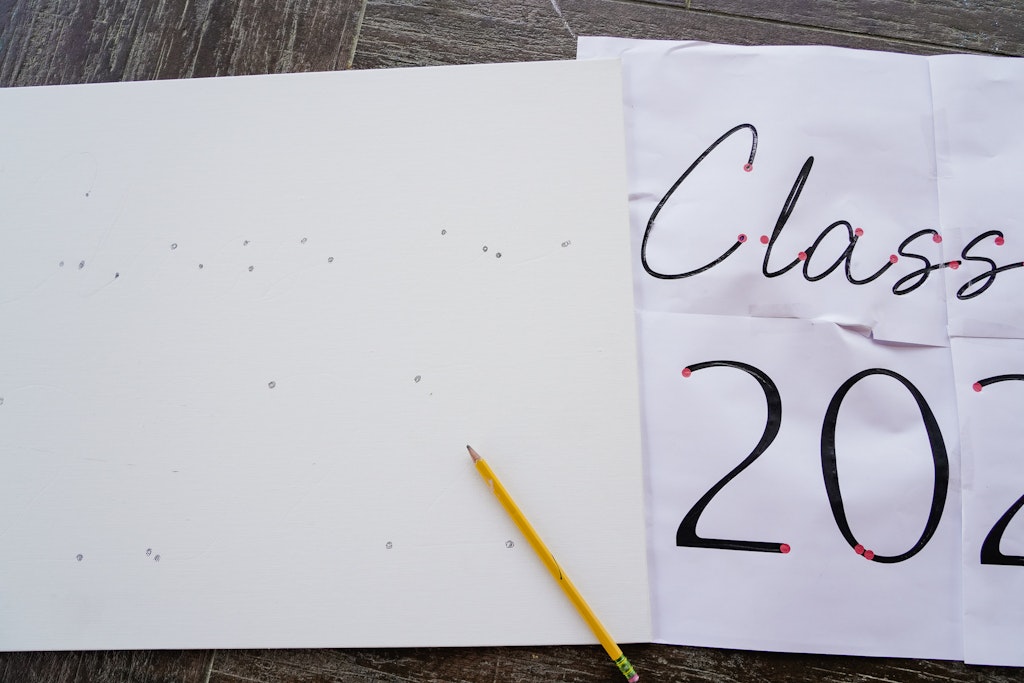
Drill Your Holes
Prop up your canvas so you’re able to drill through the board and no hit anything underneath. Use a drill bit that is about the same diameter as your el wire and drill your holes.
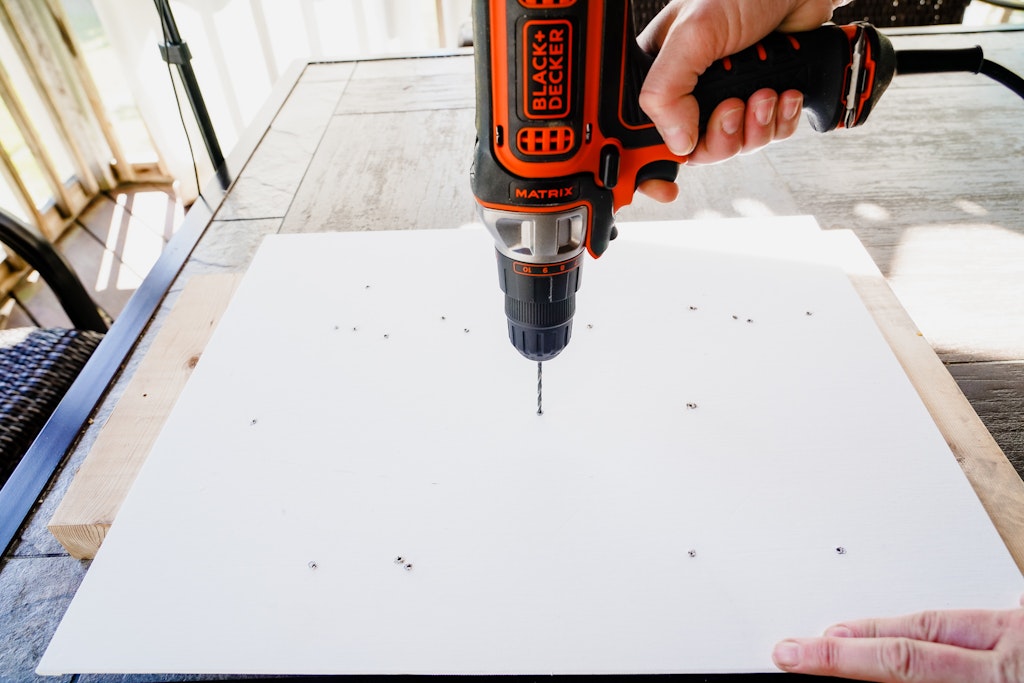
Adding The EL Wire To Your Neon Sign
Start from the back of your canvas and feed the wire all the way through to the front. Tape the battery pack to the back.
Start placing the EL wire down on the canvas along your etched out design taping it with painter’s tape as you go.
Roll up any excess el wire and tape it to the back. Some brands you’re able to cut the excess el wire off, but not all. I just kept the excess rolled up and taped it down in the center of the back of the sign so it wasn’t visible.
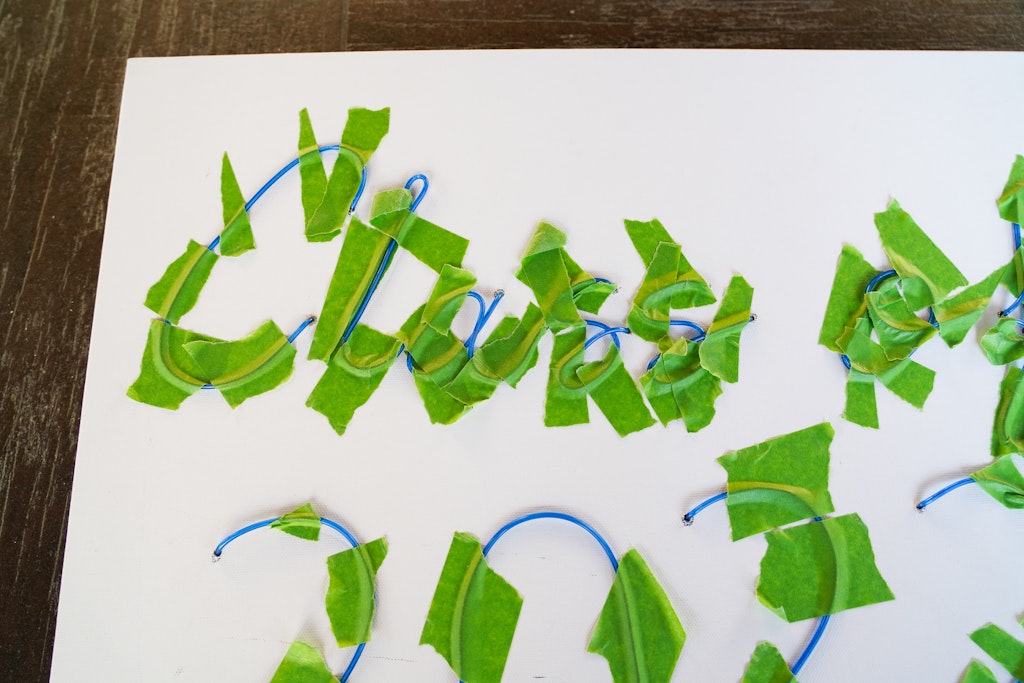
Glue Down The El Wire
After you have taped down your design you are going to slowly remove the tape in sections to glue down the wire. Be so careful not to glue yourself down with the wire.
I found that the brush applicator for the super glue worked really well to coat the bottom of the wire then gently tap it down onto the canvas. It dried so stinkin’ fast ya’ll. Like tap, tap, tap it’s done fast.
Once you’ve finished gluing the el wire down you’re all done!!!
