
How To Make A Jelly Bean Bracelet Or Necklace
These fun jelly bean candy bracelets only require a few supplies and probably take longer to eat than the do to make 🙂 I recommend that an adult do the threading of the jellybeans since they are a little tricky to pierce through with the needle, but my little helper loved helping out with the colors. This is a great activity to practice patterns, work on colors, or just snack and giggle 🙂 .
We found all of the supplies we needed while on a quick trip to Walmart, but you might have some of these already at home.
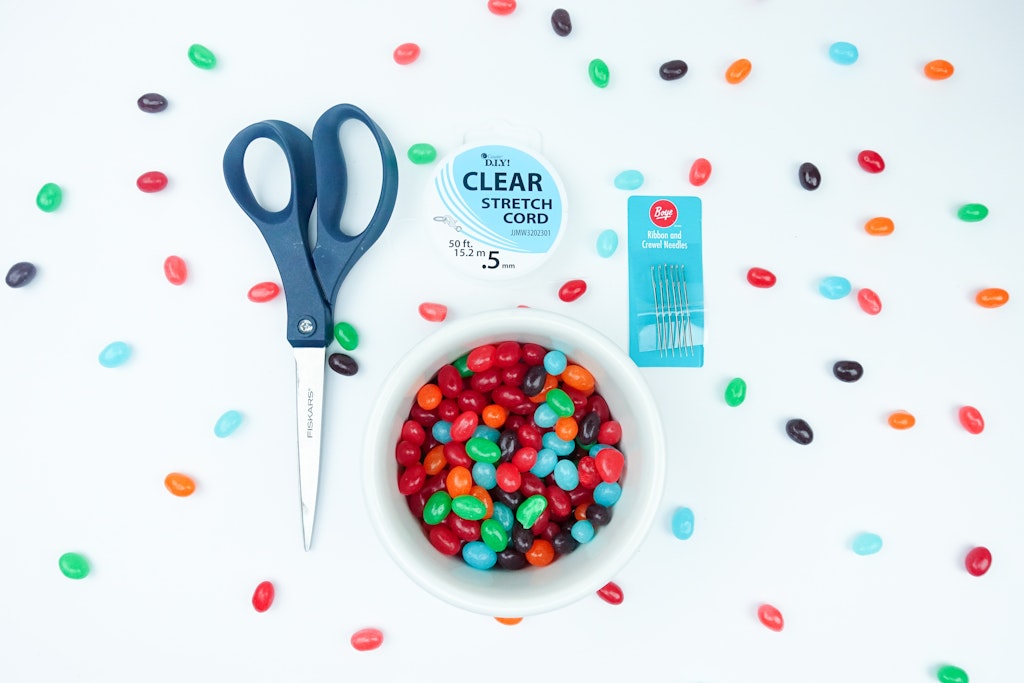
Supplies Needed For Jelly Bean Candy Bracelets
- Jelly beans – We used a package of smaller jelly beans, but any will work
- Clear Stretch Cord no thicker than .5mm (can be found in the beading aisle)
- Needle – You’ll need one that has an eye large enough to fit your stretch cord but not too thick since that will make piercing the smaller jellybeans difficult. We used “ribbon and crewel needles” I’m not much of a seamstress so i’m not really sure what exactly that means. 🙂 I just looked in the sewing aisle for a needle that would fit the thread 🙂
- Scissors
Pour your jelly beans into a bowl. You can have your little helpers sort them by color if they want to otherwise just grab and go.
Putting Together The Candy Bracelets
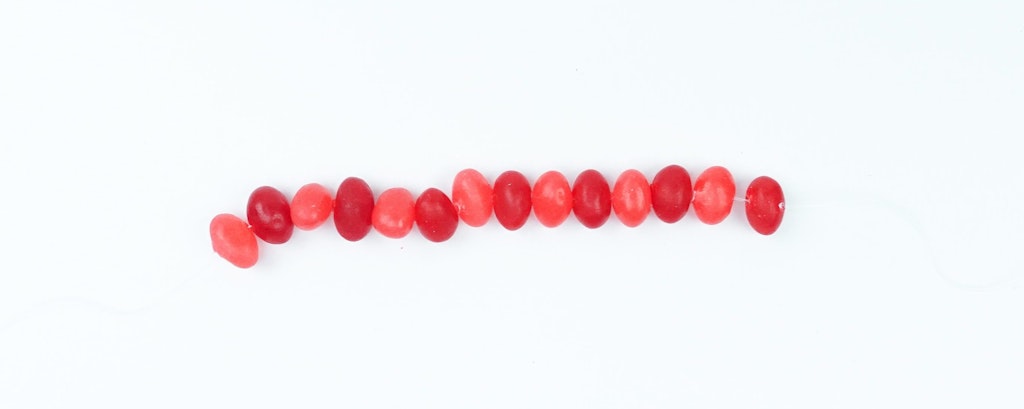
Cut about a 7 -8″ inch long section of the stretch cord. Thread your needle with one end of the stretch cord. There’s no need to tie off the end of the cord, you’ll tie the two ends together when you’re done adding the jelly beans.

Super carefully pierce the threaded needle through the center of the jellybean. Your needle might get a little gummed up after a few jelly beans, but just clean it off a bit and keep on threading.
Once you’ve reached your desired length you’re ready to tie it off. It is stretch cord so it will give a little when they put it on.
Take the two ends of your stretch cord and tie them like you are starting to tie a knot by crossing one side over the other, under and up. Take that same piece that you just brought under and up and twist it around at least one more time. Then finish with the top of your knot. This seemed to keep the stretchy cord in place for us.
Trim the ends with your scissors.
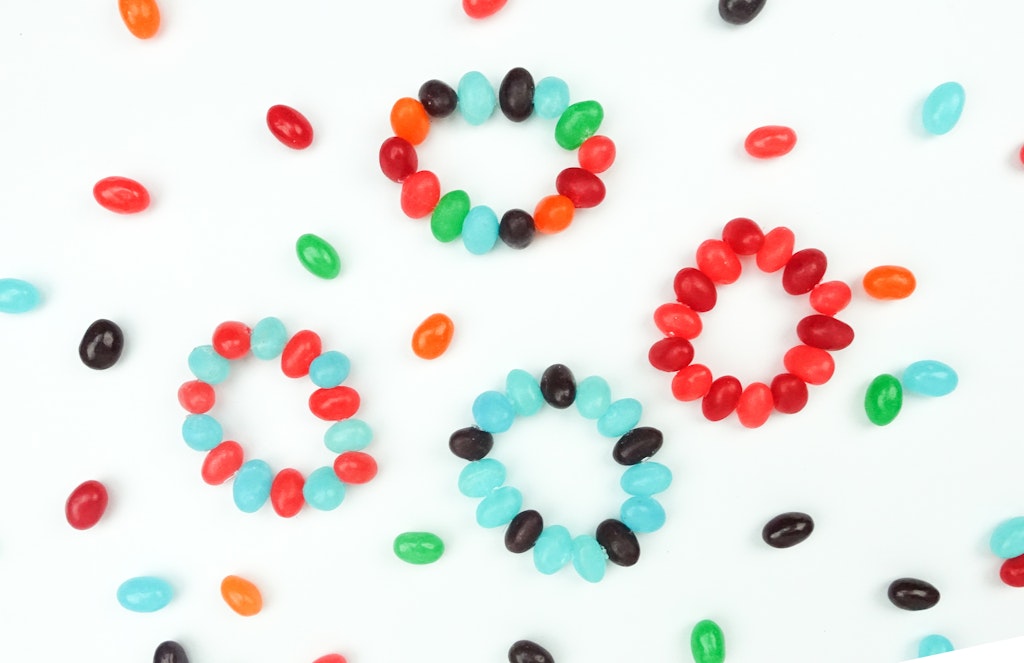
Hand out your finished candy bracelets to some lucky recipients and test them out 😉