
How To Do An Acrylic Paint Pour
I have always seen paint pouring projects and wanted to try it, but I was intimidated. We will walk through what supplies you’ll need and the steps you will take to create these fun projects.
You can try this technique on all different surfaces. Clay pots, vases, wooden signs, boxes, so many different options. It’s a little messy, but the results are so worth it.
Supplies For Acrylic Paint Pour
- Something to paint! – clay pots, wood signs or canvas boards
- Paint Pouring Marbling Medium – We picked our Testors Craft marbling medium up from Michaels many different ones can be found on Amazon like this one.
- Multiple colors of acrylic paint – at least 3 or 4 different colors
- Popsicle sticks for stirring – You can pick these up from craft store, dollar store or find some buried in your kids’ craft supplies like we did
- Paper plates, newspaper, drop cloth to keep workspace clean
- Different things to prop up what you’re pouring onto. We used toilet paper rolls, cans from recycling, anything that will prop up the clay pot, sign, etc.
- Small disposable bathroom cups – you’ll need one cup per color – you can find these at the dollar store, grocery store, etc.
- Larger disposable cups like solo cups
- Something to let the paint drip into or on. If it’s a small canvas or item that you’re covering you could probably use a large paper plate. For our larger canvases we used an old dollar store plastic bin. We lined the bottom with paper towels to help with the cleanup in between projects.
- Paper towels it can get messy
- Multiple sets of disposable gloves – this is going to get messy it would have been helpful to have a different pair of gloves for each different pot. These are not necessary, you can wash the paint off of your hands or wash your gloves in between pours, but a different pair of clean gloves for each project would have kept it super easy.
- Garbage bag for easy clean up
- Top Coat Outdoor Modge Podge or Top Coat Spray – some sort of acrylic sealer if you’re painting a porous surface like a clay pot
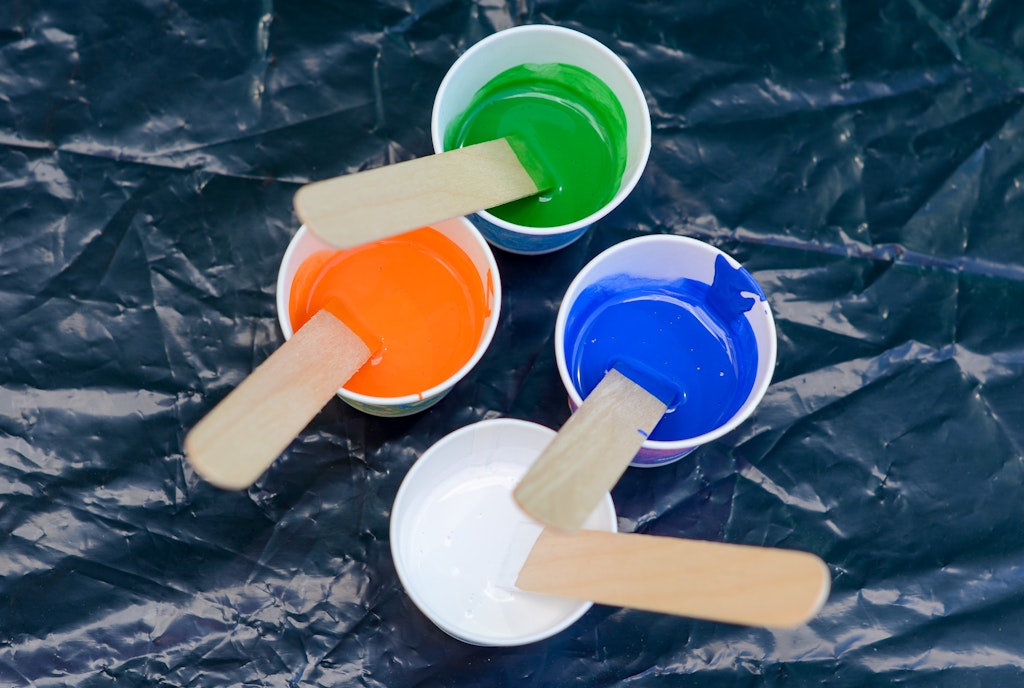
Mixing The Paint
Mix equal parts of acrylic paint and marbling medium in a small disposable cup. Different brands may vary.
We tried this with a different brand of pouring medium and we needed to add more of the other brand to get the runny consistency we were looking for.
Mix each color separately. Stir together with a popsicle stick until thoroughly mixed. The neat thing about the marbling medium is that it thins the paint without changing the color cup.
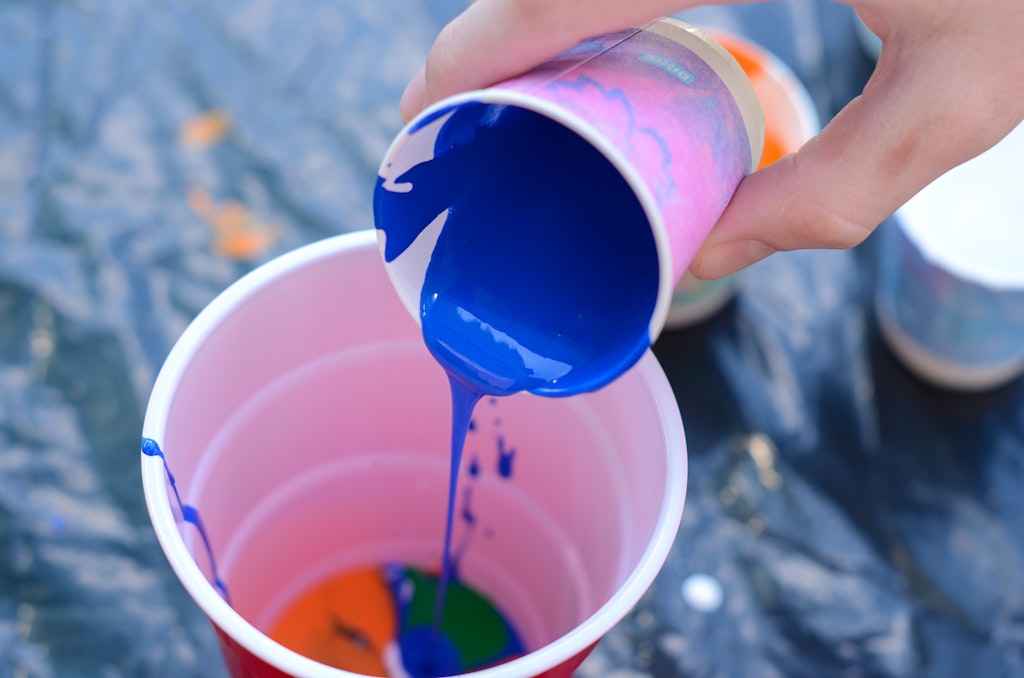
Let the paint sit for about a minute to get rid of any bubbles. Pour the different colors into one of the larger solo cups.
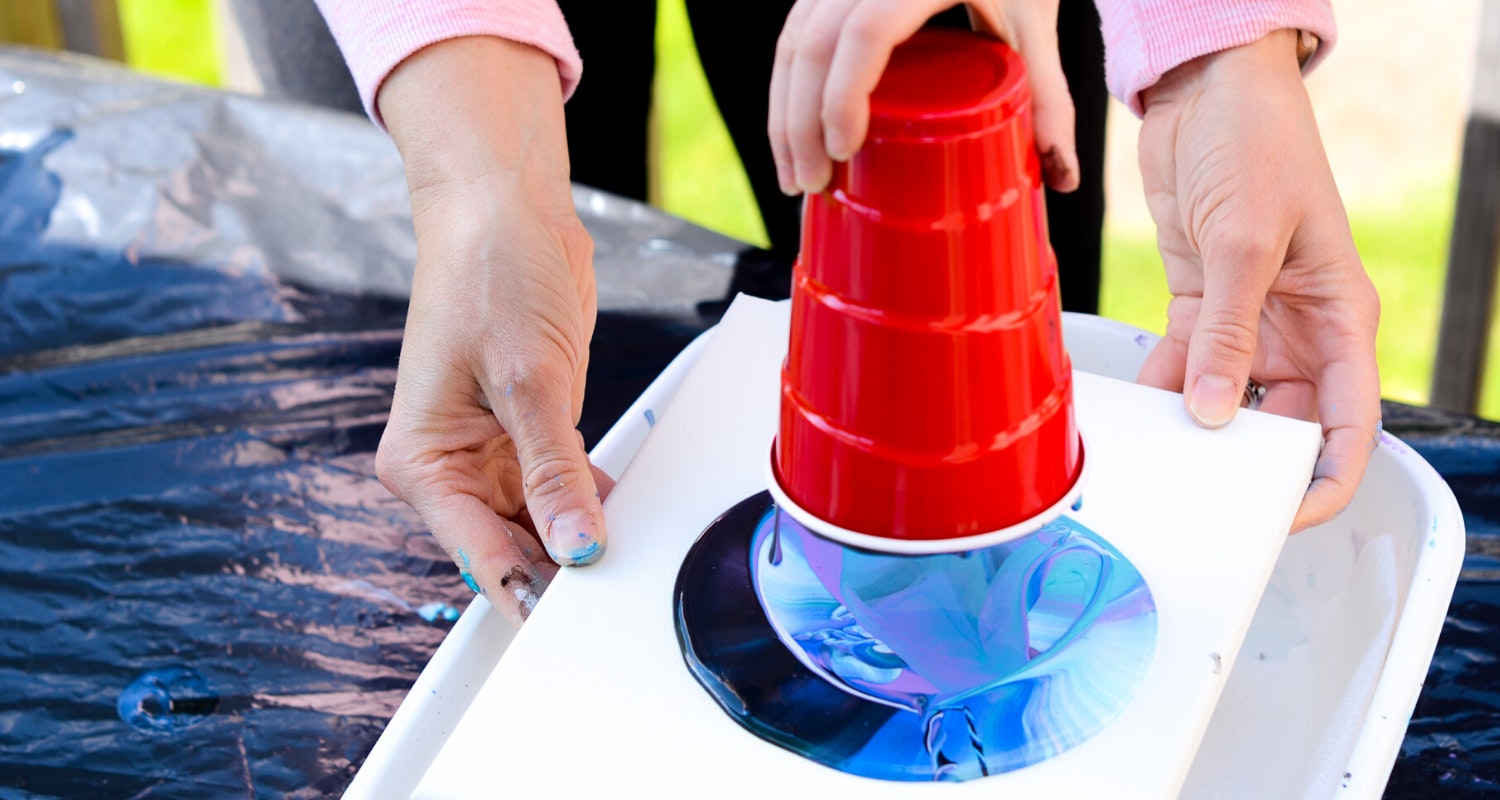
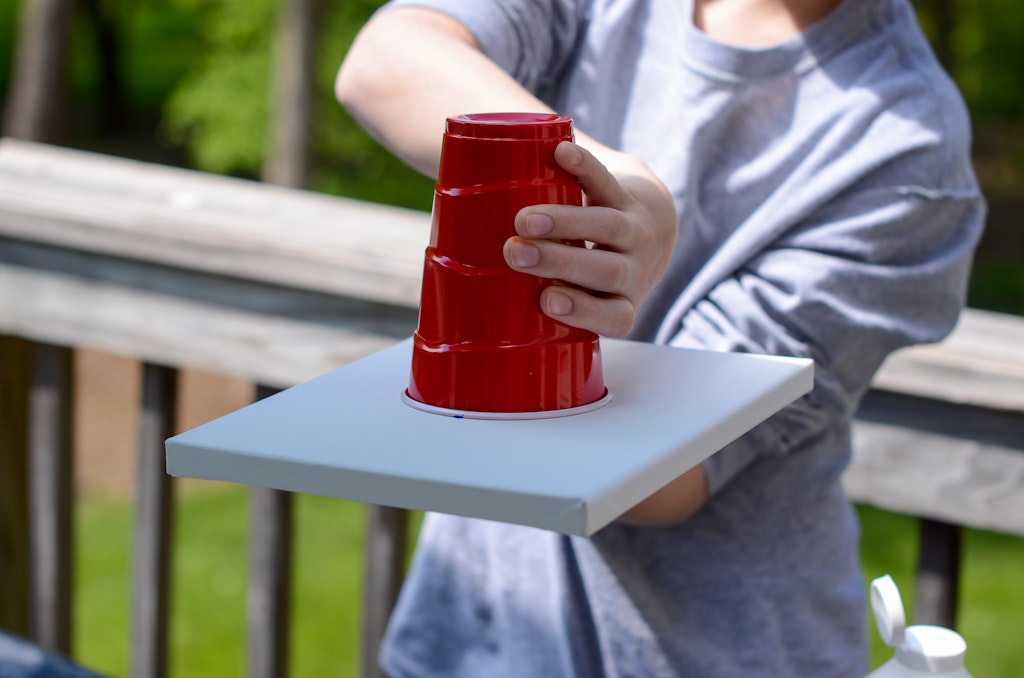
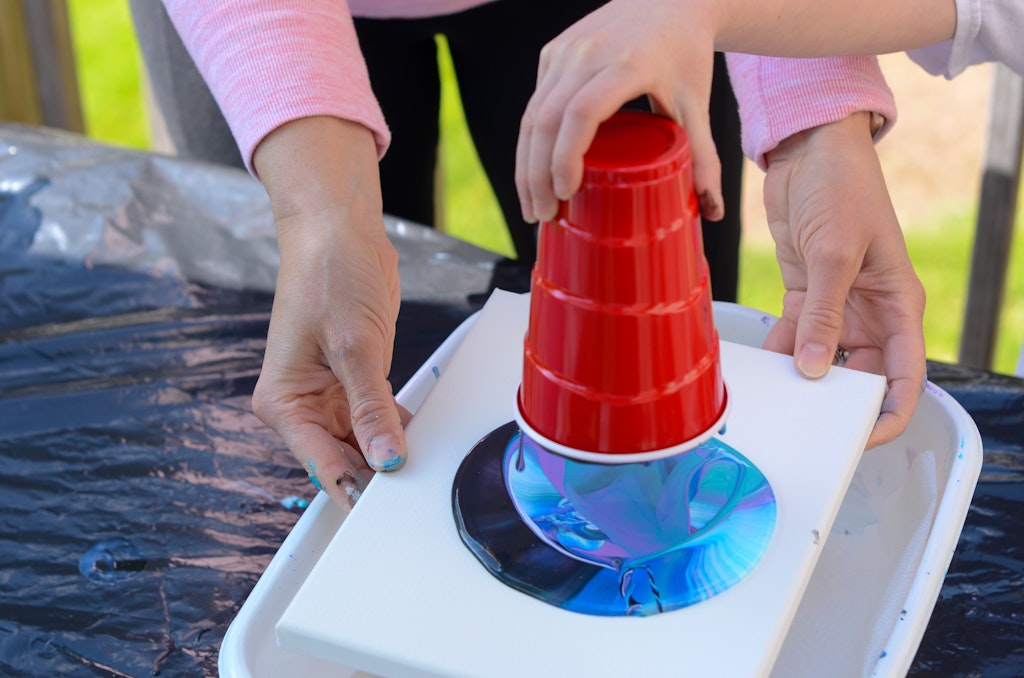
Flip Paint Pour Method
If you’re paint pouring onto canvas like we were, we suggest trying the “flip pour” method. Place your canvas upside down on top of the large solo cup full of paint.
You’re going to want something like an old baking sheet, a shallow box, a lined plastic bin, something that’s larger than the item you’re painting so the paint can drip off into the container from your canvas as you’re moving it around.
We used an old dollar store plastic bin and lined it with paper towels to may clean up a little easier in between projects.
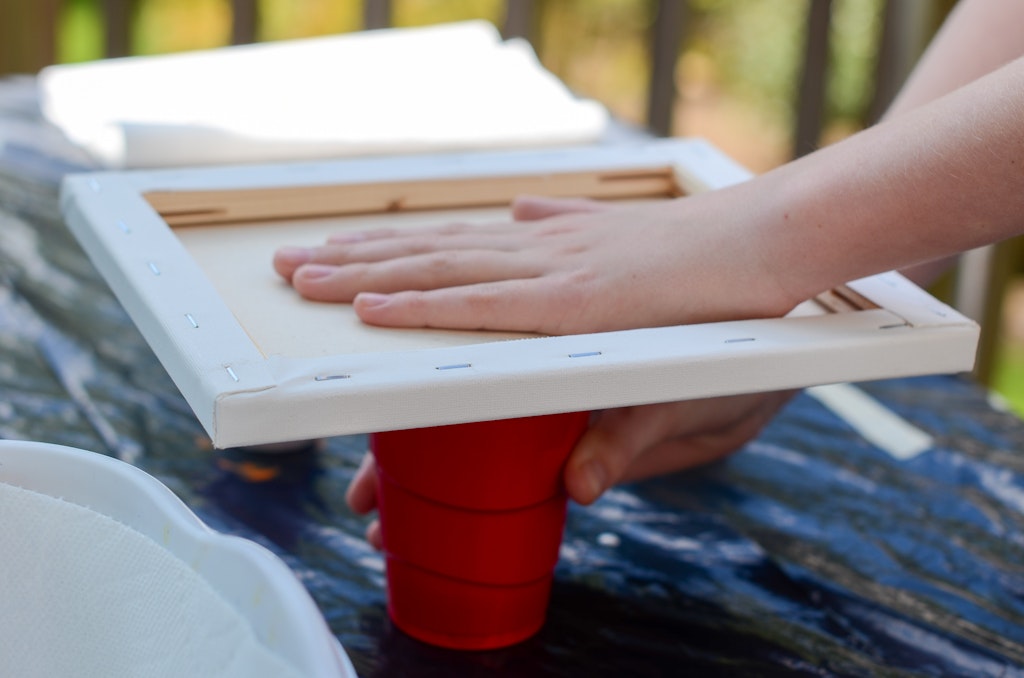
Carefully flip the cup and canvas over so the cup of paint is sitting upside down on top of the canvas.
Pull the cup straight up to release all of the paint and put the cup down out of the way.
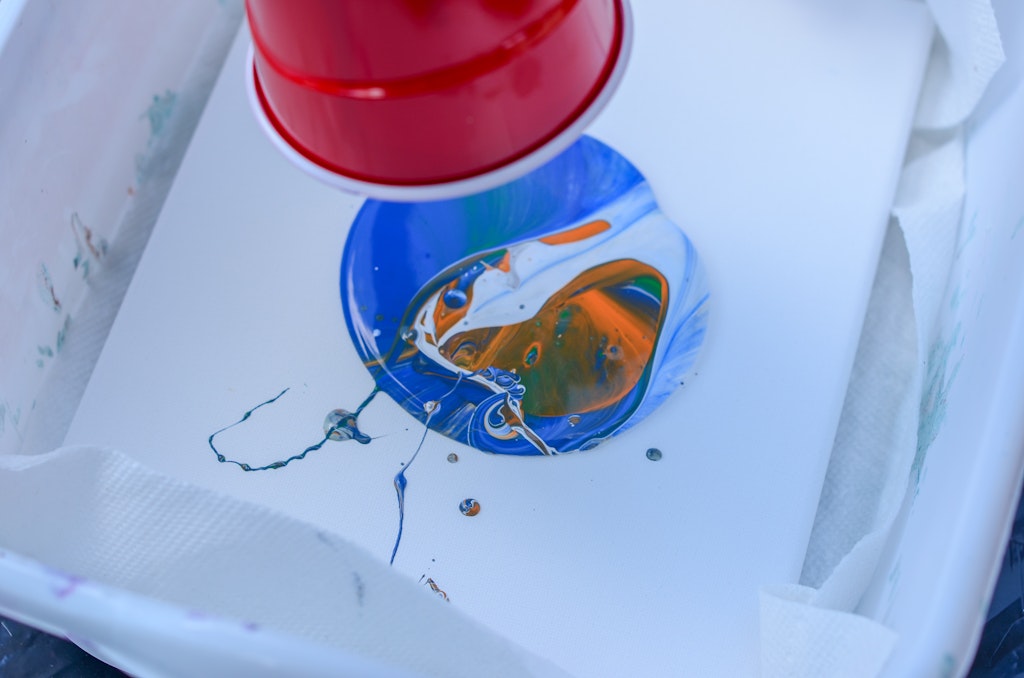
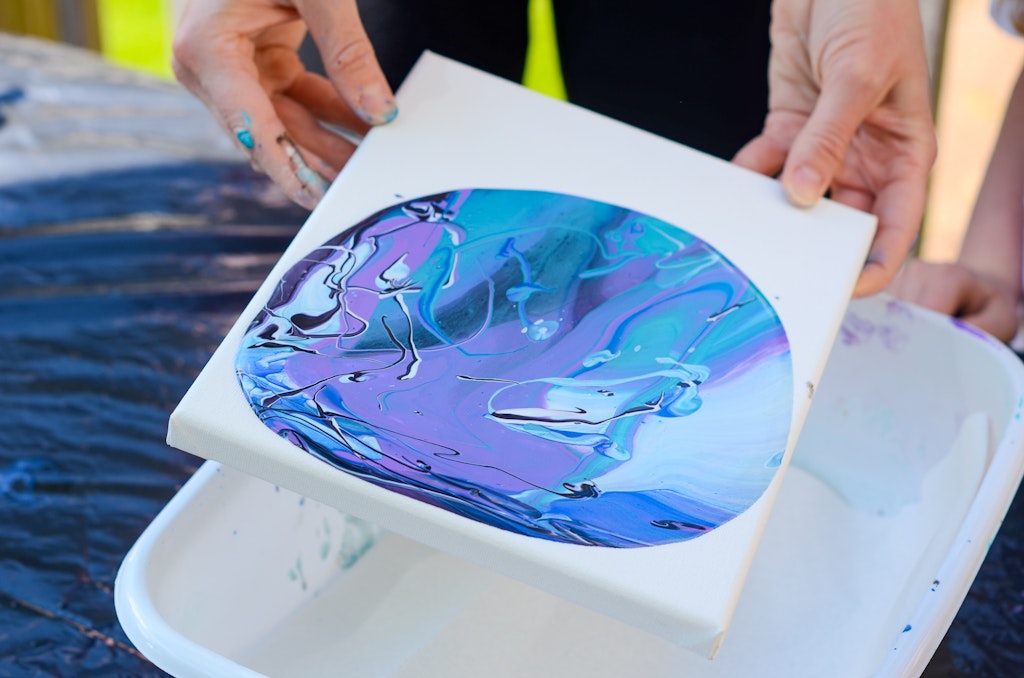
Gently tilt the canvas from side to side to move the paint around the entire canvas.
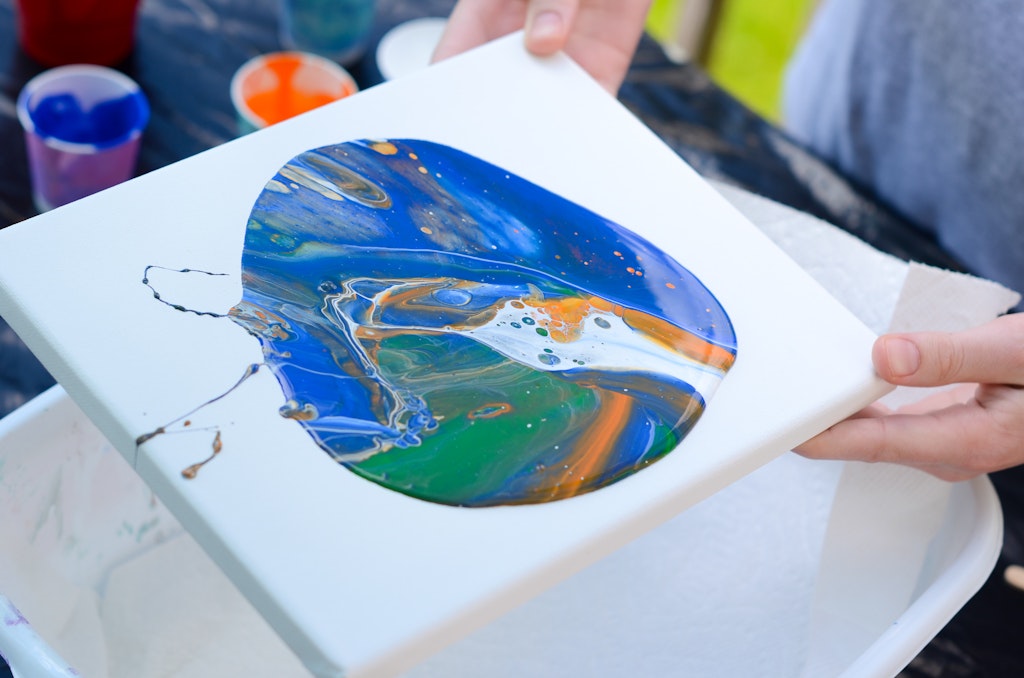
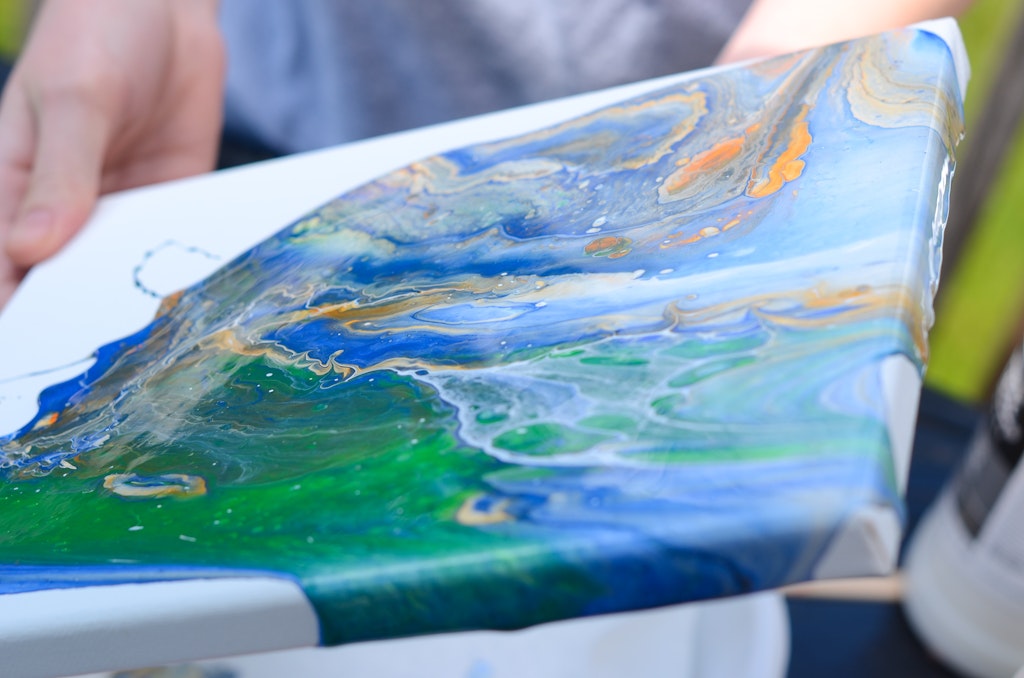
Continue tilting the canvas until the entire canvas is covered. If some of the edges or corners are missed, you can pour some extra from your mixed cup to fill in. prop it up on something and let it dry overnight.
Unfortunately, disposable gloves weren’t very easy to find when we tried this project. If you have some on hand it does cut down on some of the cleanup.
We had a blast coming up with different acrylic paint pour color combinations and trying different techniques.
You could use the same colors each time and end up with absolutely different results each time.
Dirty Acrylic Paint Pour Method
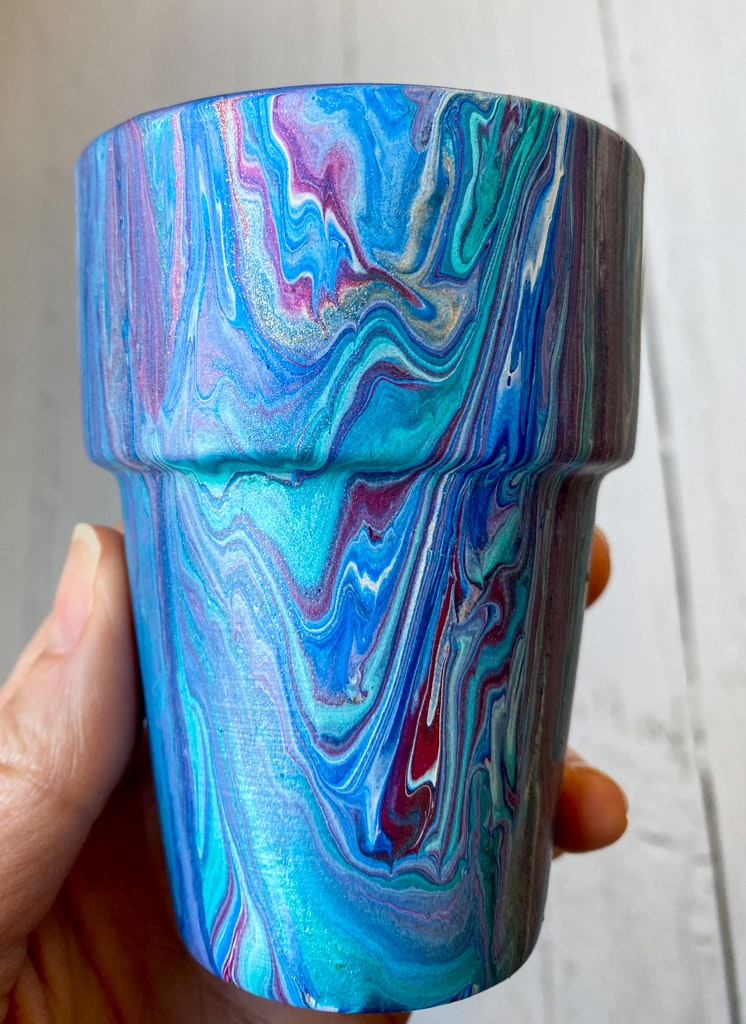
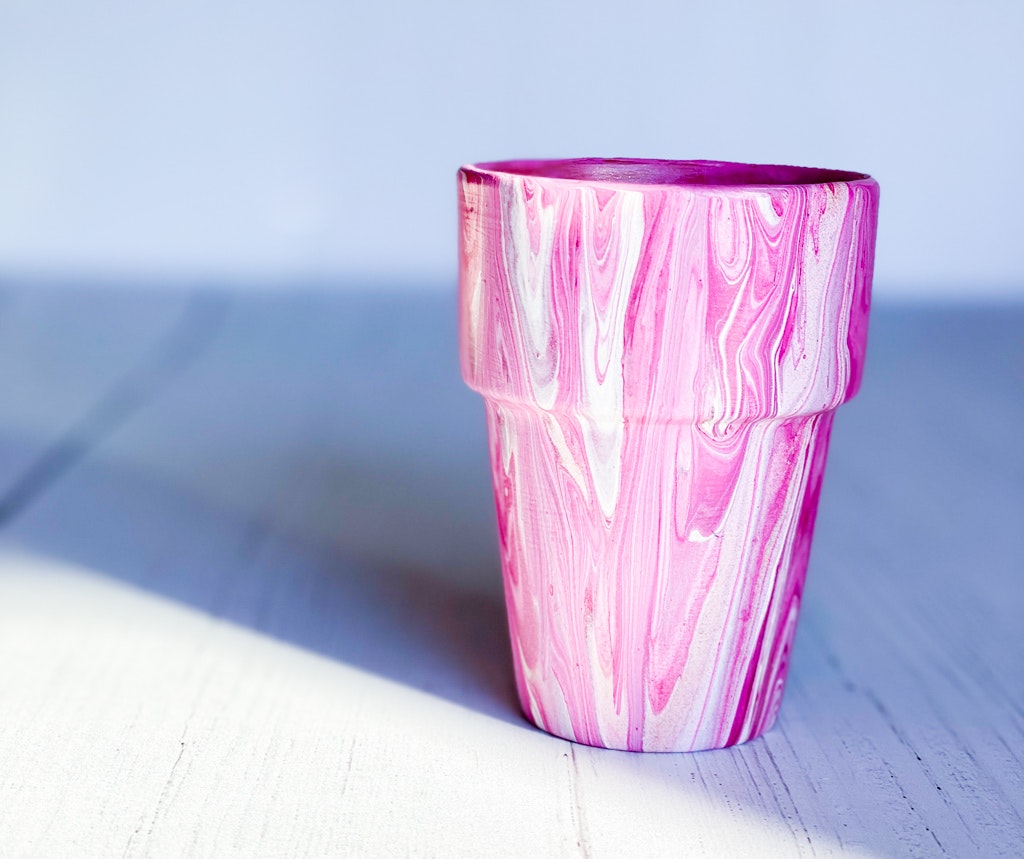
We used the “dirty pour method” to cover these clay pots. To achieve this look, instead of flipping the cup, you gently stir the paint in the mixed cup ever so slightly with a toothpick or something similar. Then start pouring the cup of colors over your object.
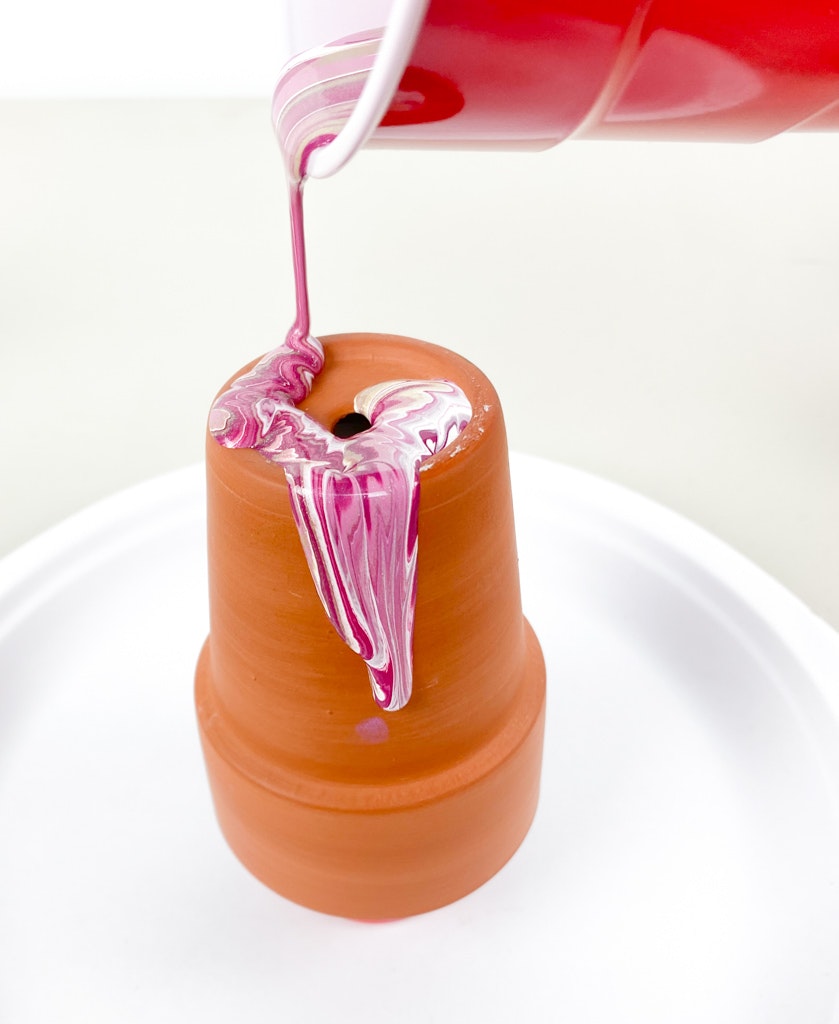
Slowly spin the object and let the paint move around the pot to cover. Continue to pour the paint until it’s completely covered and you’ve reached your desired look.
Collect drips off the edge until the paint has stopped moving. Let the object dry overnight.
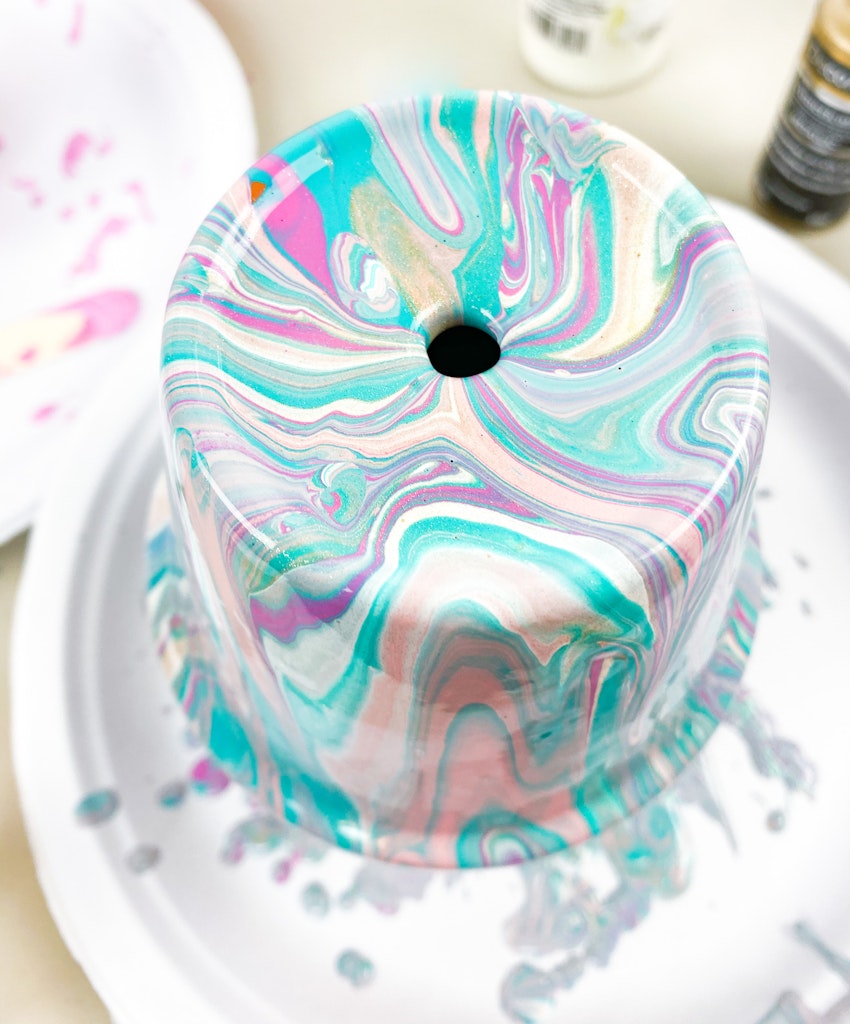
I love all of the different colors and patterns.
If you are using these to put plants in you’ll need to coat the inside and outside of the dry pot with an acrylic sealant like modge podge outdoor or a spray top coat like this one. Learn from my mistakes.
I potted a few plants in these beautiful pots with no topcoat and woke up to a bunch of bubbles underneath the paint. Not quite the look I was going for.
I absolutely love the colors on this blue one. Having a few contrasting colors in there added so much detail.
You can paint the inside of the pots the following day a solid color if you want a more finished look to the inside of the pot.
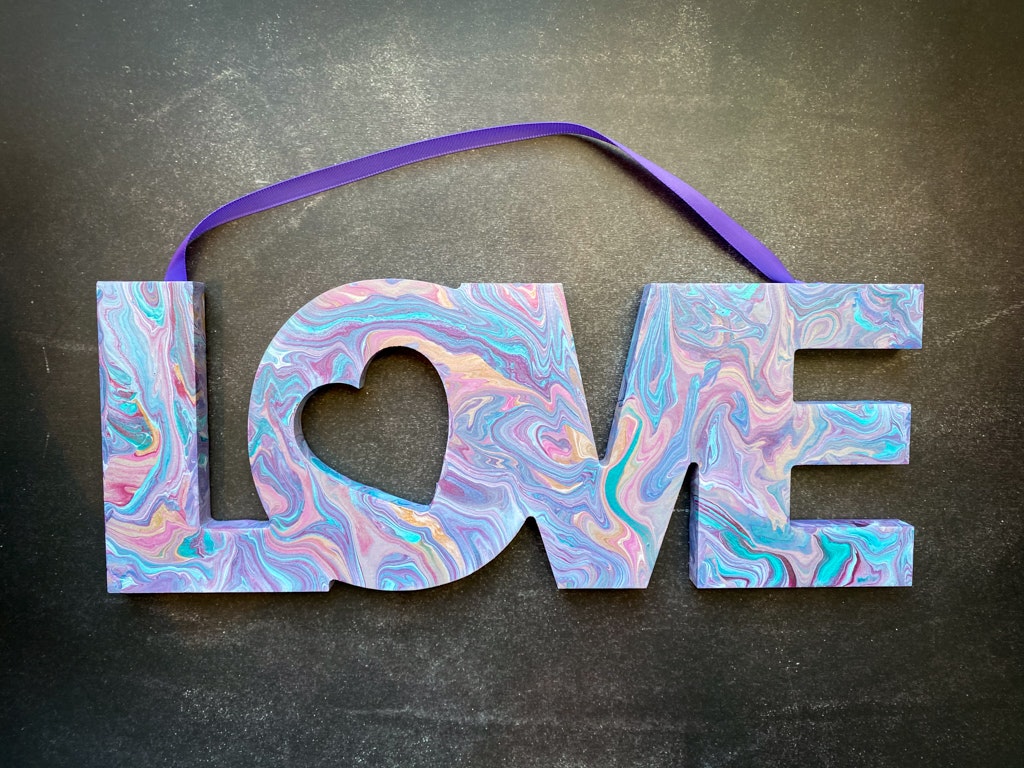
We also used all of our extra paint from the other projects and finished this Valentine’s sign from the Dollar Tree.
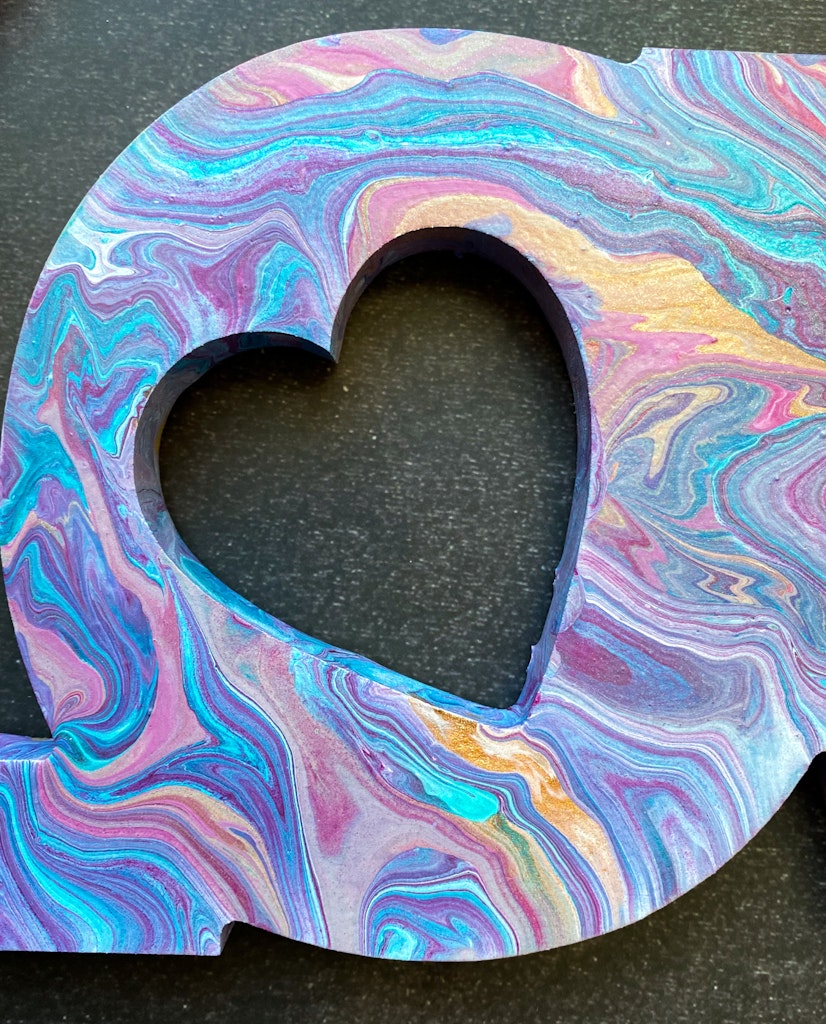
I think this was our favorite out of all of the things we tried. Again this one has so many different colors and it adds so much detail to the project.
We can’t wait to try this again on different mediums. These would make such great Mother’s Day gifts, hostess gifts, birthday gifts, or best of yet something for you!
Do you put the top coat on prior to the acrylic pour or after it dries overnight?
It’s just beautiful and I love the designs/colors!
i only used the outdoor topcoat for the painted pots b/c they came into contact with water. To be safe i would coat it with the outdoor sealer before and after, especially on the inside of the planter. I didn’t seal it at all and the paint moisture from the soil bubbled up under the paint. So I would assume if it’s sealed before and after painting it should be good.