How To Make Shrinky Dink Pins
The back to school prep continues! We were looking for a way to bring some new life and personality into the same ol’ school supplies. An activity all 3 kiddos can participate in? Yes, please! We will show you how to make DIY Shrinky Dink Pins.
What You’ll Need For Shrinky Dink Pins
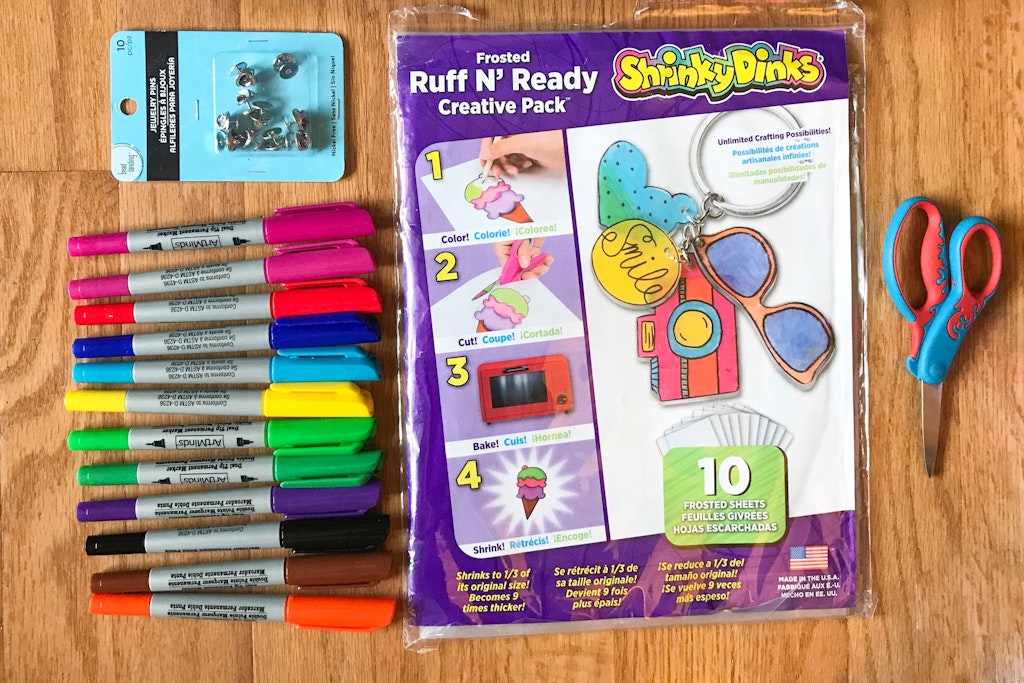
- Shrinky Dink Creative Pack of 10 sheets Ruff n’Ready- $5.56 on amazon
- ArtMinds Dual Tip Permanent Markers – $11.99 from Michaels or similar ones online here
- colored pencils as well to create a shading effects
- Jewelry Pins $2.99 from Michaels or these pin backs online
- Scissors
- Aluminum Foil (or wax paper)
- Hot glue gun
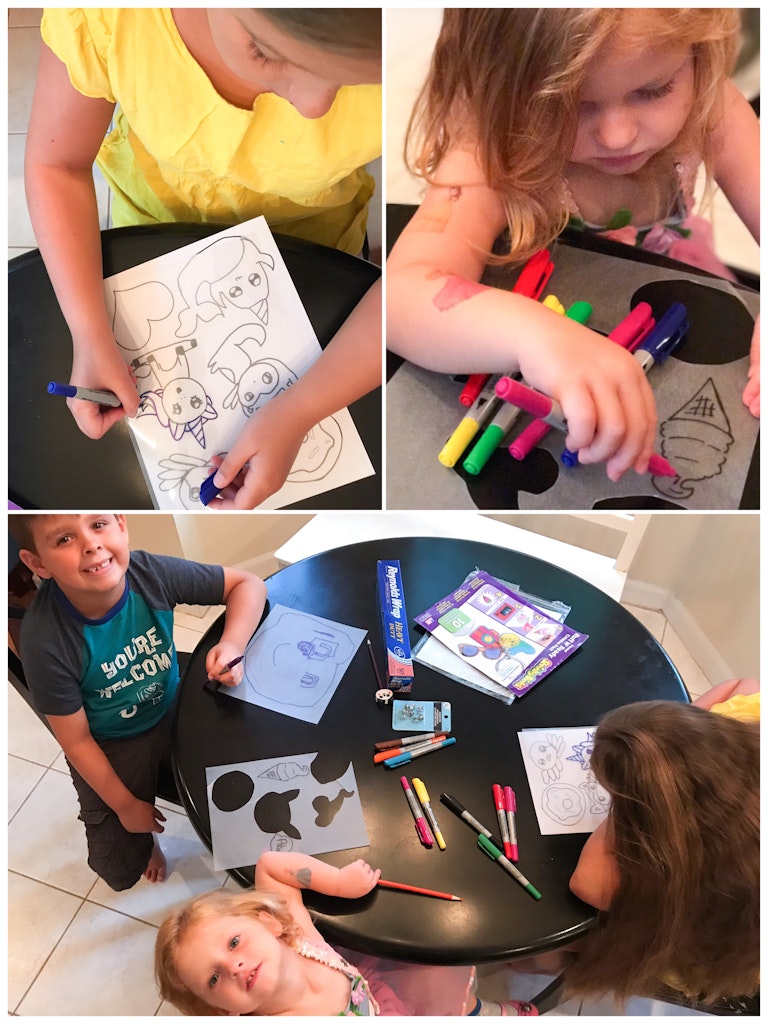
My youngest artist liked coloring in some pre-drawn designs. My Middle liked creating his own more abstract art, and the oldest even designed some trace sheets to share with others if you’d like to download them for free here!
After some trial and error, we decided using a permanent marker on the smooth side as an outline and either a marker or colored pencil to fill in on the rough side produced the best results.
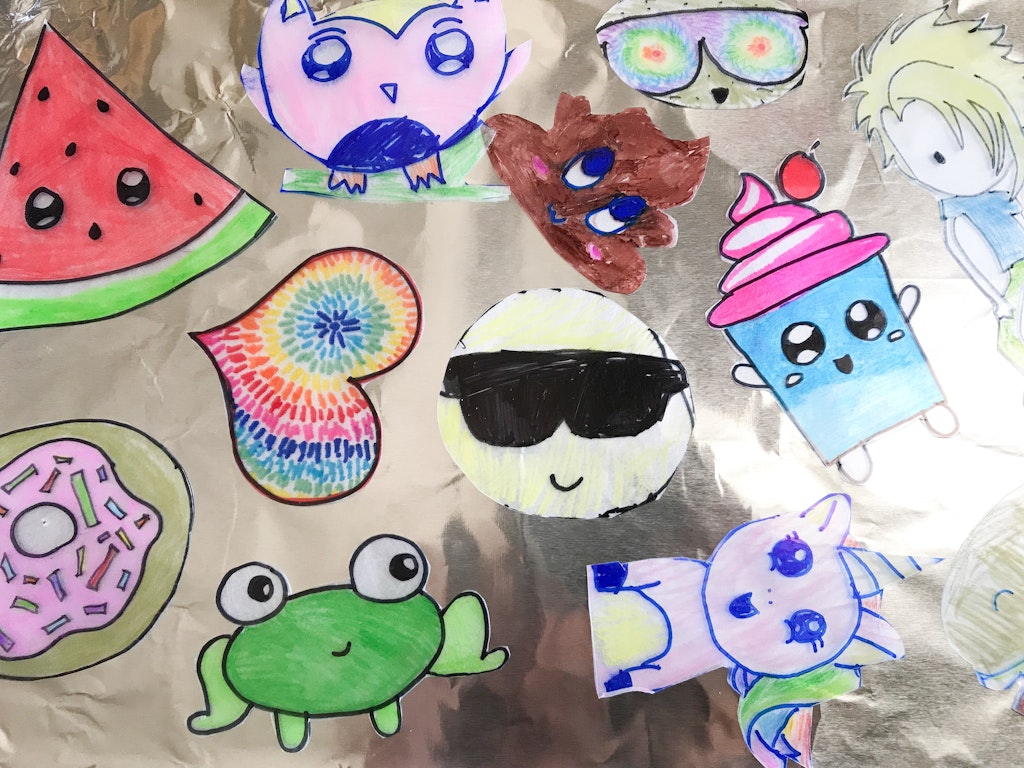
Cut Out The Shrinky Dink Designs
When the designs are done, cut them out. Small scissors are best as the paper does tend to tear.
Lay them out on an aluminum covered cookie sheet.
Bake The Shrinky Dinks
Follow the directions on your Shrinky Dink package for preheating and cooking times then let the best part begin!
We turned on the oven light so the kiddos could watch the magic!
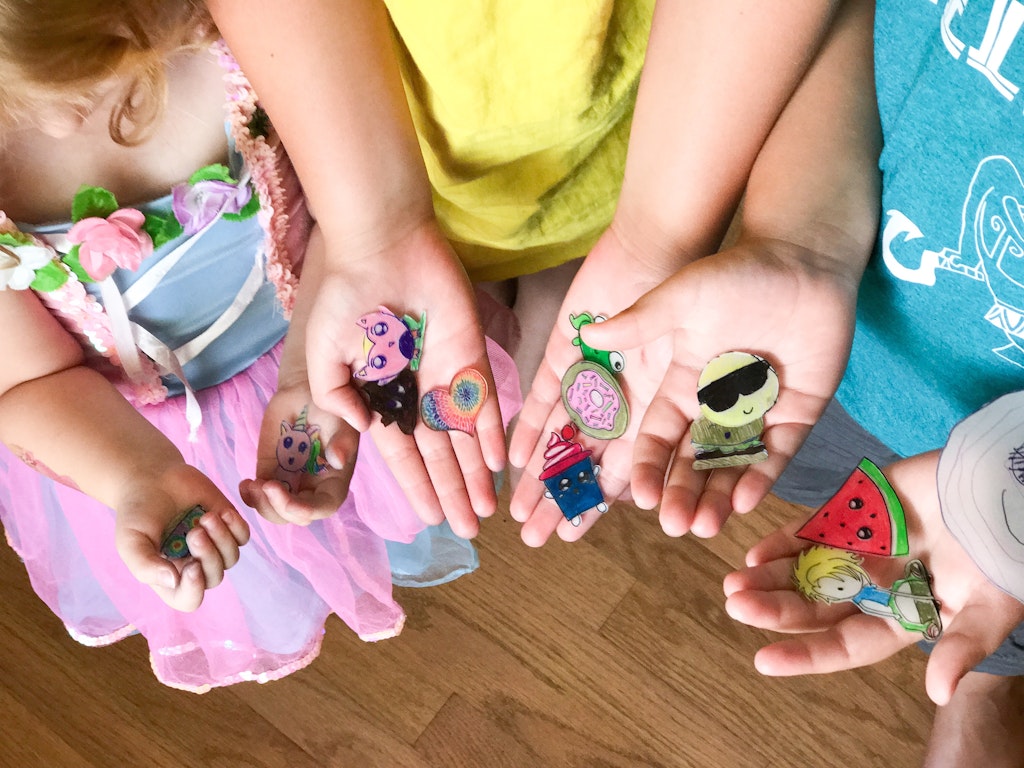
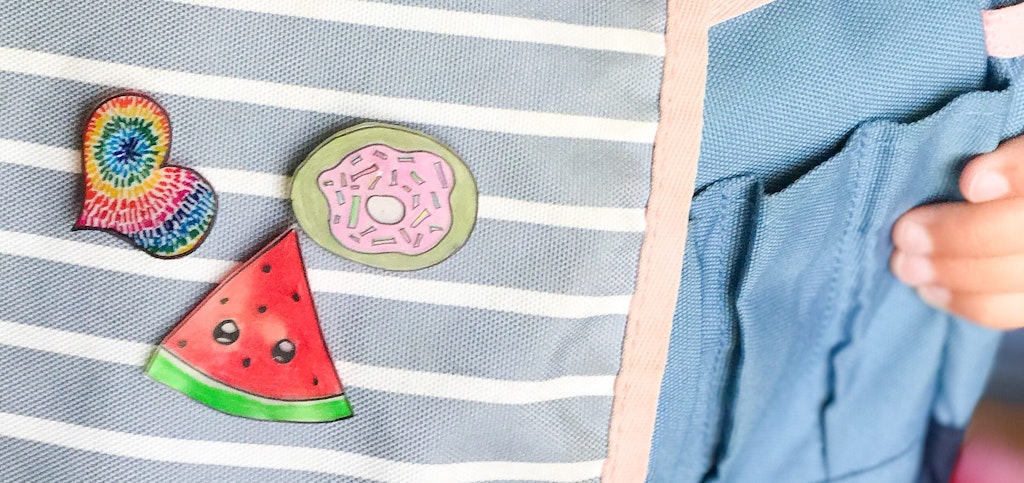
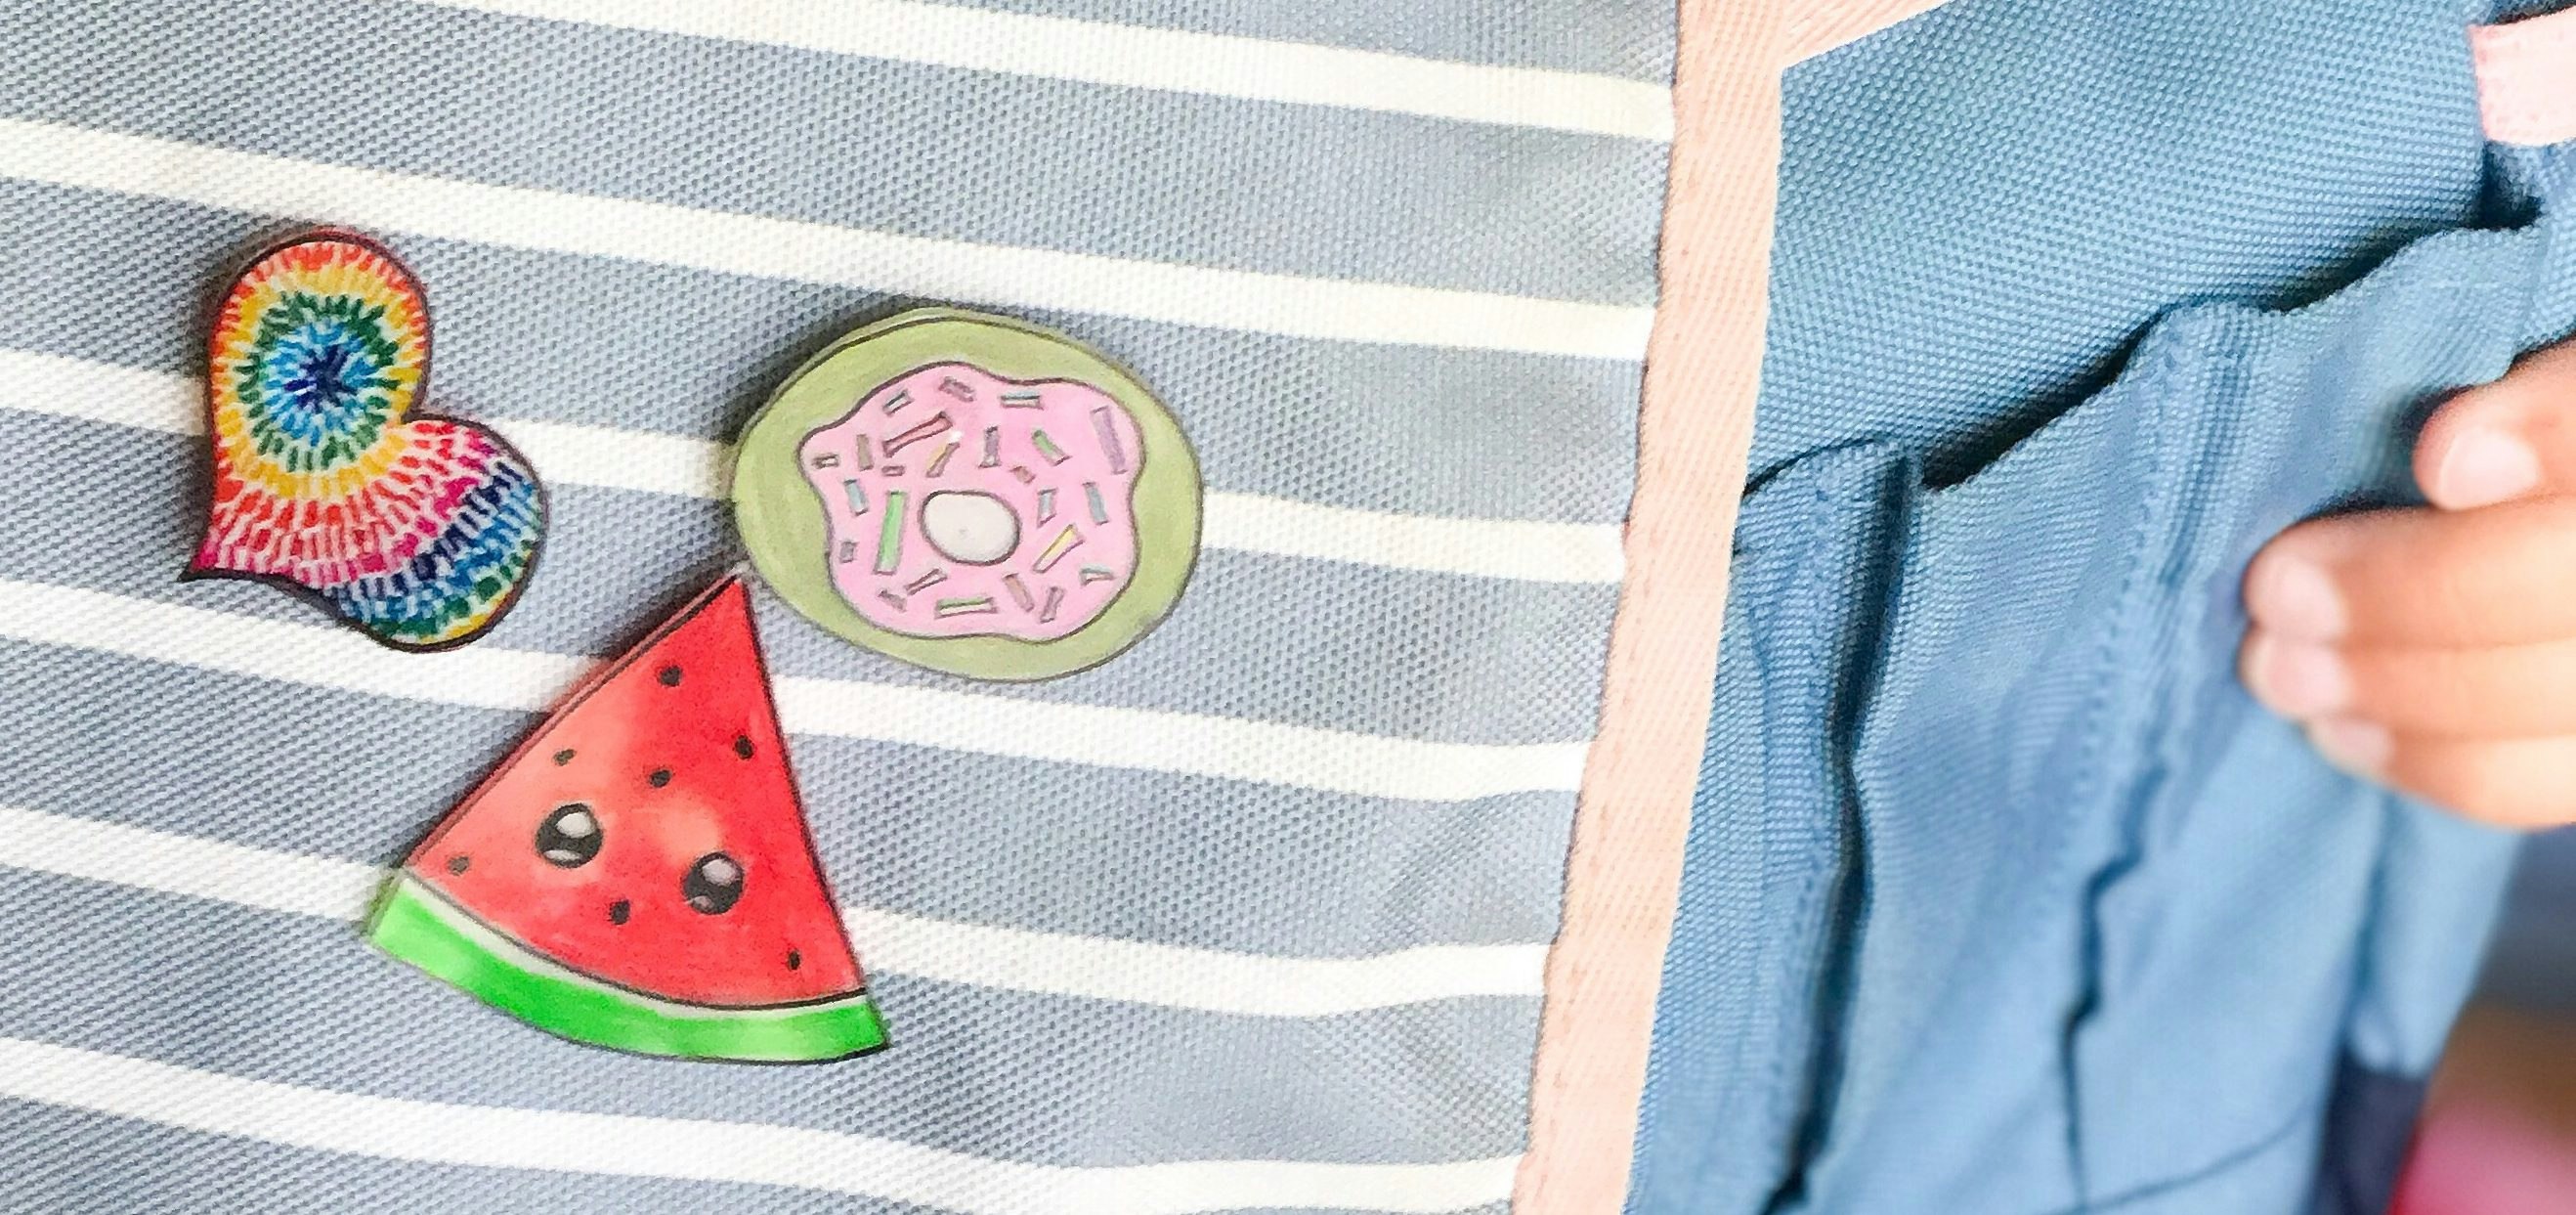
Tada! Their art has become tiny treasures!
Adding The Pin-Backs To Shrinky Dinks
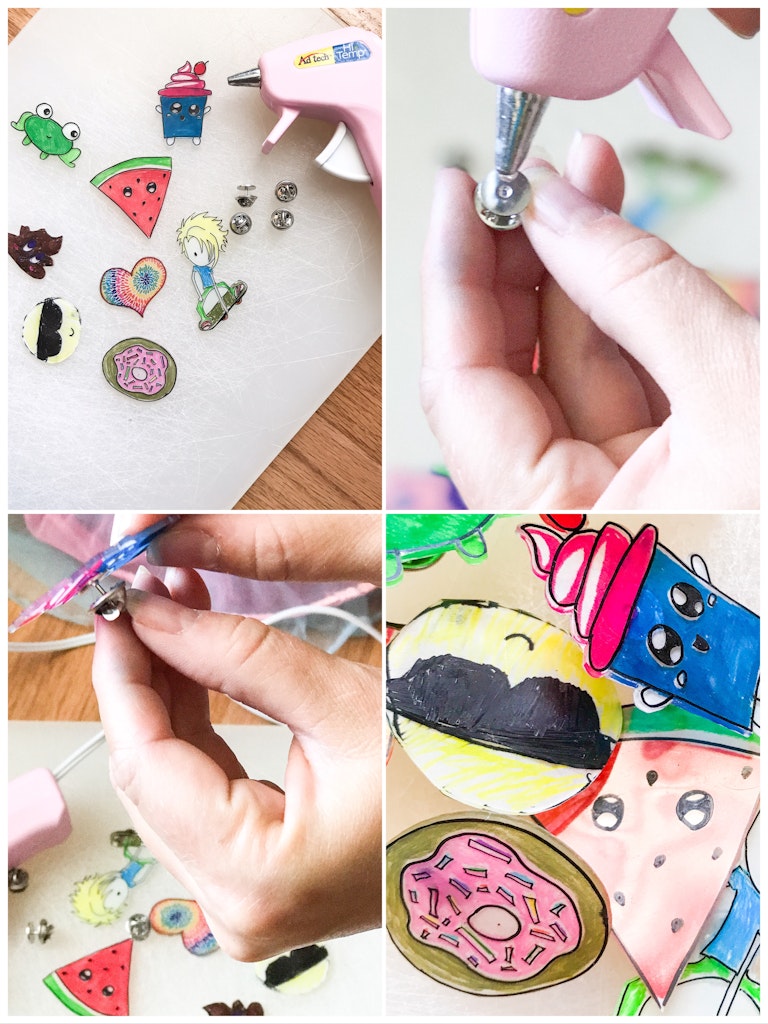
Use a little hot glue to adhere the pin backs to each work of art.
Once they are dry, add them to a backpack, jacket, or lunch box for a little extra flair!